 button on the Windows Title Bar.
 The Debtor Summary Tab provides an overview of the account including balances, assignments, actions and memos. This Screen has changed considerably from earlier Versions of CollectMax.
You may choose to expand or contract any of the Blue titles sections of the program for a more complete view of the data. Take your cursor and hover over the edges of the section or column header to display the splitter bar icon and hold down your left mouse button dragging the splitter to the desired location. This change will remain in effect until you exit CollectMax.
Additionally, CollectMax can be expanded to full screen by clicking the button on the Windows Title Bar.
From this tab you can access and modify the most following fields of information:

The Account section lists the CollectMax Account Number assigned to this account when it was added. To change the assigned account number, see How to Change the Debtor Account Number. Right Click to copy the Account Number to the clipboard.
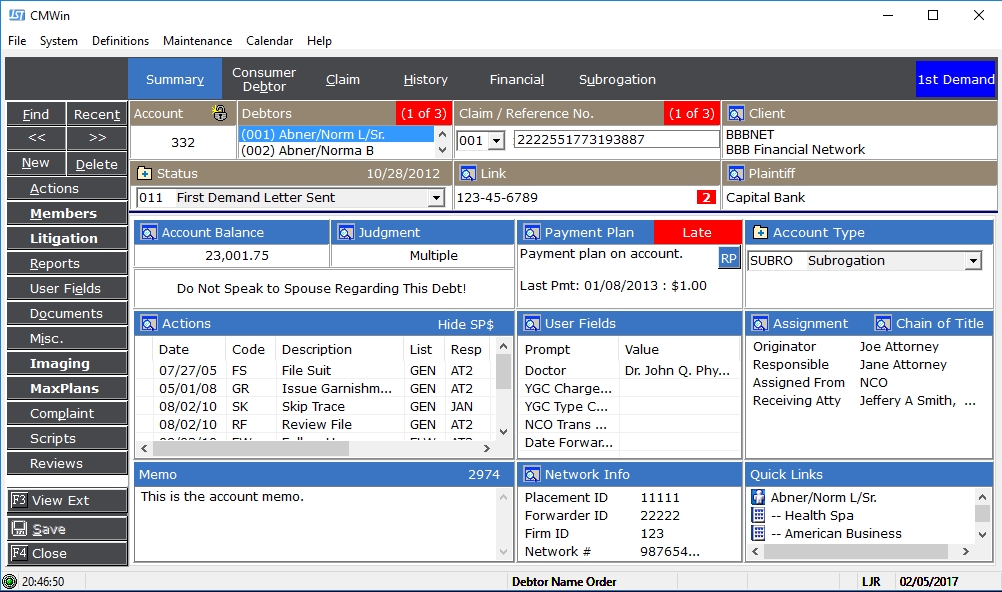
The Debtors section lists the debtor names and the number of debtors attached to this account. On some page tabs, the data on the screen will be specific to the debtor who is selected. Additionally, the selected debtor may have an affect on requested documents.
The display shows up to 2 debtors at a time. Click the scroll buttons on the right to display additional debtors. To add a debtor to an account, see How to Add Additional Debtors to an Account. To remove a debtor from the account, see How to Delete a Debtor from an Account.

The Claim/Reference section lists the claim and reference number of the account you are viewing and the number of claims attached to this account. The reference number is typically the account number given by the original creditor of this account. To view another claim, click the  button and select another claim.

On some page tabs, the data on the screen will be specific to the claim that is selected at the time. Additionally, the selected claim may have an affect on the requested documents.

The Client section lists the
Client to which this account has been assigned. The Client can be either a Creditor or a Forwarder. The Client is typically who owns the debtor currently or the Forwarder who send the debtor for collections. For additional information about the assigned client, click the  button next to Client.
To change the Client attached to this account, see Client ID Reassignment.

The Status section lists the current status of the selected claim and the date it was changed to this status. Status codes should show you at a glance where the in the collections process a particular claim is.
To
change the status, click the  button and select the status
and click the
button and select the status
and click the  button. To add a new status code, click the
  button and see add
new status codes. To update the status on all accounts at one time or to back date the status change date, see Modify the Status.
button and see add
new status codes. To update the status on all accounts at one time or to back date the status change date, see Modify the Status.

The Link section lists the number other accounts linked to this account and allows you to access them. Linking allows users to link other like accounts using a single like number. Click the button
to view all other accounts. For more information on Account Linking, see How to Link Accounts.
For automatic debtor linking, see Social Security Linking.

The Plaintiff section lists the
plaintiff attached to this account. Accounts may not have a plaintiff attached. Typically plaintiffs are assigned to accounts whose Client is a Forwarder. For more information on the plaintiff, click the button. To add a plaintiff to an account, see How to Attach an Account Member to a Debtor's Account.

The Account Balance section lists the
Balance of all open claims for this account. Click
the button to view the details of balances for each claim.

The Judgment section lists the amount and date of Judgment. If
this field is blank, then no Judgment has been obtained. If more than one Judgment has been added to this account, the section will list Multiple. To view more details about the judgments, click the button.

The Flash Message section lists the same information as the Flash Message that prompted the user when accessing the account.
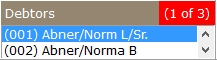
The Payment Plan section lists the
current Payment Plan including the
amount and date due. Last
payment made and the amount paid. If
the payment plan is past due, it will list the account as Delinquent.
To add a or view
the details of the payment plan, click the button.

The Type section lists the
Type of account users are viewing. You can use the type to categorize your accounts however you would like. Most reports allow you to select by type. To
add a new type code, click the button.
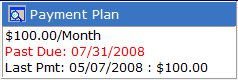
The Actions section lists the
action items attached to this account
and/or claim. Additionally, it will show you at a glance the date due, worklist attached and the responsible. If in a worklist, a ![]() indicator will mark the actions included in this worklist.
indicator will mark the actions included in this worklist.
To access the actions, click the button or double click an action item. To quick complete an action, right click the action and select Complete. See Action Code Completion.

The User Field section lists account level users fields selected by you for display. Double clicking the field in the list will take you to it's location in user fields.
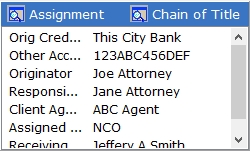
The Assignment Section lists the account
assignments for Originator, Responsible,
Assigned From, Receiving Attorney and Client Agent as well as the Original Creditor and Other Account Number Information. Typically,
Originator is used for the Attorney and Responsible for the collector.
Click
the button and select the proper Assignments from each
![]() list.
list.
Note: The Original Creditor and Other Account Number have been removed from the Account Info Section into the Assignment section.
See Chain Of Title for information about the Chain of Title feature.

The Memo section list brief notes ormemos added to the account. Click in the box and type the note. This field only allow a maximum of 3000 characters. In the top right corner of the memo, JST provides a character count down allow you to know how many available characters you have remaining.
For longer notes, JST suggests using the History Tab of the account.

The Network
Info Section, formerly the Account Info Section, lists the Placement Id, Forwarder
Id, Firm Id, Network number, and other fields custom to the Assigned From. Click the button to
edit any of these fields.
Note: The Original Creditor and Other Account Number fields have been moved to the Assignments Section of the Summary Tab.

The Quick Links section lists the Debtors attached to this account and links to the Employer, Bank and Defending Attorneys attached to each one. Double clicking on the attachment will take you directly to that members demographic information.
If any changes are made to the Summary Tab, click the button to save the changes.