 button. The
Members for Account screen will appear.
button. The
Members for Account screen will appear. 1.
From a
debtor's account, click the button. The
Members for Account screen will appear.

This screen will list any already attached account members and their association to the account.
2.
Click the
![]() button. The
Attach Member screen will appear.
button. The
Attach Member screen will appear.

3.
Select
the Member Type. The
CollectMax system has the most common member types already pre-programmed.
Click
the  button and select from the following list.
4.
CollectMax
also allows users to define their own member types. If
the member type you need is not in the above list. Click
the  button to add a new
member type.
button to add a new
member type.
5.
Next, Select
the Association. Click
the and choose which debtor or claim to associate to
this member.
6. At the bottom of the screen will appear a list of the members previously added under this member type.
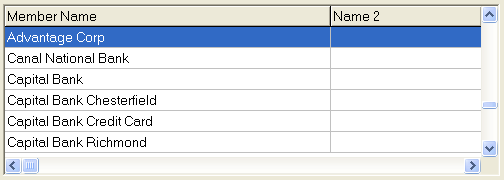
Scroll to find the existing member or type the name into the find field.
![]()
7.
Users can
click the  button to get more details about the member or
make changes to the member.
button to get more details about the member or
make changes to the member.
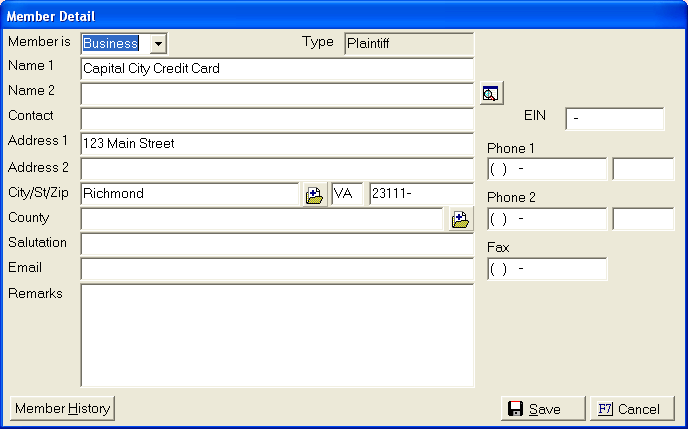
Note: Any changes to an existing member will effect all debtors attached to this member. A warning message will appear, click the ![]() button to finalize the changes.
button to finalize the changes.
8.
A record
of all changes of this member will be listed in the member history. Click
the ![]() button to review this history.
button to review this history.
9.
If the
member is not in the list, click the  button to create
a new member. The
add member screen will appear.
button to create
a new member. The
add member screen will appear.
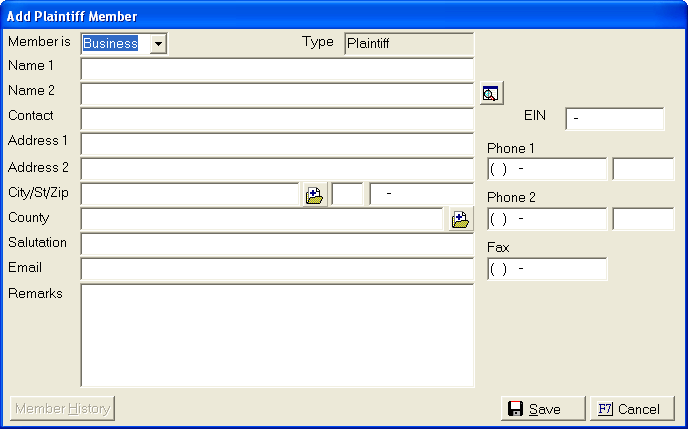
10. Enter the following information.
to select or add a city code that
will enter the city, state and zip automatically. 11.
Click the  button to add the member to the list of existing
member.
button to add the member to the list of existing
member.
12.
Once the member has been selected, click the ![]() button to
attach the member. A
confirmation message will appear.
button to
attach the member. A
confirmation message will appear.
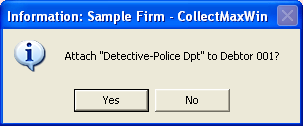
13.
Click the
![]() button to finalize the addition process.
button to finalize the addition process.
14. To delete an Account Member, see How to Delete an Account Member.