 button.
 1.
From the
main menu of CollectMax, click
the button.
2.
From the
Account Find screen click ![]() .
.
3.
From a
debtor account click  button, then select Account.
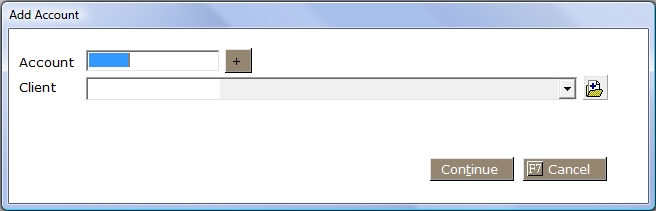
4. Enter an Account Number, or click plus button to have program auto-assign an account number. CollectMax will add one to the highest account number found in the system.
5.
Select
the client to which the debt is
owed from the client  list. If the select Client is a Forwarder, you will be prompted to select a Plaintiff.
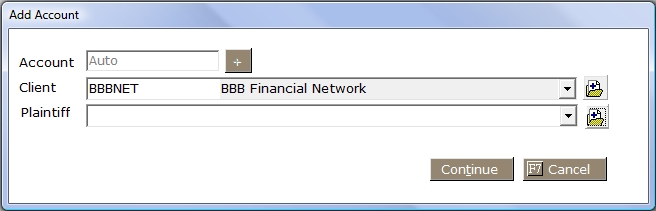
You will be unable to continue to add the account until the proper plaintiff is selected. If the plaintiff is unavailable in the list, you will need to add the plaintiff to the account members by clicking the  button. See Account Members.
6.
Once the
correct client has been selected, click  , which will take
you to the Add Account Screen.
, which will take
you to the Add Account Screen.
7.
If you
choose to use Type Codes to distinguish
your accounts by type, select the appropriate type code from the  list.
list.
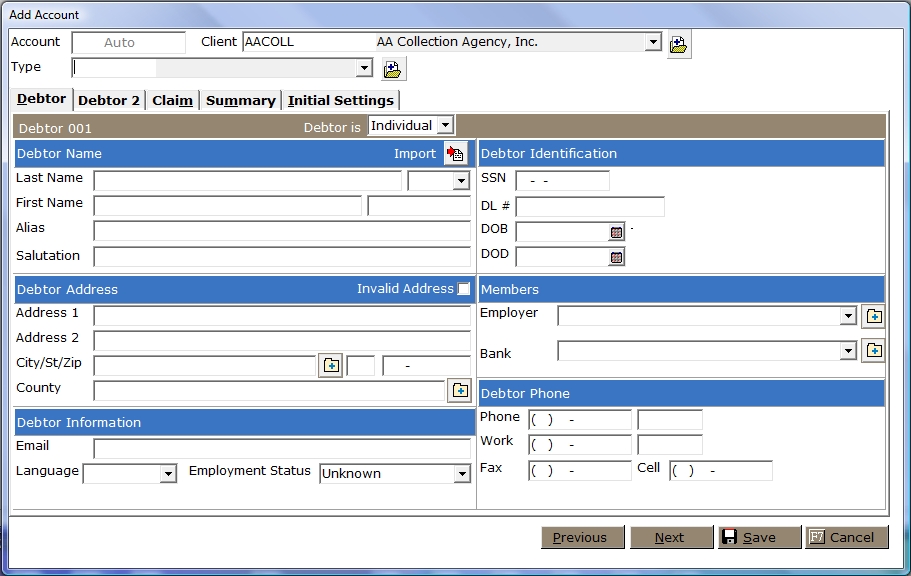
The Add Account Screen consists of 4 tabs: Debtor, Debtor 2, Claim, Summary and Initial Settings. Begin by completing fields of information on the Debtor Tab. Subrogation Users will also see a Subrogation Tab.
8. Select whether the debtor is an Individual or a Business in the Debtor Is field. CollectMax will adjust the demographic fields according to your selection.
9. CollectMax allows you to import debtor demographic information if this debtor is already in the CollectMax System. Click the  button next to Import and select the debtor to import. See Cloning a Debtor Account.
10. For Business Debtors, please skip to 33. For Business debtors, CollectMax allows you to import debtor demographic information if this debtor is already in the CollectMax System. Click the button next to Import and select the debtor to import. See Cloning a Debtor Account. For Individual Debtors, click or tab to the Last Name Field, and enter the primary debtor's last name.
11. Tab and enter or select the appropriate name Suffix, if necessary for the primary debtor.
12. Tab and Enter the primary debtor's First Name.
13. Tab and enter the primary debtor's Middle Name or Middle Initial.
14. Tab and enter the primary debtor's Alias. For Example: The debtors nickname such as Bill for William.
15. Tab and enter the Salutation, to be used in correspondence with debtor. Remember that if using the document variable for Salutation, the document will pull whatever has been entered into this field. Be careful not to enter Dear in the Salutation Field and also hard code Dear in the document.
16. If the primary debtor's address is invalid, tab once and mark the Invalid Address Box. If the address is assumed valid, tab twice and enter the primary debtor's Address 1.
17. Tab and enter Address 2. Typically Address Line 2 is used for unusually long addresses or additional address information such as Apt. # or Suite #.
18. Tab and enter the primary debtor's City/ST/Zip. If using City Codes with complete city state and zip fields, you can type the City Code or click the  button and select the City code and tab to the State field and the City State and Zip should automatically populate.
If using County Codes with complete city state and zip fields, tab through to the county field and enter the county code and tab to the next field or click the button and select the proper County Code to populate the County, City, State and Zip.
19. Tab and enter the primary
debtor's County of residence or if using county codes, enter the code and tab to the next field or click the button and select the proper county code.
20. Tab and enter the primary debtor's Email address.
21. Tab and select the primary debtor's Language of choice.
22. Tab and select the primary debtor's Employment Status.
23. Tab and enter the social security number of the debtor in the SSN field.
24. Tab and enter the primary debtor's Driver's License Number.
25. Tab and enter the primary
debtor's Date of Birth by typing
the date in MM/DD/YYYY
format or
click the ![]() button to use the calendar.
button to use the calendar.
26. Tab and select the primary debtor's Employer. If the employer is not in the system, click the button to add the employer to the available account members.
27. Tab and select the primary debtor's Bank. If the bank is not in the system, click the button to add the bank to the available account members.
28. Tab and enter the primary debtor's Homephone number. Tab and enter any Home phone extension.
29. Tab and enter the primary debtor's Work phone number. Tab and enter any Work phone extension.
30. Tab and enter the primary debtor's Fax phone number.
31. Tab and enter the primary debtor's Cell phone number.
32.
When you
have completed the Debtor Tab, click on  to continue to the Debtor 2 tab. Skip to Step 53 to add Debtor 2.
33.
For Business
debtors, CollectMax allows you to import debtor demographic information if this debtor is already in the CollectMax System. Click the button next to Import and select the debtor to import. See Cloning a Debtor Account.
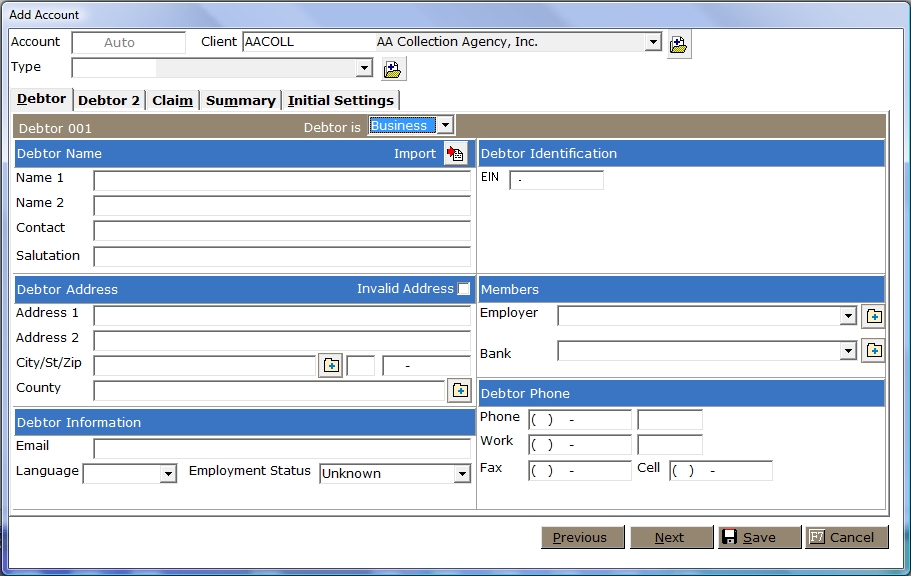
34. Tab and manually enter the primary debtor's business name in the Name 1 field.
35. Tab and enter the primary debtor's business Name 2. Typically used if the name of the business is too long for this one field. If the business name is still too long, see Client Accounts for a third name field.
36. Tab and enter the primary debtor's business Contact.
37.Tab and enter the primary debtor's business Salutation to appear on correspondence with the business. Remember that if using the document variable for Salutation, the document will pull whatever has been entered into this field. Be careful not to enter Dear in the Salutation Field and also hard code Dear in the document.
38. If the primary debtor's address is invalid, tab once and mark the Invalid Address Box. If the address is assumed valid, tab twice and enter the primary debtor's Address 1.
39. If additional address information exists, i.e. Suite#, enter in the Address2 field.
40.
Enter the
business City, State
and Zip code in the appropriate
fields. If using City Codes with complete city state and zip fields, you can type the City Code or click the button and select the City code and tab to the State field and the City State and Zip should automatically populate.
If using County Codes with complete city state and zip fields, tab through to the county field and enter the county code and tab to the next field or click the button and select the proper County Code to populate the County, City, State and Zip.
41. Tab and enter the business' Countyor if using county codes, enter the code and tab to the next field or click the button and select the proper county code.
42. Tab and enter the business Email address.
43. Tab and select the business Language of choice.
44. Tab and select the business Employment Status.
45. Enter the Employee Identification Number in the EIN field.
46. Tab and select the primary debtor's Employer. If the employer is not in the system, click the button to add the employer to the available account members.
47. Tab and select the primary debtor's Bank. If the bank is not in the system, click the button to add the bank to the available account members.
48. Tab and enter the business Homephone number. Tab and enter any Home phone extension.
49. Tab and enter the business Work phone number. Tab and enter any Work phone extension.
50. Tab and enter the business Fax phone number.
51. Tab and enter the business Cell phone number.
52.
When you
have completed the Debtor Tab, click which will take you
to the Debtor 2 Tab. If there is no secondary debtor information for this account, click the button to be taken to the Claim Tab.
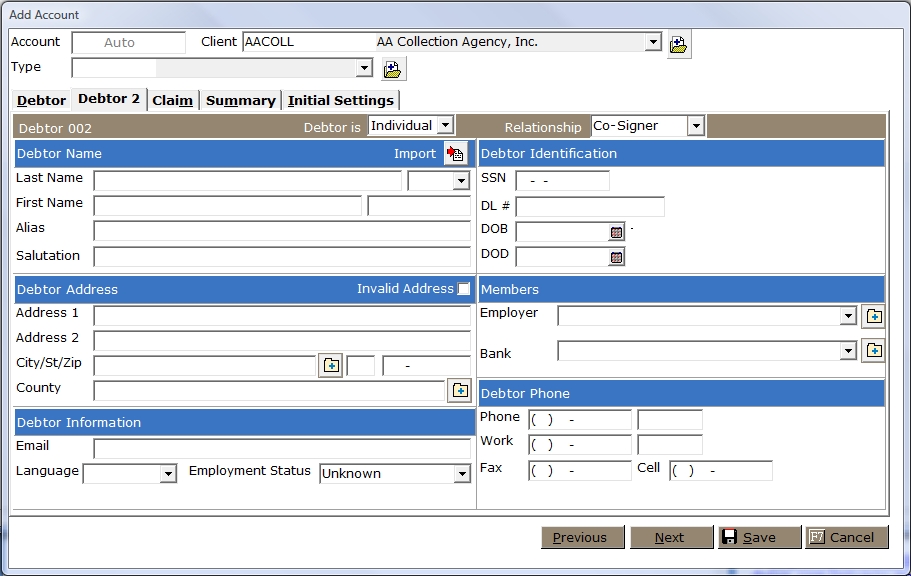
53. Select whether the debtor is an Individual or a Business in the Debtor Is field. CollectMax will adjust the demographic fields according to your selection.
54. Tab and select the Relationship Debtor 2 has on the account.
55. Continue through the Debtor 2 information as for the Debtor Tab or primary debtor demographics for either individual or business.
56. Once the Debtor 2 tab has been completed, click the button to be taken to the Claim Tab. Some of the data fields on the Claim Tab may be filled in with data set at the Debtor PreSets set at the Client or System Level. If the data is incorrect for this claim, change the data to override the PreSet Settings.
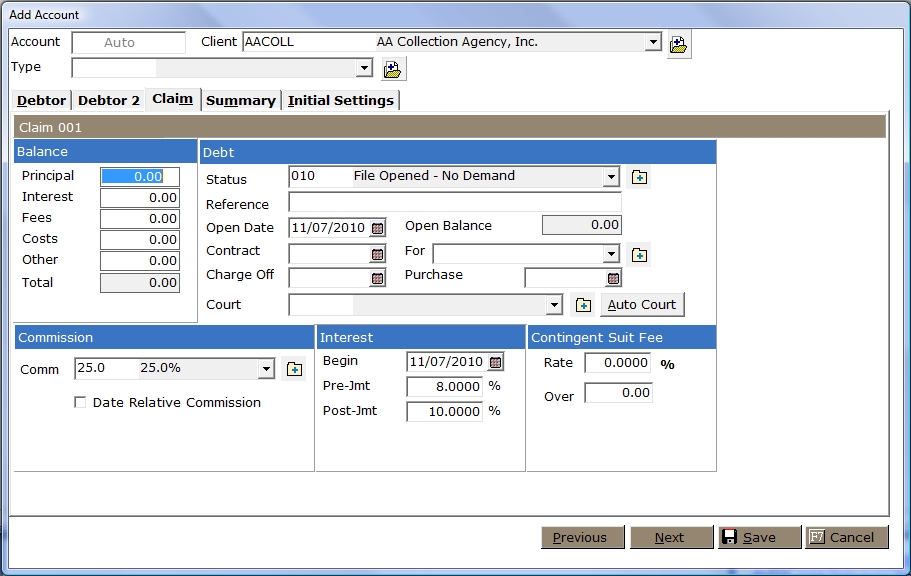
57. Enter the current or opening principal balance for this claim in the Principal balance field.
58. Tab through and enter any balances owed for Interest, Fees, Costs and Other.
59. Tab and select
the Status of the account from
the Status the ![]() list.
list.
60. Tab and enter the Reference Number for this claim. Typically the Reference Number is the original account number for the debt.
61. Tab and enter the Open Date. This field will default to today's date.
62. Tab and enter the Contract
Date, then tab and enter the For Codefor the debt by selecting from the ![]() list or entering in the reason for the debt. The Contract Date and the For field can be used as you see fit but typically the Contract Date is the date of the debt was incurred and the For Field is what the debt was incurred for.
list or entering in the reason for the debt. The Contract Date and the For field can be used as you see fit but typically the Contract Date is the date of the debt was incurred and the For Field is what the debt was incurred for.
63. Tab and enter the Charge Off Date for this claim.
64. Tab and enter the Purchase Date for this claim. The purchase date is typically the date the debt was purchased by you or your client.
65. Tab and select the proper Court for this Claim. If the Court is unavailable, click the button and add the court to the list of Court Payee Codes. If you have Auto Court setup for this client, click the  button to have CollectMax select the court based on your auto-court settings.
66. Tab and select the proper Commission rate. If the rate you need is not available, click the button to add the commission code. See Commission Codes.
If the commission rate changes on this account at different stages, tab to and select the Date Relative Commission.
67.Tab and enter the Begin Interest Date. This is the date interest should begin earning interest. The system will default to today's date.
68.Tab to and enter the Pre-Jmt Rate.
69. Tab and enter the Post-Jmt Rate.
70. If Contingent Suit Fees are to be earned, tab and enter the percentage to be earned in the Contingent Suit Fee Rate field, then tab and enter the amount collected Over to begin earning these fees.
71.
Once you
have completed the fields on the Claim Tab, click , to display the Summary Tab.
Some of the data fields on the Summary Tab may be filled in with data set at the Debtor PreSets set at the Client or System Level. If the data is incorrect for this claim, change the data to override the PreSet Settings.
Selections on this Tab are optional and not needed to add an account.
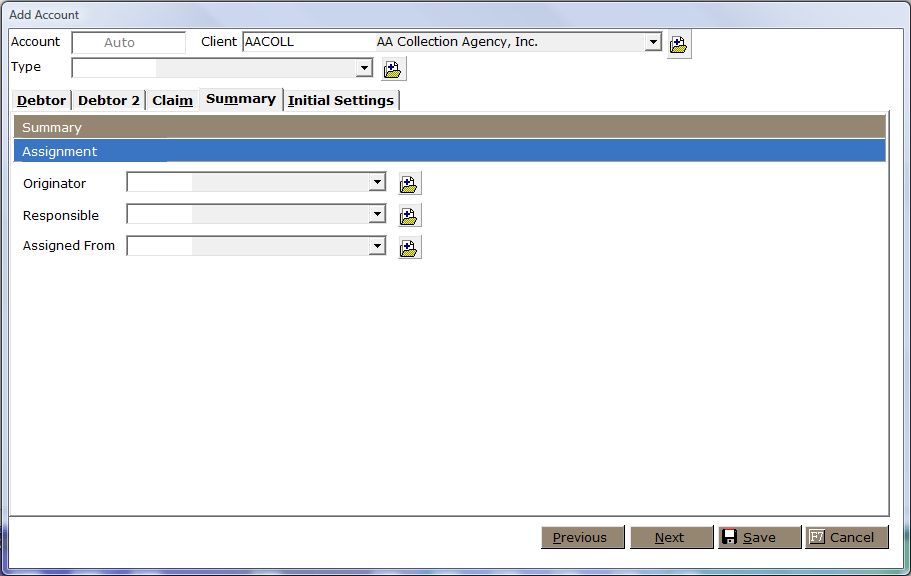
72. Select the party responsible for Originating this account.
73. Tab and select the Responsible Attorney or Collector for this account.
74. Tab and select the Assigned From for this account.
75.
Once these
fields have been assigned, click to go to the Initial
Settings Tab. Some of the data fields on the Initial Settings Tab may be filled in with data set at the Debtor PreSets set at the Client or System Level. If the data is incorrect for this claim, change the data to override the PreSet Settings.
Settings on this Tab are optional and not needed to add an account.
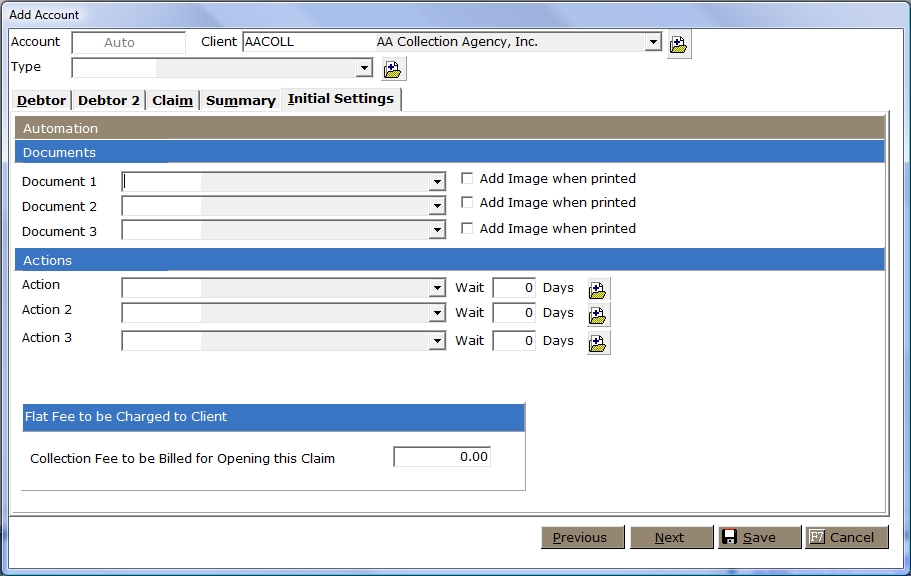 76. Select a Document 1 to be added to the print list for this claim. These document will not be automatically printed but be added to a print list to be printed at a later time. If you have imaging, tab and select to Image the document.
77. Tab and select a Document 2 to be added to the print list for this claim. These document will not be automatically printed but be added to a print list to be printed at a later time. If you have imaging, tab and select to Image the document.
78. Tab and select a Document 3 to be added to the print list for his claim. These document will not be automatically printed but be added to a print list to be printed at a later time. If you have imaging, tab and select to Image the document.
All Document Automation will be executed on the Account. Please be sure the documents are entered in the correct order so that the status and actions on the account will be accurate.
79. Tab and enter an Action to be added to the account/claim. Tab and enter the Wait Days for the action. Entering Wait Days will override the default setting of the Action. If the action you would like to add is not available, click the button and add a new action.
80. Tab and enter an Action 2 to be added to the account/claim. Tab and enter the Wait Days for the action. Entering Wait Days will override the default setting of the Action. If the action you would like to add is not available, click the button and add a new action.
81. Tab and enter an Action 3 to be added to the account/claim. Tab and enter the Wait Days for the action. Entering Wait Days will override the default setting of the Action. If the action you would like to add is not available, click the button and add a new action.
82. Tab and enter the Collection Fee to be charged for adding this new account.
83.
Click the  button to add the new account. To verify or change data on another tab, click the
  button until you get to the proper tab or click on the tab. To Cancel the addition of this account, click the
  button.