 button.
 1.
From
the main screen of CollectMax, click the button.

2.
Click
on the  button.
3. From the menu, select to generate All Worklists, One Worklist, or a Worklist Group.

When Generate All Worklists is selected, any action items that do not meet the criteria settings in the defined worklists will be assigned to a system worklist called SYS. It is expected that a supervisor will review the SYS worklist and refer the items to operators, create new worklists in which the settings will permit these items to be included the list, or modify existing worklists so that settings will include these unassigned items.
Note: The SYS worklist does not get created when the option to generate one worklist or worklist group is selected.
4. If Generating All Worklists, the Worklist Generation Screen will appear.
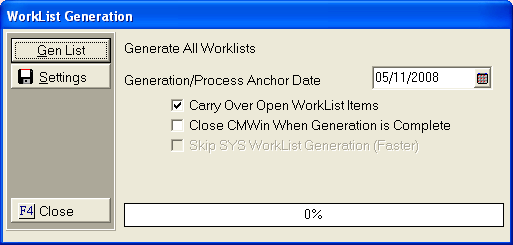
In the Generation/Process
Anchor Date, a default date will appear that is the system date plus one
(tomorrow). This date will be the basis for determining the beginning
and ending points of the date range that was established when the worklist
was defined. To
change this date, type in the correct date in the MM/DD/YYYY
format or click on the ![]() button and select the date.
button and select the date.
Select the
additional generation options, by clicking the  box next
to the selected option.
box next
to the selected option.
Note: All users must be out of CollectMax to start the generation process.
Skip to Step 7.
5. If Generating One Worklist, the Worklist Generation Screen will appear.
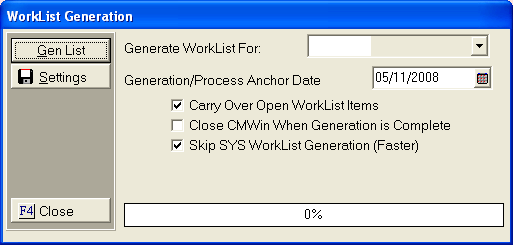
Select the
worklist to be generated from the  list on the screen.
In the Generation/Process
Anchor Date, a default date will appear that is the system date plus one
(tomorrow). This date will be the basis for determining the beginning
and ending points of the date range that was established when the worklist
was defined. To
change this date, type in the correct date in the MM/DD/YYYY
format or click on the ![]() button and select the date.
button and select the date.
Select the
additional generation options, by clicking the box next
to the selected option.
Note: All users must be out of CollectMax to start the generation process.
Skip to Step 7.
6. If Generating a Worklist Group, the Worklist Generation Screen will appear.

Type in the worklist group you want to select.
In the Generation/Process
Anchor Date, a default date will appear that is the system date plus one
(tomorrow). This date will be the basis for determining the beginning
and ending points of the date range that was established when the worklist
was defined. To
change this date, type in the correct date in the MM/DD/YYYY
format or click on the ![]() button and select the date.
button and select the date.
Select the
additional generation options, by clicking the box next
to the selected option.
Note: All users must be out of CollectMax to start the generation process.
7.
Click
on the ![]() button.
button.
8.
To
cancel and start over, click on the  button.
9. Once the worklist have been generated, a message box will appear.
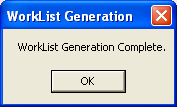
Click on
the  to clear the message.
10. The Worklist screen will list each worklist ID, worklist name, quantity of open items currently assigned to list, the generation date, and the anchor date.
11.
To
exit the Worklist Screen, click the  button.
12. See How to Work the Worklist.