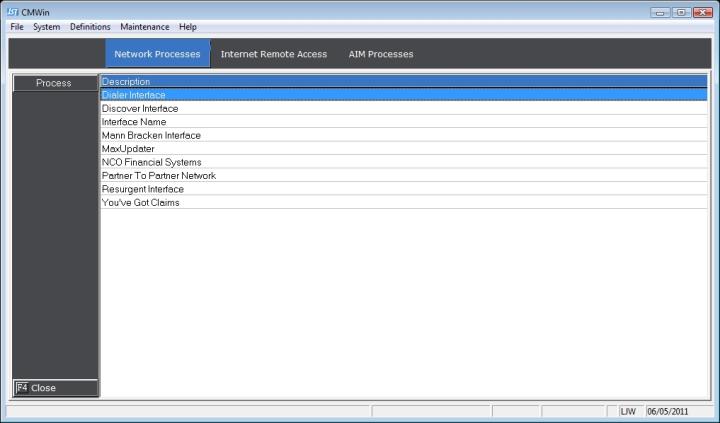
 button to display the Network Processes Screen.
 MaxUpdater updates most fields with the exception of payment plans and bankruptcy, allows for differing file formats with varying files specs and can update multiple fields per record.
MaxUpdater can be used with Excel, CSV, Tab Delimited and Pipe Delimited file formats. The data fields do not have to be in any particular order and extraneous fields are allowed the file.
Note: The MaxUpdater is being expanded regularly and the Help Topic may not reflect all available screens, options and fields. Most will work similarly to the fields listed in this Help Topic.
From the Main Screen of CollectMax, click the button to display the Network Processes Screen.
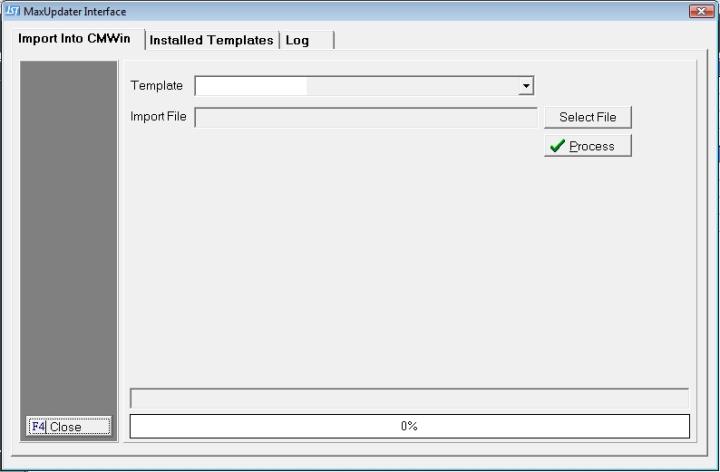
Select the MaxUpdater and double-click or click the  button to display the MaxUpdater Interface.
Before using the MaxUpdater Interface, you may want to set the template defaults as a shortcut on template setup. Any of these settings can be overridden at the template level.
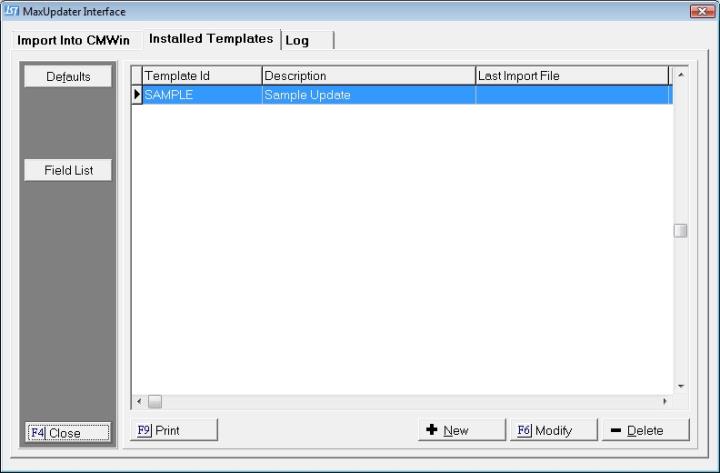
Select the  tab to display the MaxUpdater Installed Templates Screen.
Click the  button to display the MaxUpdater Template Defaults Screen
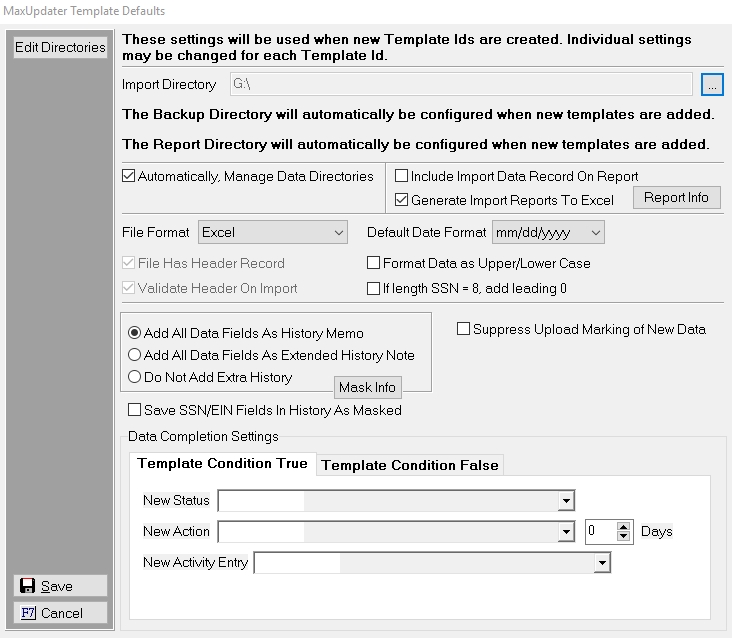
Set the following options as Defaults:
You have the ability to set a default directories to pull the data files from and to save a backup and reports. These will be the default options, each can be changed at the Template Level.
 and select the proper directory location on the network. Only the Import Directory will be displayed if choosing to Automatically, Manage Data Directories.
Set the Default Completion Settings for accounts updated with the file. For users with MaxConditions or MaxPlans, the Default Completion Options will include options for True and False Template Conditions. These options will process the automation based on the Template Condition added to the Template.
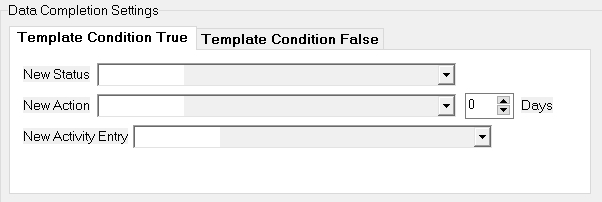
 list. list and set the days delay for the Action Due Date. The responsible will be select from the action default responsible. a list.
Note: If selecting to Suppress Upload Marking, these automation will not be marked for translation and upload. If not one of these valid values the field will be ignored.
If the row is imported due to a True Condition, you can select the following automations to be processed.
list. list and set the days delay for the Action Due Date. The responsible will be select from the action default responsible. list.
Note: If the user selected to Suppress Upload Marking, these automation will not be marked for translation and upload.
If the row is not imported due to a False Condition, you can select the following automations to be processed.
list. list and set the days delay for the Action Due Date. The responsible will be select from the action default responsible. list.
Note: If selecting to Suppress Upload Marking, these automation will not be marked for translation and upload.
Click the  button to save the Default Options. These options can be overridden at the Template Options Level.
MaxUpdater requires you setup a template the corresponds with the file to be imported. You can create a different template each time you import a new file or you can setup one template and make your import files conform to the created template.
Click the tab to display the Installed Templates screen.
On this screen a list of the current templates will be displayed. From this screen, a user can set the defaults, add a new template, modify and existing template, delete an existing template or print a list of available fields.
Click the  button to create a new template.
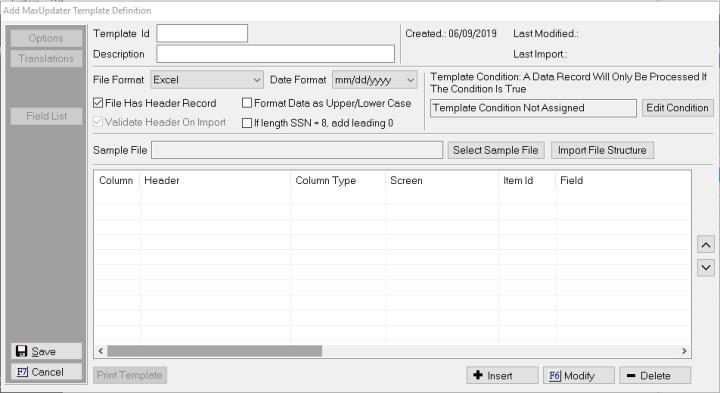
Each Template will require a unique Template ID. The Template ID will be used for identification of the template when importing or in the download information added to the debtor history.
A Description is optional but is useful when better defining the Template ID.

If the Template was an existing template, the upper right hand corner will list statistical information regarding the creation and use of this template.

Select the format of file that this template will use. Select from XLS (includes XLSX), Comma Delimited (CSV), Pipe Delimited and Tab Delimited.

Select the formats of the Dates included in the file. Select from the following Date Formats:
If the file has multiple date formats, select the one most frequently used and override the date format at the field level. Dates will import incorrectly or will cause a download errors if the format is not properly selected. If there are multiple formats within a field, you to ensure that all dates within the field/column match to the same Date format. Failure to do so my cause an error in download or accessing an account or incorrectly downloaded dates.
Check the Box next to any of the following that apply:
If MaxConditions or MaxPlans have been purchased, you can set a Template Condition. This condition will evaluate each row of data imported. If the account meets the Condition Criteria or the Condition is True, MaxUpdater will attempt to update the account/claim. If the account does not meet the Condition Criteria or the Condition is False, MaxUpdater will not update the account/claims but will still process any Template Conditions set at the default or template level.
To set a Template Condition, click the  button and set the condition in the Condition Editor.
Note: If you do not have MaxConditions or MaxPlans, the Condition option will be visible but Edit Conditions Button will not be enabled. Please contact the Sales Department for more information on this and other features.
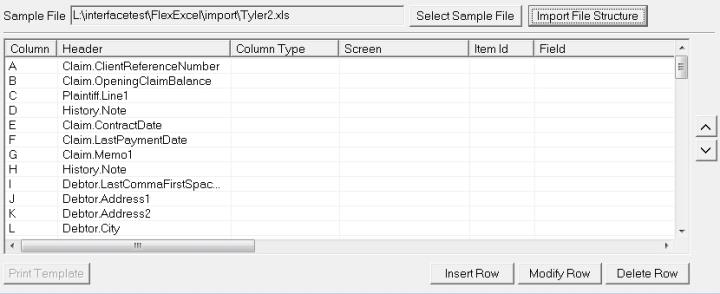
Select the Sample File to create the Template. Click the  button and select the file from the network. Once selected, click the
  button to import the fields into the template grid below.
If you know that the data file will contains extra rows than the file you are using to create the template, you can highlight the row below the inserted row and click the  button to add a new row to be defined.
If you know a row will not be included in the final template, you can highlight the row and click the  button.
Once all setting have been set and all columns been defined, click the button to save the template to the list of available import templates.
Each column of Data in the import file must be defined or the import process will skip column. There must be at least one column used to identify the account, debtor or claim to be updated. There can be multiple account, claim or debtor identifiers.
From the Add or Modify MaxUpdater Template Definition screen, select the first column to be defined and click the  button to display the MaxUpdater Template Definition Screen.
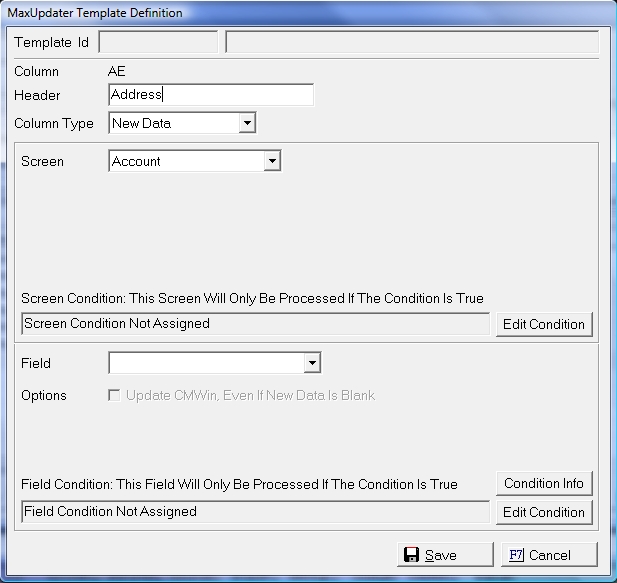
The Column Designation and the Header or First Row of Data for files without an header will be displayed. The Header can be modified from this screen.
Select the Column Type from the list. Select either Look Up, New Data or Skip.
If the Column you are defining should be used to find the proper account, debtor or claim, select Look Up as the Column Type and select the proper Look Up Field.
You may use more than one Look Up Field to find the proper entity or litigation item to update. The more Look Up Fields used the more specific a user can be about finding the proper entity or litigation item to change.
The proper account, debtor or claim can be found by the following Look Up Fields.
Note: When updating a claim or debtor level field but finding by an account level variable, only the first claim or primary debtor will be updated unless an additional Look Up Field is being used to narrow the entities found.
If an account, debtor or claim has duplicate entries within CollectMax, the update process will not update any entity or litigation item. User will need to further define the accounts by using additional Look Up Fields or manually update these type accounts.
Note: The Key fields are for use with PK's. Since the users will not typically have access to export the PK IDs these fields will likely not be used by the user. There maybe exception if the users is using a process that exports the PK IDs like High Cotton or MaxMail.
Once the Look Up Field has been selected, click the button. Or click the  button to exit the definition. Then, select the next column to be defined.
If the column you are defining has data that should be imported into an account, debtor or claim, select New Data as the Column Type. The MaxUpdater Template Definition Screen will be updated to display additional items for selection.
Select the correct Screen from the list. The New Data Fields are separated by Screens for organization. If the field is on a particular account Tab or Screen, select that Screen to find the proper Data Field. The Account Screen is the same as the Summary Tab.
Select the Account Screen to update any fields associated with the Summary Tab or Account Level.
Select from the following Account Screen fields:
Client Agent is not an available field for the MaxUpdater at this time. If a user needs to update that field, please check with the Sales Department.
By default, the MaxUpdater will overwrite existing data with blank data fields from the file. All of the Account Screen Level fields with the exclusion of Account Number and Client ID can be overwritten with blank data from the import file by checking the option to Update CMWin, Even If New Data is Blank
For New Data fields that have codes such as Type and Responsible, the import process will add the data from the file into a template translation table. If the codes used in the file are the same as in CollectMax, the process will automatically translate them otherwise the user will have to translate them manually into the proper CollectMax codes.
For MaxConditions or MaxPlans users, the Template Definitions Screen will allow the user to add condition statements at the Screen and field levels. The user will click the and use the Condition Editor to set the condition.
The Screen Level condition will allow the user to disallow the update of all fields pertaining to that screen if the Condition Statement is false. This condition will be carried over between columns of data if the same screen is selected.
The Field Level Condition will allow the user to disallow the update of the field if the Condition Statement is false. This Condition will only be applicable to that specific field for that specific entity or litigation item.
Select the Account Member Screen to add any account member to an account. Once the Account Member Screen is selected, you will need to select the Member Type from the  list. All member types including any manually added member types will be available for selection except for Bank, Employer and Plaintiff. Each of these have their own Screen.
Note: Account Members can only be added to an account or claim (Plaintiff only). Due to the nature of our Account Members system, existing members cannot be updated through the MaxUpdater process. If a user needs to update existing member, a custom project may need to be written. See the Sales Department.
Once the Member Type is selected, click the button and select from the following fields:
list. Select from Last, First Middle;Last Suffix,/First Middle; Last/First Middle/Suffix; Last/First/Middle/Suffix; or First Middle Last SuffixAll Dates can be set to override the template date format by selecting the proper date format.
Note: MaxUpdater requires that the member must have a name to be added. If the user selects to add an account member and does not have a column with the Name, the account member will not be added and the data will be skipped.
The Remarks Field is not available for update in the MaxUpdater at this time. If a user needs to update this field, please check with the Sales Department.
Select the Action Screen to translate the data in the column to an action code. Users may add as many columns to add an action code as necessary. However in doing so, they must associate all the fields for each action using the Item ID.
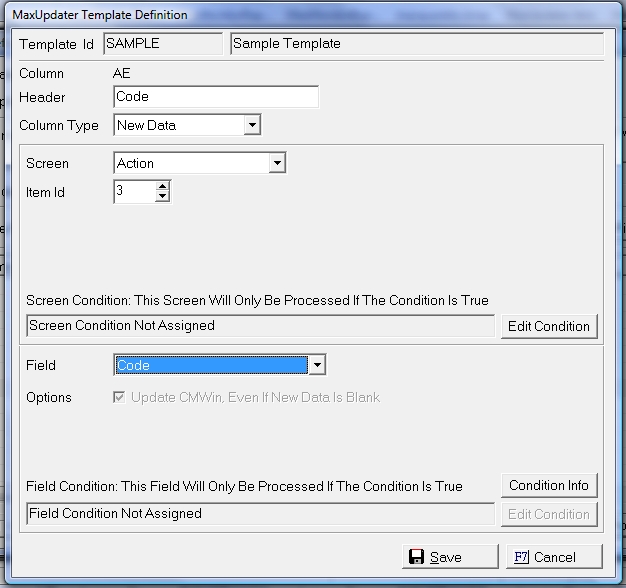
If this is action number one to be added to the account, the user will select Item ID 1 and then will select the action field this data should populate.
Once the Item Id is selected, select the Field from the following available fields:
All Dates can be set to override the template date format by selecting the proper date format.
Note: To add an action with MaxUpdater, you must have at least the action code.
When adding an action with MaxUpdater, the action default Responsible and default Days Delay will be used if not responsible and/or Scheduled Date is available in the file.
When adding an action with MaxUpdater, the preferred court from the aligned claim will be used for the court if no court is available in the file.
On any subsequent actions to be added to the account, the user must pick another Item ID.
Note: If only the action code is selected for translation and import, the MaxUpdater will set the due date and the responsible as per the action item settings.
Select to Activity Entry Screen to translate the data in the column/field to an existing activity code in CollectMax. User may add as many activity codes as needed with the file. However in doing so, they must associate all related fields to each activity code by using the same Item ID.

Once the Item Id is set, select the Field from the following available fields:
All Dates can be set to override the template date format by selecting the proper date format.
On any subsequent activity code fields to be added to the claim, the user must pick another Item ID.
Select the Alternate Address Screen to add an alternate address. Users may add as many alternate addresses as needed within the file. However in doing so, they must associate all related fields to that address by using the same Item ID.
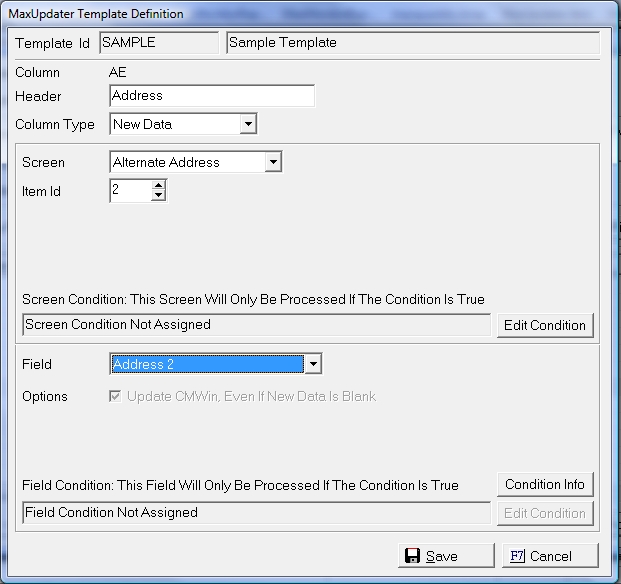
Only new Alternate Addresses can be added. MaxUpdater does not update existing alternate addresses.
Once the Item ID is set, select the Field from the following available fields:
All Dates can be set to override the template date format by selecting the proper date format.
On any subsequent alternative address fields to be added to the Debtor, the user must pick another Item ID.
Note: An alternate address will only be added if only one of the following is imported: Address 1, Address 2 or City
If the address to be imported exactly matches another alternate address, the alternate address fields will not be imported.
Select the Alternate Phone Screen to add an alternate phone numbers. Users may add as many alternate phones as needed within the file. However in doing so, they must associate all related fields to that phone by using the same Item ID.
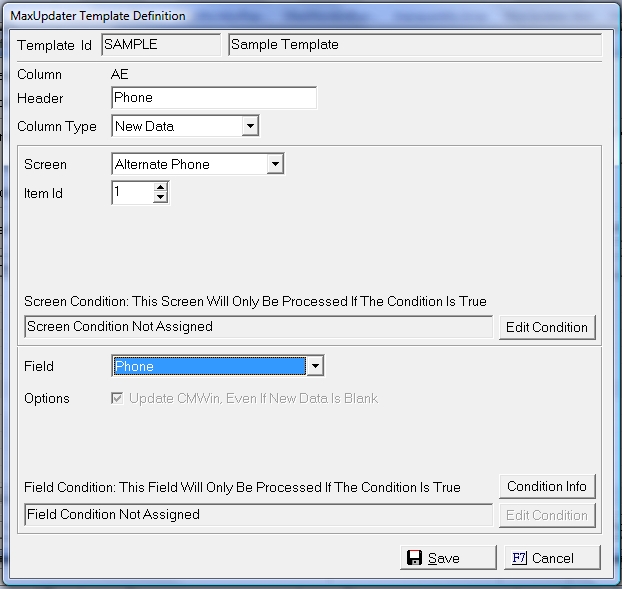
Only new alternate phone numbers can be added. The MaxUpdater cannot update existing Alternate Phone Numbers.
Once the Item ID is set, select the Field from the following available fields:
All Dates can be set to override the template date format by selecting the proper date format.
On any subsequent Alternative Phone Number fields to be added to the Debtor, the user must pick another Item ID.
Note: An Alternate Phone Number will only be added if a phone number imported.
If there is no phone type, MaxUpdater will import the number without a type.
If the phone number to be imported exactly matches another alternate phone, the alternate phone number fields will not be imported.
Select the Arbitration Screen to add or update Arbitration Litigation Information.
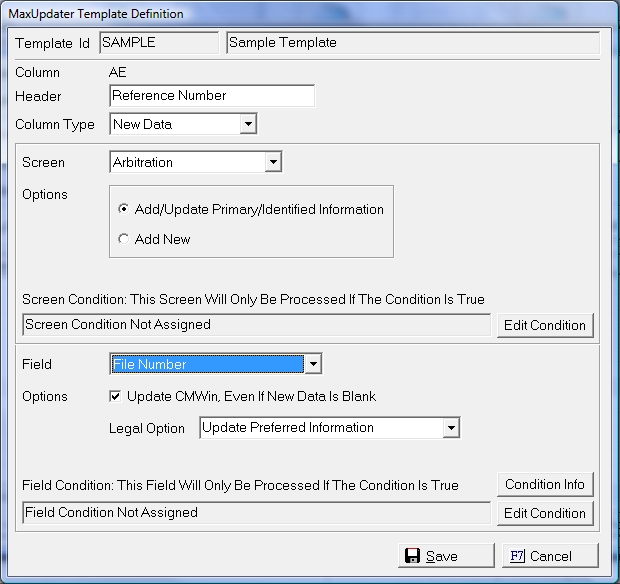
The user has the option of just adding a New Arbitration Litigation Item or to Add/Update Primary/Identified Information.
Selecting the Add/Update Primary/Identified Information option will do the following:
If the user wants to simply add an Arbitration no matter what data is present, select to Add New.
Note: If the update process cannot find the Identified Arbitration Item, the data will be skipped and not downloaded.
Once the Options have been set, select the proper Arbitration Field from the following:
All Dates can be set to override the template date format by selecting the proper date format. All Data fields can be set to update the field with Blank Data otherwise MaxUpdater will not overwrite existing data with a blank.
Select the Bank Garnishment Screen to add or update Bank Garnishment Litigation Information.
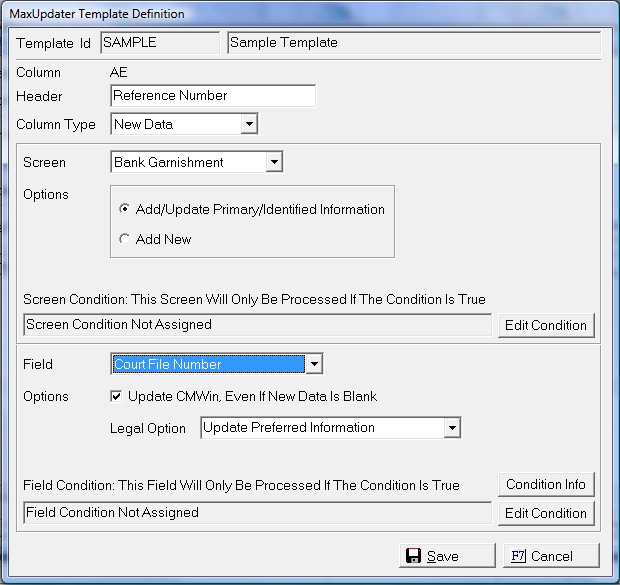
Select the proper update options: Add/Update Primary/Identified Information or Add New
Selecting the Add/Update Primary/Identified Information option will do the following:
If the user wants to simply add an Bank Garnishment no matter what data is present, select to Add New.
Note: If the update process cannot find the Identified Bank Garnishment, the data will be skipped and not downloaded.
Once the Options have been set, select the proper Bank Garnishment Field from the following:
Note: A Bank Garnishment Requires a Projected Date. If no projected date is set to import on an added Garnishment, a Bank Garnishment will not be added and an exception report will be generated.
All Dates can be set to override the template date format by selecting the proper date format. All Data fields can be set to update the field with Blank Data otherwise MaxUpdater will not overwrite existing data with a blank.
Select the Claim Screen to update any field associated with the Claim Tab.
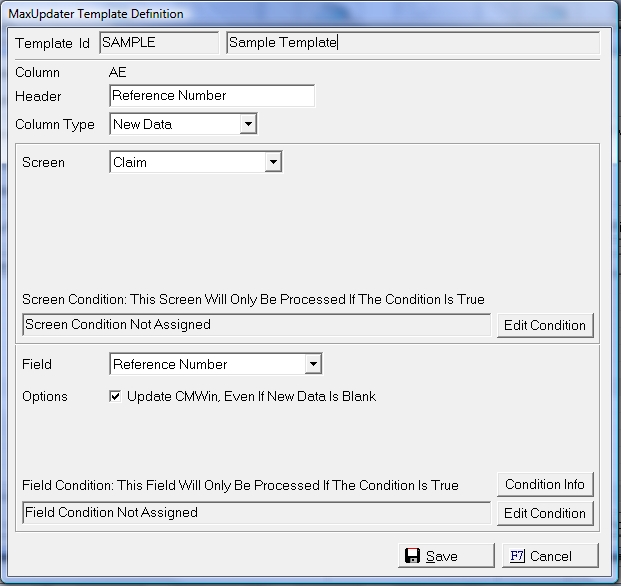
Once the Claim Screen has been selected, select from the following available Fields:
All Dates can be set to override the template date format by selecting the proper date format. All Data fields can be set to update the field with Blank Data otherwise MaxUpdater will not overwrite existing data with a blank.
Select the Credit Score Screen to update the credit score fields.
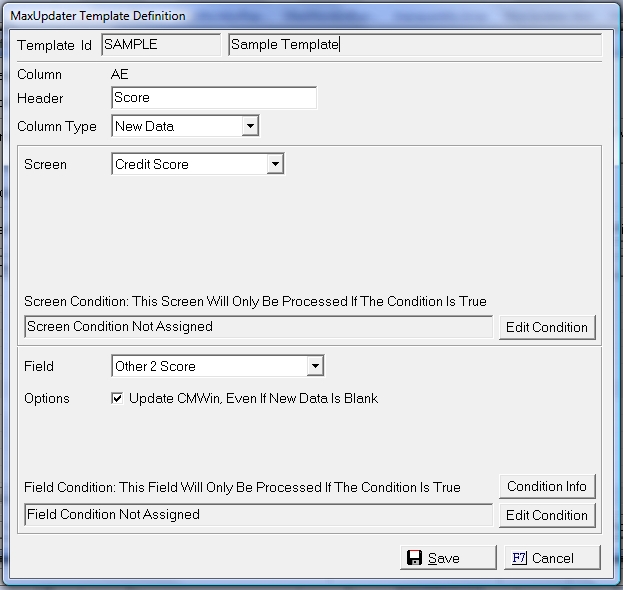
Once the Screen has been set, select from the following available fields:
All Dates can be set to override the template date format by selecting the proper date format. All Data fields can be set to update the field with Blank Data otherwise MaxUpdater will not overwrite existing data with a blank.
Select the Debtor Screen to update any fields on the Debtor Tab/Screen.
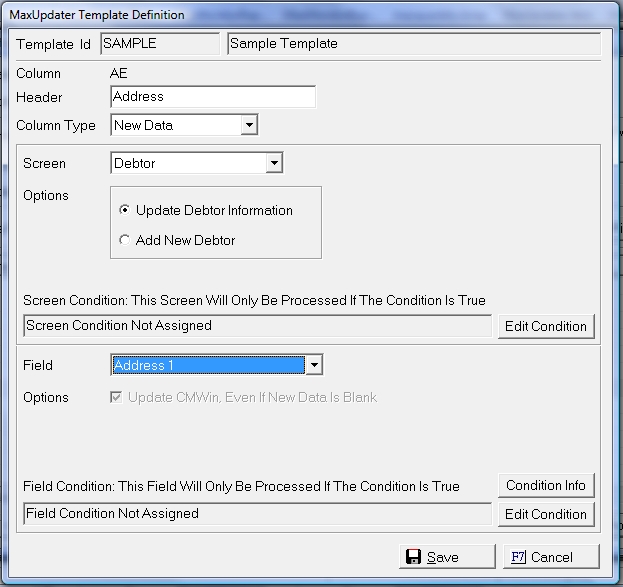
Select the proper update options: Update Debtor Information or Add New Debtor.
Note: If selecting to add a new Debtor, the debtor must have a debtor name. If there is no debtor name, all debtor fields will skipped and not downloaded.
If Looking Up the account by an Account or Claim identifier, the process will update the primary debtor information only unless additional Look Up Fields identify a subsequent debtor.
Once the options have been set, select from the following available Debtor fields:
All Dates can be set to override the template date format by selecting the proper date format. All Data fields can be set to update the field with Blank Data otherwise MaxUpdater will not overwrite existing data with a blank.
Select the Debtor Bank Screen to add a Debtor Bank. Users may add as many banks as needed within the file. However in doing so, they must associate all related fields to that bank by using the same Item ID.
Note: Banks will be added to the primary debtor unless an subsequent debtor is being added to the account and then the bank will be attached to that debtor or the Look Up fields are associated with an existing subsequent debtor.

Once the Item Id has been set, select from the following Bank Fields:
All Dates can be set to override the template date format by selecting the proper date format.
Note: Due to the complexities of the member system, Banks can only be added and not updated.
To add a Bank, the name must be included for import.
Select the Debtor Employer Screen to add an employer. Users may add as many employers as needed within the file. However in doing so, they must associate all related fields to that employer by using the same Item ID.
Note: Employers will be added to the primary debtor unless an subsequent debtor is being added to the account and then the employer will be attached to that debtor or the Look Up fields are associated with an existing subsequent debtor.

Once the Item Id has been set, select from the following Employer Fields:
All Dates can be set to override the template date format by selecting the proper date format.
Note: Due to the complexities of the member system, Employers can only be added and not updated.
To add an employer, the name must be included for import.
Select the Debtor Property Screen to add a Property Asset. Users may add as many property assets as needed within the file. However in doing so, they must associate all related fields to that asset by using the same Item ID.
Note: Assets will be added to the primary debtor unless an subsequent debtor is being added to the account and then the Asset will be attached to that debtor or the Look Up fields are associated with an existing subsequent debtor.
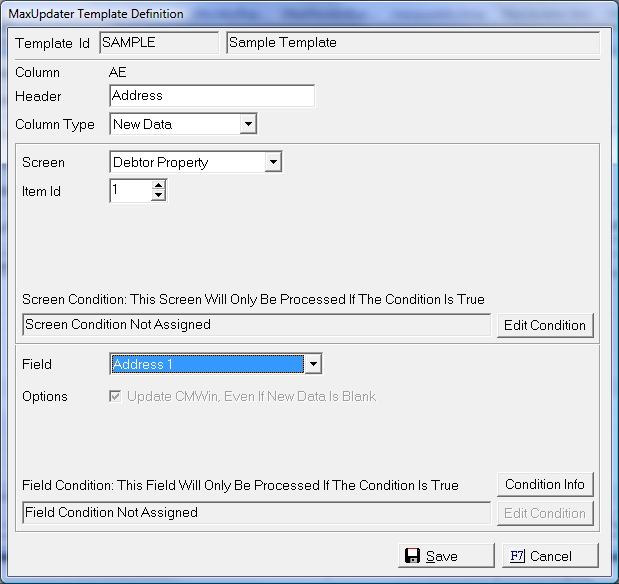
Once the Item Id has been set, select from the following Property Asset Fields:
Note: If the Property Ordinal is included in the import or the Property Key is used on the Look Up, the process will update the corresponding Property Asset. All fields will be updated as one.
Select the Debtor Vehicle Screen to add a Vehicle Asset. Users may add as many vehicle assets as needed within the file. However in doing so, they must associate all related fields to that asset by using the same Item ID.
Note: Assets will be added to the primary debtor unless an subsequent debtor is being added to the account and then the Asset will be attached to that debtor or the Look Up fields are associated with an existing subsequent debtor.

Once the Item Id has been set, select from the following Property Asset Fields:
Note: If the Vehicle Ordinal is included in the import or the Vehicle Key is used on the Look Up, the process will update the corresponding Vehicle Asset. All fields will be updated as one.
Select the Filing Screen to add or update Filing Litigation Information.
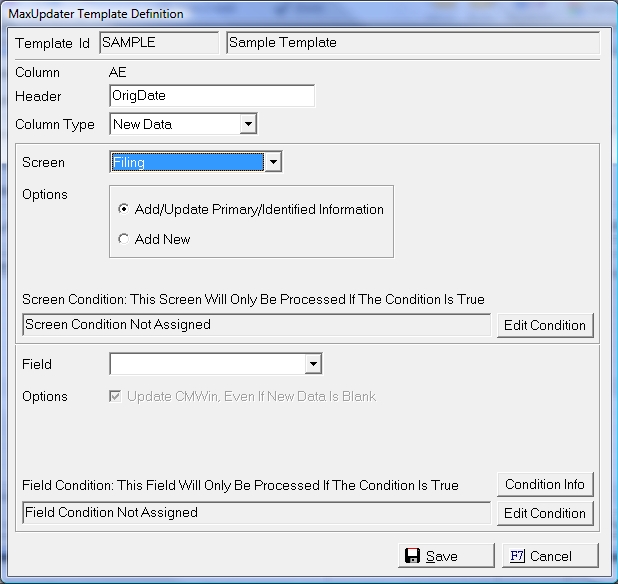
Select the proper update options: Add/Update Primary/Identified Information or Add New
Selecting the Add/Update Primary/Identified Information option will do the following:
If the user wants to simply add an Filing no matter what data is present, select to Add New.
Note: If the update process cannot find the Identified Filing, the data will be skipped and not downloaded.
Once the Options have been set, select the proper Filing Field from the following:
All Dates can be set to override the template date format by selecting the proper date format. All Data fields can be set to update the field with Blank Data otherwise MaxUpdater will not overwrite existing data with a blank.
Note: If adding a Filing but not including balance amounts in the import, the process will add a filing with no balances.
Select the General Asset Screen to update any General Asset Fields.
Note: Assets will be added to the primary debtor unless an subsequent debtor is being added to the account and then the Asset will be attached to that debtor or the Look Up fields are associated with an existing subsequent debtor.

Once the Screen is set, select from the following General Asset Fields:
Select the Judgment Screen to add or update Judgment Litigation Information.
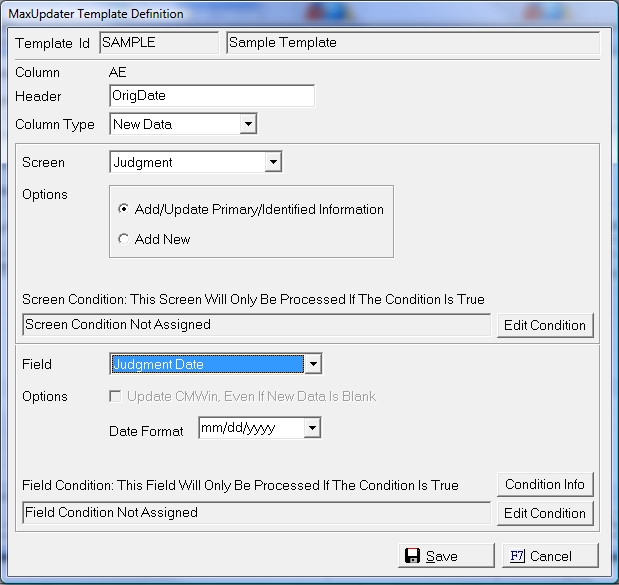
Select the proper update options: Add/Update Primary/Identified Information or Add New
Selecting the Add/Update Primary/Identified Information option will do the following:
If the user wants to simply add an Judgment no matter what data is present, select to Add New.
Note: If the update process cannot find the Identified Judgment, the data will be skipped and not downloaded.
Once the Options have been set, select the proper Judgment Field from the following:
All Dates can be set to override the template date format by selecting the proper date format. All Data fields can be set to update the field with Blank Data otherwise MaxUpdater will not overwrite existing data with a blank.
Note: MaxUpdater only adds memo judgments. If the balance amounts are not included on the import, a judgment will be entered with a zero judgment amount.
Select the History Note Screen to add a history note.

Once the Screen is set, select from the following history notes:
Select the History Coded Note Screen to add a History Note that has an associated note code. Users may add as many coded notes as needed within the file. However in doing so, they must associate all related fields to that note by using the same Item ID.
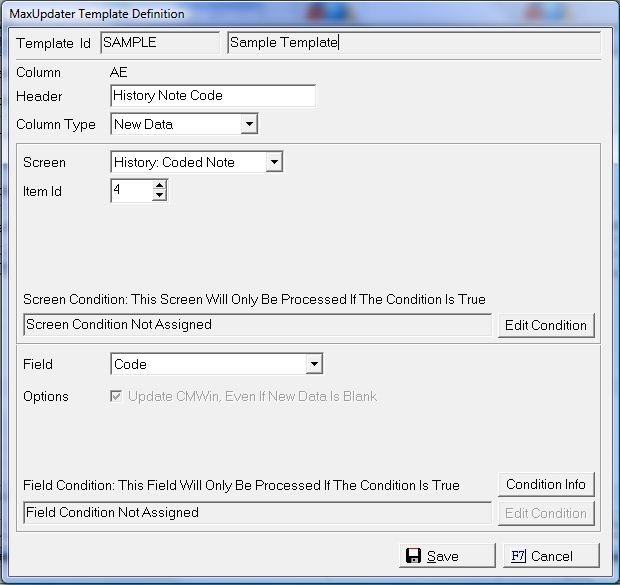
Once the Item Id has been set, select from the following History Fields:
All Dates can be set to override the template date format by selecting the proper date format.
Select the Interrogatory Screen to add or update Interrogatory Litigation Information.

Select the proper update options: Add/Update Primary/Identified Information or Add New
Selecting the Add/Update Primary/Identified Information option will do the following:
If the user wants to simply add an Interrogatory no matter what data is present, select to Add New.
Note: If the update process cannot find the Identified Interrogatory, the data will be skipped and not downloaded.
Once the Options have been set, select the proper Interrogatory Field from the following:
All Dates can be set to override the template date format by selecting the proper date format. All Data fields can be set to update the field with Blank Data otherwise MaxUpdater will not overwrite existing data with a blank.
Note: To add an Interrogatory, the Return date must be imported. If available for import, the Interrogatory will be skipped.
Select the Lien Screen to add or update Lien Litigation Information.
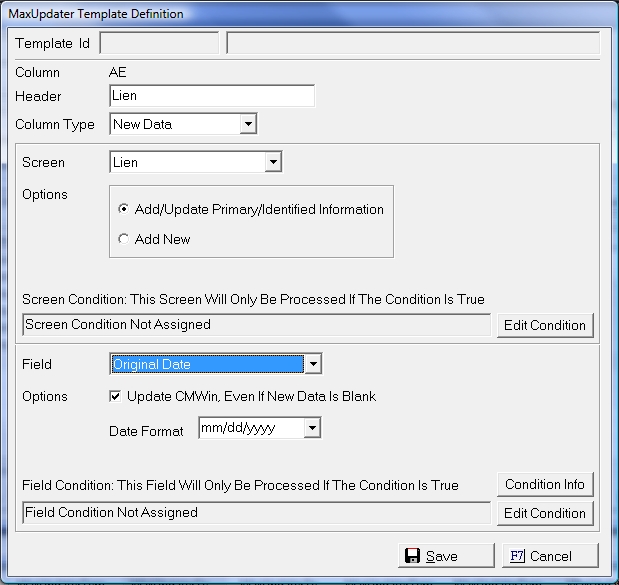
Select the proper update options: Add/Update Primary/Identified Information or Add New
Selecting the Add/Update Primary/Identified Information option will do the following:
If the user wants to simply add an Lien no matter what data is present, select to Add New.
Note: If the update process cannot find the Identified Lien, the data will be skipped and not downloaded.
Once the Options have been set, select the proper Lien Field from the following:
All Dates can be set to override the template date format by selecting the proper date format. All Data fields can be set to update the field with Blank Data otherwise MaxUpdater will not overwrite existing data with a blank.
Select the Plaintiff Screen to add a Plaintiff on a claim.

Set the Plaintiff Options, when adding remove existing Plaintiffs or Add Additional Plaintiff
Selecting When Adding Remove Existing Plaintiffs will remove all Plaintiffs attached to a claim and replace it with the new Plaintiff.
Note: Account Members can only be added to an account or claim (Plaintiff only). Due to the nature of our Account Members system, existing members cannot be updated through the MaxUpdater process. If a user needs to update existing member, a custom project may need to be written. See the Sales Department.
Once the Options are set, click the button and select from the following fields:
Note: MaxUpdater requires that the member must have a name to be added. If the user selects to add an account member and does not have a column with the Name, the account member will not be added and the data will be skipped.
The Remarks Field is not available for update in the MaxUpdater at this time. If a user needs to update this field, please check with the Sales Department.
The MaxUpdater will now add new service events and soon update specific service events. This will allow users to take files from their process servers and update the service events and filing, judgment and garnishments.
When defining a MaxUpdater Template for Service, select the Service to access the service fields.
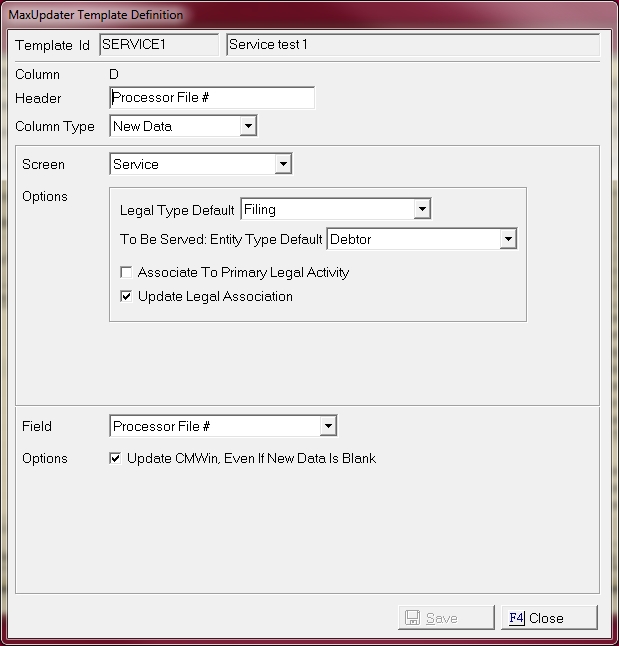
Select from the following default import Options for Service:
Note: Currently the users can only update the primary service item and not specific service items. This is because the user cannot export the service item PK. Once they can export, they will be able to update specific service items.
Select from the following fields to update the Service:
Note: The MaxUpdater imports the service events last. So, a file can add a filing and then the attached service item for example.
Select the Settlement Screen to add or update any settlement information.

Once the Screen is set, select from the following Settlement Fields:
All Dates can be set to override the template date format by selecting the proper date format. All Data fields can be set to update the field with Blank Data otherwise MaxUpdater will not overwrite existing data with a blank.
Note: If a Settlement is present, MaxUpdater will update the current Settlement. If no settlement is present, MaxUpdater will add a new settlement.
Select the User Fields Screen to update any level user field.
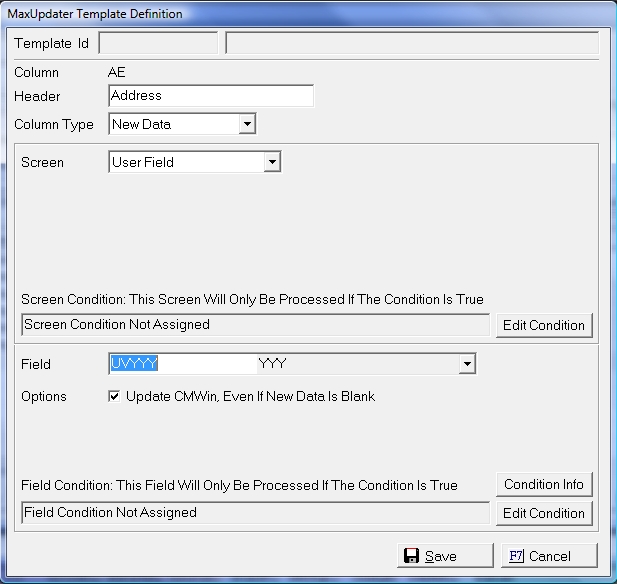
Once the Screen is set, select from the list of User Fields .
Note: Only Account, Debtor and Claim level user variables are available for update with the MaxUpdater.
Select the Wage Garnishment Screen to add or update Wage Garnishment Litigation Information.
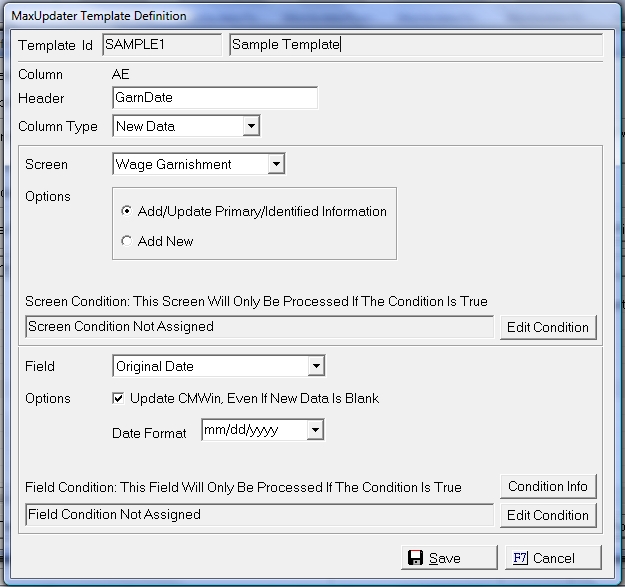
Select the proper update options: Add/Update Primary/Identified Information or Add New
Selecting the Add/Update Primary/Identified Information option will do the following:
If the user wants to simply add an Wage Garnishment no matter what data is present, select to Add New.
Note: If the update process cannot find the Identified Wage Garnishment, the data will be skipped and not downloaded.
Once the Options have been set, select the proper Wage Garnishment Field from the following:
All Dates can be set to override the template date format by selecting the proper date format. All Data fields can be set to update the field with Blank Data otherwise MaxUpdater will not overwrite existing data with a blank.
Note: A Wage Garnishment Requires a Projected Date. If no projected date is set to import on an added Garnishment, a Wage Garnishment will not be added and an exception report will be generated.
If a field/column should be skipped and not imported, select the Column Type of Skip or just skip defining the field/column altogether. The MaxUpdater will automatically skip any undefined fields/columns.
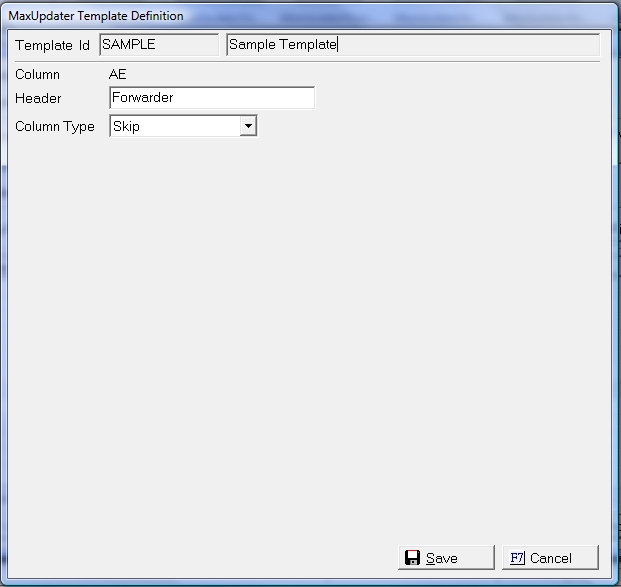
Note: If choosing to add the import data to the history, the skipped fields will be included in the history note.
Once you have selected the proper data screen, options and fields, click the  button and continue to modify all fields in the template until the template is complete.
After all Fields have been defined, click the button to save the template settings. The Template can be modified if needed at a future time.
See MaxUpdaterPlus for information on obtaining the ability to do batch transaction posting through the MaxUpdater.
Once the Template has been saved, click the  button to override any Options set at the Default Level.
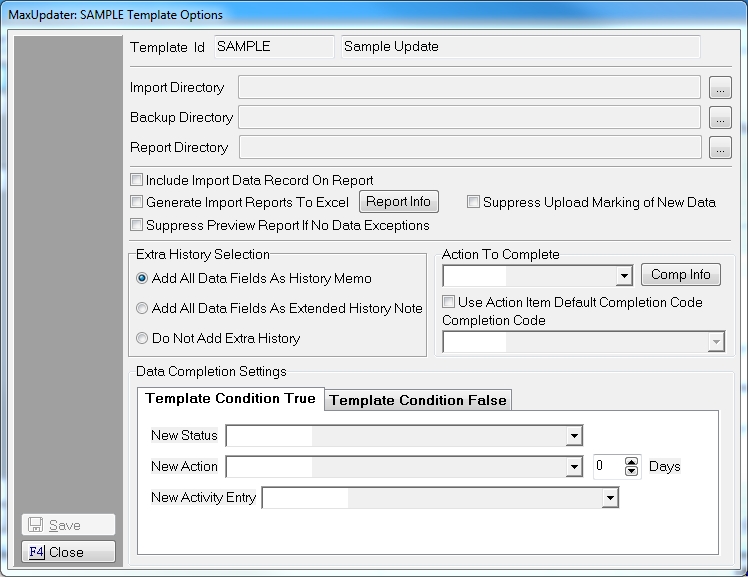
Any options set here will be for this specific Template only.
Most options may be set from the Defaults but can be overridden at the template level. The following Options are Template specific:
Note: Some Imports like financial transactions, do not review for exceptions until the final.
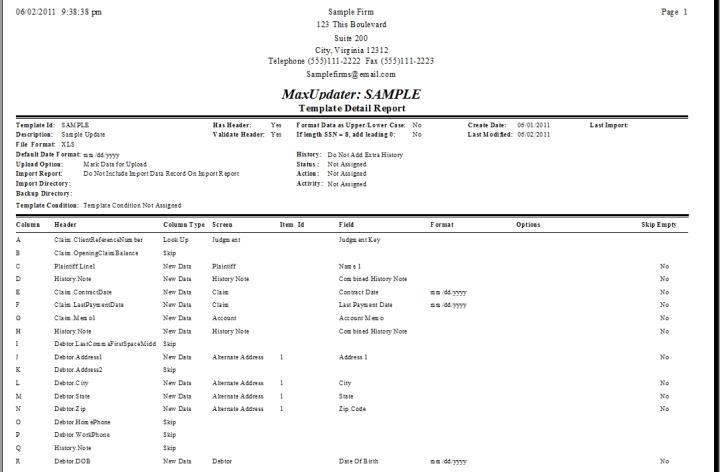
Once the Template has been saved and all the Template Options have been set, the user can print a report of the Template settings.
From the Add or Modify MaxUpdater Template Definitions Screen,

click the  button to print the Template Detail Report.
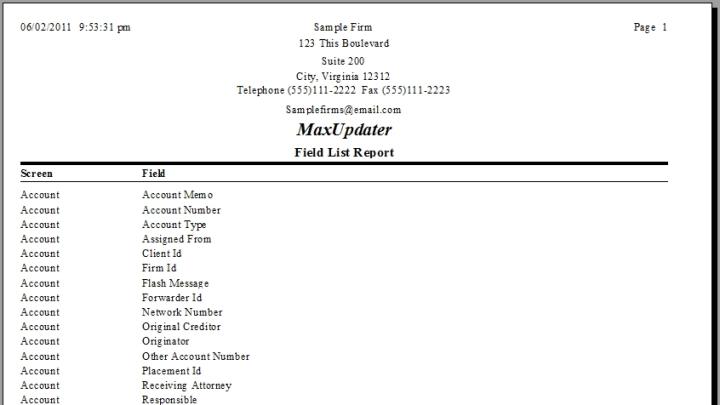
To get a list of all available fields for update with the MaxUpdater, click the  button from the Installed Templates Screen or the Add/Modify MaxUpdater Template Definitions Screen.
When ready to import a data file into CollectMax, select the 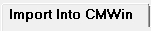 tab to display the MaxUpdater Import Screen.
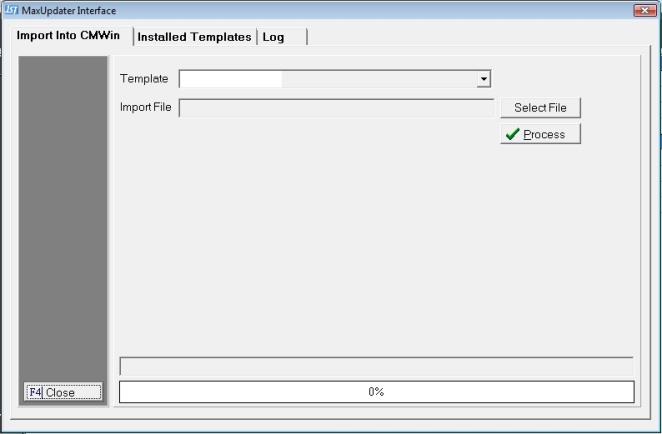
Select the proper Template from the list of available templates. If the new file does not have a template, the user must create a template before attempting to import.
After selecting the template, click the  button and browse to find the import file and then click the
  button to start the import process.
The Process will first validate the file headers if that option was selected for the import template. If a difference is found, a File Headers Error Screen will be displayed.
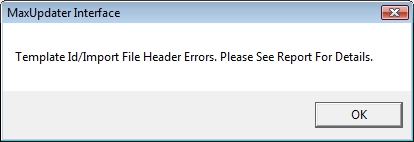
Click the  button to display the Error Report.
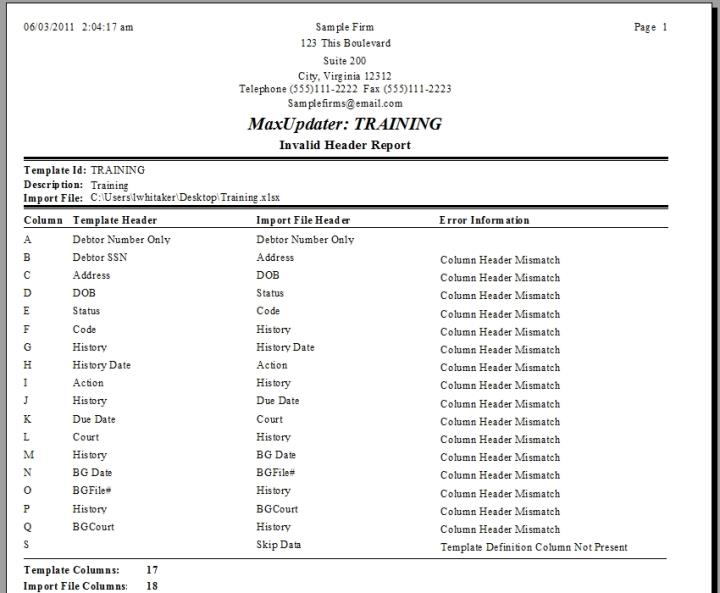
Note:If the user has select the validate headers option, they must resolve all template inaccuracies before the import process will allow them to process the data file. If a user removes the header validation, they will be able to download the file but at the risk of missing import data fields and importing incorrect data.
The Process will begin to evaluate the data. If invalid data is found in any validated fields, an Invalid Date Report will be displayed.
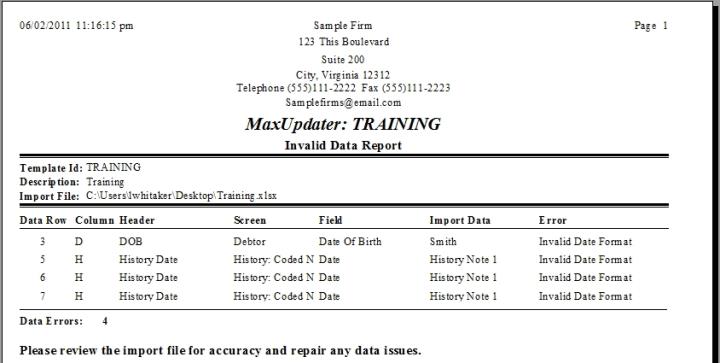
The users should fix the data errors and reprocess the file. They may go ahead and process the file but the invalid data fields will be skipped from importing.
Note: The validation process cannot find all data errors, the user should not depend on the MaxUpdater to find all bad data.
If the import process finds codes to import that must be translated to CollectMax codes, a Template Translation Table Notification will be displayed listing all Codes that require translation.
![]()
If the Translation Table finds codes that Match a CollectMax Code, the process will automatically translate the Code. The code translation will be listed on the Translation Table screen. User can override the automatic translations at the Template Level.
To translate all other codes or to override a translation, click the  button. The Import Process will be terminated until the Codes are Translated.
Next, click the tab to display the List of Templates.

Find the Template being used for the download, highlight it and click the  button to display the Modify MaxUpdater Template Definition Screen.

Click the ![]() button to display the Template Translation Table Screen.
button to display the Template Translation Table Screen.
![]()
All Codes to be Translated or Automatically Translated will be listed on the Screen. To Narrow the list of Codes by type, click the button and select the Translation Type. Choose from the following:
From the list of codes that need to be translated, select a code and click the  button to display the Translation Screen and make the necessary translation.
The Translation Options can be different for each Translation Type.
Note: User can add the translations prior to the import process. They will just have to enter both the file code and its translation. If they miss a code, the import process will add it and asked for a translation at time of import.
Allowing the Import Process to populate the Translation Table is a much faster and more efficient way to handle code translations.
![]()
To Translate the Code in the import file, select the proper Type from the list. If a translation is not available, the user will have to exit the MaxUpdater and add a new Type before translating this code.
Click the button to save the translation.
![]()
To Translate the Code in the import file, select the proper Action from the list and set the Days Delay for the action Due Date. The Delay Days will only be used if there is no defined Action Date to be imported in the template/data file. If a translation is not available, the user will have to exit the MaxUpdater and add a new Action before translating this code.
Click the button to save the translation.
![]()
To Translate the Code in the import file, select the proper Activity Code from the list. If a translation is not available, the user will have to exit the MaxUpdater and add a new Activity Code before translating this code.
Click the button to save the translation.
![]()
For the Code in the import file To Translate the Code in the import file, select the proper Assigned From from the list. If a translation is not available, the user will have to exit the MaxUpdater and add a new Assigned From before translating this code.
Click the button to save the translation.
![]()
For the Code in the import file To Translate the Code in the import file, select the proper Client ID from the list. If a translation is not available, the user will have to exit the MaxUpdater and add a new Client ID before translating this code.
Click the button to save the translation
![]()
To Translate the Code in the import file, select the proper Court from the list. If a translation is not available, the user will have to exit the MaxUpdater and add a new Court before translating this code.
Click the button to save the translation.
![]()
To Translate the Code in the import file, select the proper Action Code from the list. Select the number of Delay Days for the Action Due date. Select to the proper Responsible by selecting to Use the Action Defaults, No Responsible of a selected responsible. Add an Action Note to be imported with the action during the download process.
If there is no translation available for the Action code, the user will have to exit the MaxUpdater and add a new Action before translating this code.
Note: The History Coded Note Codes will not be automatically added to the translation table. Users will need to add these manually if needed.
Click the button to save the translation.
![]()
To Translate the Code in the import file, select the proper Originator from the list. If a translation is not available, the user will have to exit the MaxUpdater and add a new Originator before translating this code.
Click the button to save the translation
![]()
To Translate the Code in the import file, select the proper Receiving Attorney from the list. If a translation is not available, the user will have to exit the MaxUpdater and add a new Receiving Attorney before translating this code.
Click the button to save the translation.
![]()
To Translate the Code in the import file, select the proper Responsible from the list. If a translation is not available, the user will have to exit the MaxUpdater and add a new Responsible before translating this code.
Click the button to save the translation.
![]()
To Translate the Code in the import file, select the proper Status Code from the list. If a translation is not available, the user will have to exit the MaxUpdater and add a new Status Code before translating this code.
Click the button to save the translation.
Once all codes have been translated, select the tab and begin the import process again. The process will continue to validate and import the data.
If a complete Row of Data cannot be imported, and Preview Exception Report will generated.
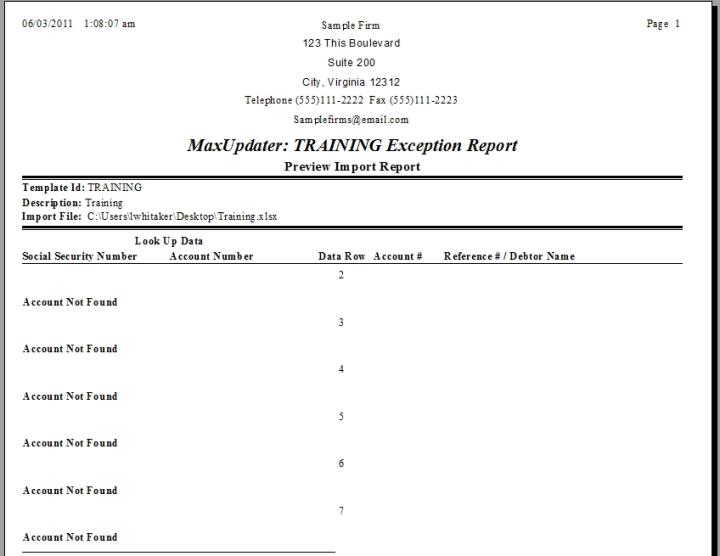
Note: If the Import Process finds more than one account, debtor, claim or litigation item with the same Look Up fields, the import will not import the data row.
If the process cannot find the account, the process will not import the entire data row.
If the process finds an account with multiple rates while trying to change the rate, the process will not import the entire data row.
If the process when trying to change the client finds an account that cannot be changed, the process will not import the entire data row.
If the process finds a condition that fails, the process will not import the entire data row.
The user can select to not process the file import and use the exception report to correct the import file.
If the validation process determines that there are data fields that cannot be updated in a row with other data that will be imported, a Handled Exception Report will be create.
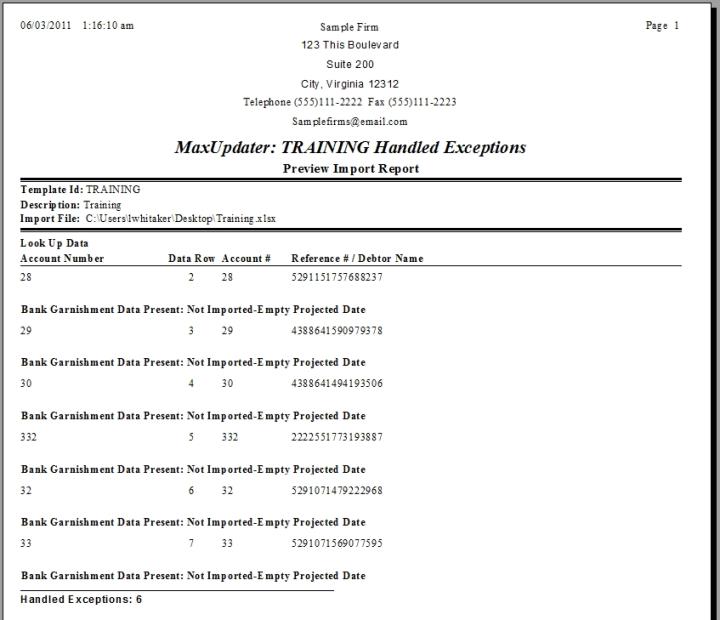
The Report will list the exceptions and the data that will not be uploaded. These exceptions will not preclude other data within the row from being imported on the account.
Users can exit the preview and fix the data file prior to downloading the data.
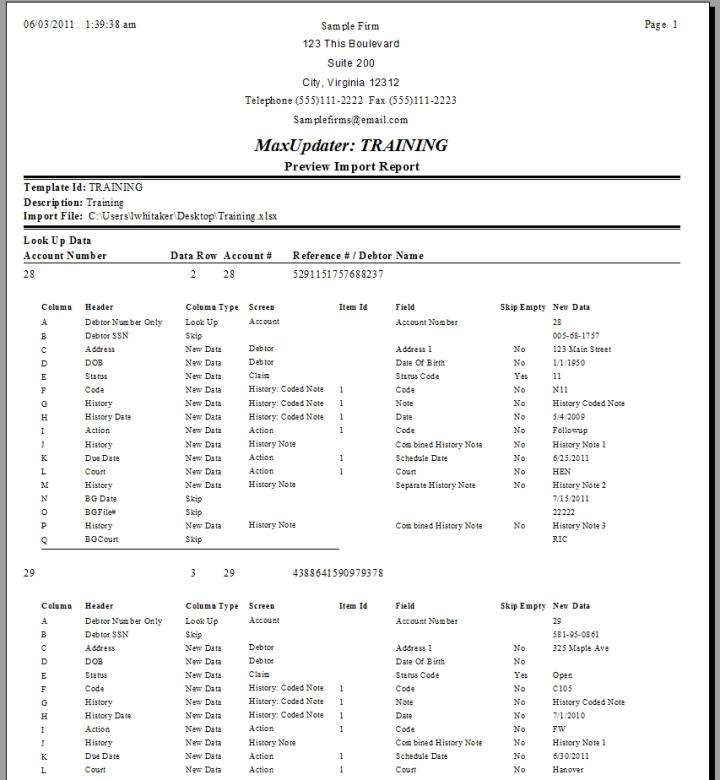
If there are no exceptions, the process will display the Import Report.

If you selected the option to include all data fields on the import report, the Import Report will list the column fields and the data to be imported.
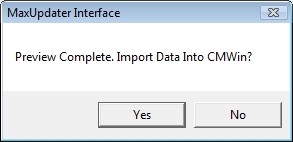
Once the preview is complete and you are ready to import the data, click the  button on the Preview Complete Screen. User can continue to the final without resolving the exceptions or handled exceptions. However, the row or fields will not be imported.
The Final Import will recreate the Import, Exception and Handled Exception Report and add a Log Entry on the Log Tab.