 from the menu bar of CollectMax.
 1.
Click  from the menu bar of CollectMax.
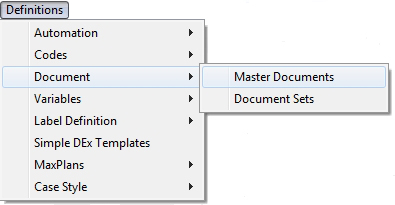
2. Select Document, Master Documents from the menu.
3.
Click the
![]() button.
button.
4.
Select
Document Style as LABEL TEMPLATE from
the  list.
list.

5.
Select
a DEFAULT PRINTER from the  list.
list.
6. Give document a NAME and DESCRIPTION. The Name should be a short code for the template. The description should describe what that code means.
Note: You should not put any slashes, quotes or special characters in the Name.

7.
Click the
![]() button.
button.
8.
In Word, look for MAIL MERGE TOOLBAR.
If tool bar is not available, go to ![]() from the menu bar,
select TOOLBARS, and MAIL
MERGE from the drop down menus.
from the menu bar,
select TOOLBARS, and MAIL
MERGE from the drop down menus.
9.
Find the
MAIN DOCUMENT SETUP icon ![]() on MAIL MERGE TOOLBAR,
(usually first icon on left). Click on icon.
on MAIL MERGE TOOLBAR,
(usually first icon on left). Click on icon.
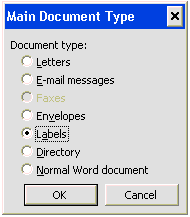
10. Change or Select NORMAL WORD DOCUMENT .
11.
Click the
![]() button.
button.
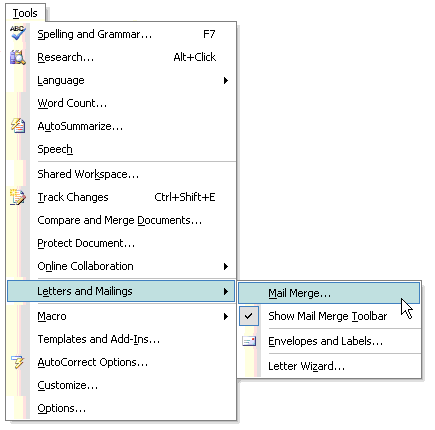
12. Click on Tools, Letters and Mailings and Mail Merge.
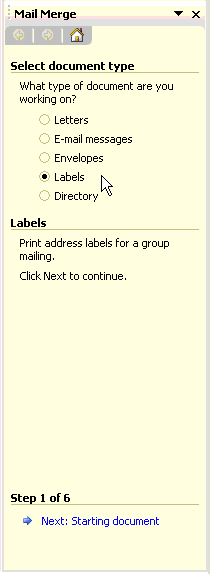
13. On the MAIL MERGE WIZARD, select Labels.
14.
At
the bottom of the Wizard after selecting Labels, click the  hyperlink to go to Step 2.
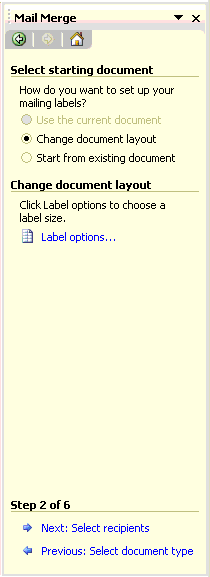
15.
Click ![]() in the middle of the wizard to display the Label Options
screen.
in the middle of the wizard to display the Label Options
screen.
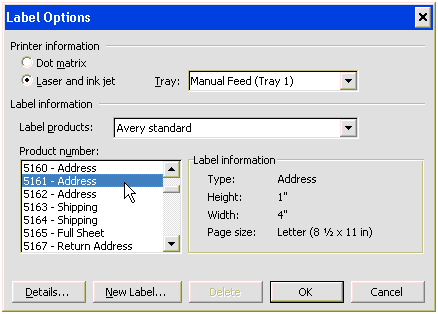
If the label
is not listed or to create a custom sized label, click the ![]() button to create a custom label.
button to create a custom label.
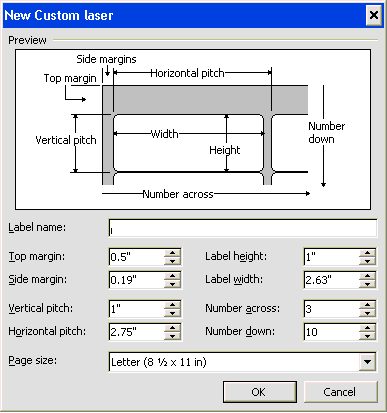
Enter the
new label name and margins. Click
the ![]() button to continue.
button to continue.
16. Select the Printer information. CollectMax does not work with Dot Matrix Printers. So, select Laser and ink jet and the tray the labels should print from on the printer that will be used to print labels.
17. Next, select the proper Label products and product Number. This should be the manufacturer of the Labels and the Label Number to be used with CollectMax.
18.
Click the ![]() button.
button.
19. Click the Select recipients hyperlink to go to Step 3.

20. Select to start from or use existing document.
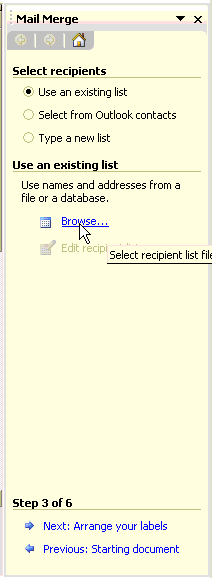
21. Click the Browse hyperlink to display the browse window.
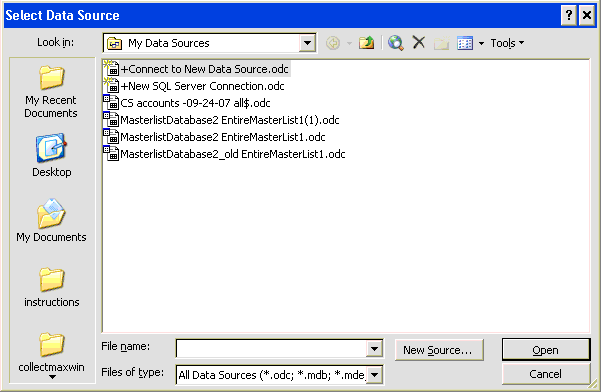
22.
In ![]() , click the
, click the  button. Find
the C drive,
double click the file named
 ![]() , and highlight the
, and highlight the ![]() then click the Open button. Or
in the
then click the Open button. Or
in the ![]() box type C:\JSTEMP\CMWinVar.doc
or .txt.
box type C:\JSTEMP\CMWinVar.doc
or .txt.
23. The Mail Recipient Screen will be displayed.
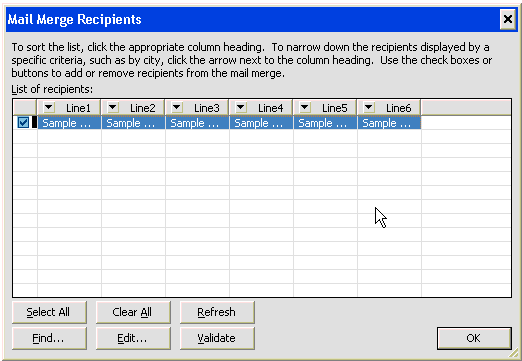
click ![]() , then click
, then click ![]() .
.
24.
On the Wizard click the Arrange Labels hyperlink  to display
Step 4.
25.
Select the ![]() hyperlink.
hyperlink.
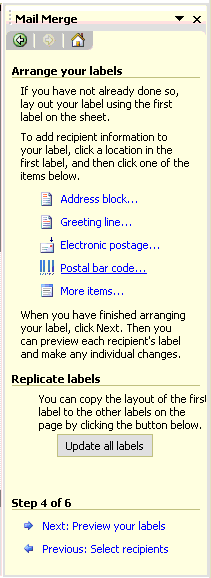
26. The Insert Merge Field screen will be displayed.
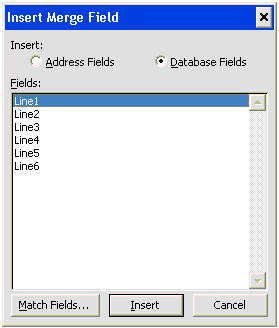
27.
Select
Line 1 and click the ![]() button. The
Line Mergefields will correspond to the Label Definitions mergefields.
button. The
Line Mergefields will correspond to the Label Definitions mergefields.
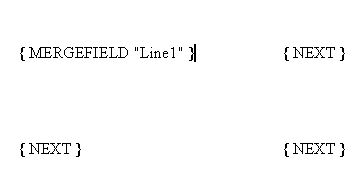
Continue to Insert the Mergefields until all necessary fields have been entered. If the mergefields need spacing like new lines, tabs or spaces, insert all merge field necessary and close the Insert Merge Fields screen and make the changes.
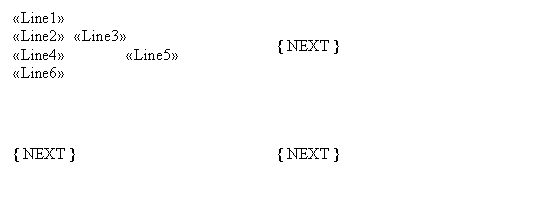
28.
Click the ![]() button to copy the mergefields to all labels.
button to copy the mergefields to all labels.
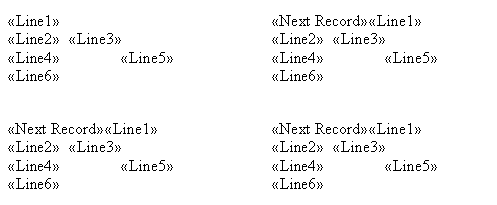
29.
Click the ![]() button.
button.
1.
Click  from the menu bar.
2. Select LABEL DEFINITION.
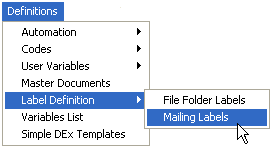
3. Select MAILING LABELS.
4.
Click the
![]() button.
button.
5. Enter a NAME & DESCRIPTION .

6. Click in Zip Code field.
7.
Select
the Zip Code variable from the  list to insert in the Zip
Code field.
I.E. DEZIP
This is required to be able to sort by the zip code when printing.
8. Click in the Label Line 1 field.
9.
Select
the variable from the he  list to insert in to the Line
1 field.
10. Repeat steps 6-7 for additional label lines.
11.
Click the
 button.
12.
Click the
 button.
See Also Generating a Mailing Label and Printing Mailing Labels
1.
In CollectMax,
click  .
.
2.
Click ![]()
3.
Click ![]()
4.
Click the
 button.
5. Click PREFERENCES tab
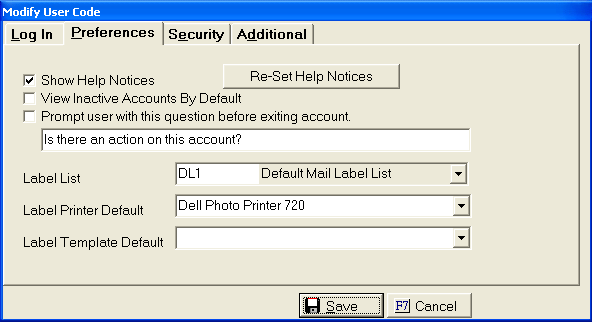
6. Select a LABEL QUEUE, PRINTER DEFAULT, and
DOCUMENT
DEFAULT from the  lists.
7.
Click the
 button.
8.
Repeat
steps 15-21 for each USER