 button.
 1.
From
the main menu of CollectMax click the button.
2. Find the Debtor's Account for judgment.

3.
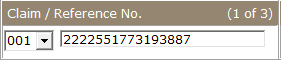
From any Tab, select the Claim that should have the Judgment. Click the  button and select the claim form the list.
Note: Selecting the proper claim before entering the filing is essential. The proper claim cannot be selected from the Litigation Screen and once a filing is entered, you cannot move the filing to another claim without deleting and re-enter it.
4.
On the Claim Tab, click the
 button in the Litigation area to open the Litigation Screen. Or click the
  button to the left of the screen on any Debtor Tab.
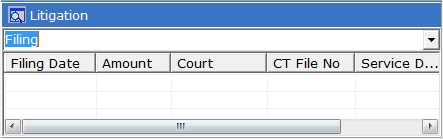
6.On the Litigation Screen, click the
![]() button.
button.
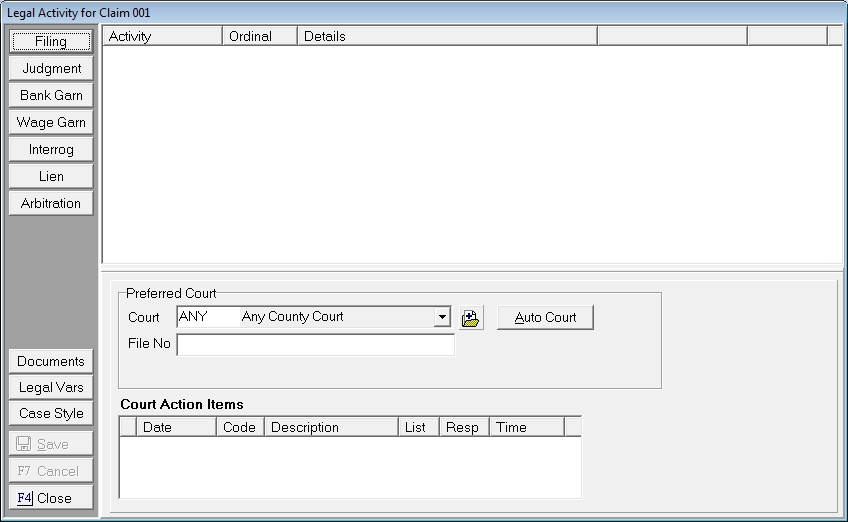
7. If there is no judgment information exists for this claim, the Select Judgment Type Screen will be displayed.
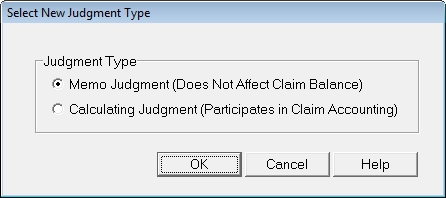
Select the Judgment Type:
Note: If a memo judgment is the first judgment entered on a claim then all subsequent judgement must be memo judgments and no calculating judgment can be entered on the claim.
Make your selection by clicking the  button next to your selection and click the
  button.
For Memo Judgments, skip to Step 29.
8. Enter the Judgment Date in the Judgment Field in MM/DD/YYYY Format or or click the ![]() to select the judgment date.
to select the judgment date.

The judgment date is required when entering a Calculated Judgment.

9. Enter any of the available dates in the following fields:
10. Enter any additional comments in the comment field. The comments can be included in the on documents by inserting the JMTCMTS variable.

11. A judgment can be attached to a Filing. If there is only one Filing attached to this claim CollectMax will automatically select the Filing. Otherwise, click the  button and select the filing that should be attached to this judgment.
Note: Attaching a Filing allows the filing balances to be pulled in as the Judgment Balance. However, no filing is required to be attached to the filing.
12. The Judgment Court will be auto filled with the Preferred Court or the Court from the selected Filing. If Preferred Court/Filing Court is not the proper court for this judgment, select
the appropriate court by clicking on the ![]() button and picking
the court from the list or click the
button and picking
the court from the list or click the  button and
add a court . A court is required to post a judgment.
button and
add a court . A court is required to post a judgment.

Note: The Preferred Court is uploaded for Network Interface Accounts. If you add a different Court on the Judgment Screen and want it uploaded, be sure an update the Preferred Court.
13. The Judgment Court File Number will automatically filled with the Preferred Court File Number or the File # from the selected Filing. If the Preferred Court File Number/Filing File # is not the proper File # for this judgment, enter the proper File #.

14. Select or Enter the following known Judgment Information:
15. Select the proper place to Set or Enter the Judgment From.

Click the proper button and the balances will be imported into the balance fields or enter the balances into the fields.
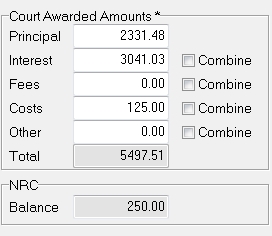
To combine all balance into the principal, check the  box next to each balance component to be combined in the principal.
16. Assign the debtor or debtors that are party to this judgment. CollectMax will automatically select the debtor on account with only one debtor or it will automatically assign the debtors attached to the selected filing. If there is more than one debtor on the account or if the selected debtors are not party to this judgment, click the 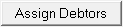 button to display the Assign Debtor Screen.

Click the  box next to the debtors who are a party to this Judgment.
17. If there is a NRC (Non-Recoverable Cost) Balance, click the  button to display the NRC Transactions and Adjustments Screen. If you do not a NRC balance this button will not be displayed.
![]()
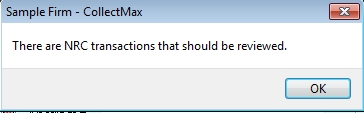
If you fail to review the NRC screen before saving, a reminder message will be displayed. Click the  button to display the NRC Transactions and Adjustments Screen.
18. Review the NRC and NRCADJ transactions posted for this claim. If any of these transaction are now recoverable, click the Transactions Tab to post a NRCADJ adjustment.

19. Enter the Date of the Transaction.

20. Select an Adjustment Reason:

21. Enter a Note to be added to the Transaction History.
![]()
22. Enter the Amounts to be adjusted remembering to use a negative if lowering the balance.

23. Click
 to save transaction and click
  to closed the NRC Transactions and Adjustments Screen.
24. Click button to review the balance and post the judgment.
25. Review the payments on the claim.

Select the payments to review:
Click the  box next to the payments that should be recorded post judgment. Moving payments to post judgment adjusts the post judgment claim balance to exclude the selected payments amounts.
Once all post judgment payments have been selected, click the  button.
26. Review the cost transactions on the claim.
Select the costs to review:
Click the box next to the costs that should be recorded post judgment. Moving costs to post judgment adjusts the post judgment claim balance to include the selected cost amounts.
Once all post judgment costs have been selected, click the button.
27. Review the Judgment Entry to insure that the claim balance will be accurate.

Review the Judgment Amounts, Current Balance Amounts and Adjustments to insure the claim balance will be accurate post judgment. If something seems inaccurate, click the  button and adjust the cost and payment posting or click
  button and adjust the balances on the Judgment Screen.
For more detail of the adjustments, click the  button.

The details list the balances and adjustments to balances for each balance component. The Pending Post Judgment Balance will be the claim balance once the judgment is posted.
28. If the Judgment Entry looks correct, click the  button to save the Calculated Judgment.
If this is the first Judgment entered on a claim, it will be automatically considered to be the Primary Judgment. It is the primary judgment that is used for uploading on Network Interface Accounts and will use the customary variables unless another judgment has been selected. See Litigation Variables.
For Information on changing the Primary Judgment, see Setting the Primary Judgment.
Skip to Step 46.
29. Enter the Judgment Date in the Judgment Field in MM/DD/YYYY Format or or click the ![]() to select the judgment date.If a payment
or payments have been made since filing but prior to post the judgment,
CollectMax will prompt you to see if these payments have been included
in the judgment amount.
to select the judgment date.If a payment
or payments have been made since filing but prior to post the judgment,
CollectMax will prompt you to see if these payments have been included
in the judgment amount.
The judgment date is required when entering a Calculated Judgment.
30. Enter any of the available dates in the following fields:
31. Enter any additional comments in the comment field. The comments can be included in the on documents by inserting the JMTCMTS variable.
32. A judgment can be attached to a Filing. If there is only one Filing attached to this claim CollectMax will automatically select the Filing. Otherwise, click the button and select the filing that should be attached to this judgment.
Note: Attaching a Filing allows the filing balances to be pulled in as the Judgment Balance. However, no filing is required to be attached to the filing.
33. The Judgment Court will be auto filled with the Preferred Court or the Court from the selected Filing. If Preferred Court/Filing Court is not the proper court for this judgment, select
the appropriate court by clicking on the ![]() button and picking
the court from the list or click the button and
add a court . A court is required to post a judgment.
button and picking
the court from the list or click the button and
add a court . A court is required to post a judgment.
Note: The Preferred Court is uploaded for Network Interface Accounts. If you add a different Court on the Judgment Screen and want it uploaded, be sure an update the Preferred Court.
34. The Judgment Court File Number will automatically filled with the Preferred Court File Number or the File # from the selected Filing. If the Preferred Court File Number/Filing File # is not the proper File # for this judgment, enter the proper File #.
35. Select or Enter the following known Judgment Information:
36. Select the proper place to Set or Enter the Judgment From.
Click the proper button and the balances will be imported into the balance fields or enter the balances into the fields.
To combine all balance into the principal, check the box next to each balance component to be combined in the principal.
37. Assign the debtor or debtors that are party to this judgment. CollectMax will automatically select the debtor on account with only one debtor or it will automatically assign the debtors attached to the selected filing. If there is more than one debtor on the account or if the selected debtors are not party to this judgment, click the button to display the Assign Debtor Screen.
Click the box next to the debtors who are a party to this Judgment.
38. If there is a NRC (Non-Recoverable Cost) Balance, click the
button to display the NRC Transactions and Adjustments Screen. If you do not a NRC balance this button will not be displayed.
![]()
If you fail to review the NRC screen before saving, a reminder message will be displayed. Click the button to display the NRC Transactions and Adjustments Screen.
39. Review the NRC and NRCADJ transactions posted for this claim. If any of these transaction are now recoverable, click the Transactions Tab to post a NRCADJ adjustment.
40. Enter the Date of the Transaction.
41. Select an Adjustment Reason:
42. Enter a Note to be added to the Transaction History.
![]()
43. Enter the Amounts to be adjusted remembering to use a negative if lowering the balance.
44. Click
to save transaction and click to closed the NRC Transactions and Adjustments Screen.
45.
Click button to post the judgment. The judgment will be posted but the claim balances will remain unchanged.
If this is the first Judgment entered on a claim, it will be automatically considered to be the Primary Judgment. It is the primary judgment that is used for uploading on Network Interface Accounts and will use the customary variables unless another judgment has been selected. See Litigation Variables.
For Information on changing the Primary Judgment, see Setting the Primary Judgment.
46. If Judgment Option have been set for this client, the Judgment Options Confirmation Screen will be displayed.

Click the ![]() button to accept these changes or edit them before saving. Click the box to exclude any section or click the button to stop the execution of any Judgment Options.
button to accept these changes or edit them before saving. Click the box to exclude any section or click the button to stop the execution of any Judgment Options.
47. Click
to exit the Judgment Screen.