 .
.This new feature allows for COST and CEX transactions to be exported to QuickBooks. This will enable you to print checks in CollectMax or QuickBooks and then update both software seamlessly. This export works with QuickBooks 2012, 2013 and 2015. It is not compatible with the web features in 2013 & 2015.This Feature requires the purchase and installation of the CheckWriting Feature in CollectMax.
This feature has a built in security feature. This feature is not enabled on any workstation upon installation of Version 6. It requires a separate QuickBooks installer to be ran on all workstations that plan on using the QuickBooks Export. To install the QuickBooks Installer use the following steps:
1.
On the workstation of your choice, right click
on the .
2. Select Open Windows Explorer.
3. Navigate to C:\program Files\jstechnologies\cmwin. If you are using a 64 bit machine it may be under C:\program files (x86)\js technologies\cmwin.
4. Select the file labeled QBFC11_0Installer.exe.

5. Double click QBFC11_0Installer.exe. It should take a few minutes.
To start using the benefits of the QuickBooks Cost Export the feature must be activated first. After installing the QuickBooks installer package you will need to sign in CollectMax and follow the following steps:
1.
Go to ![]() .
.
2.
Go to ![]() .
.
3.
Select ![]() .
.
4.
Select the ![]() tab that should pull up.
tab that should pull up.
5.
Then navigate to the company file by selecting
the browse button ![]() .
.
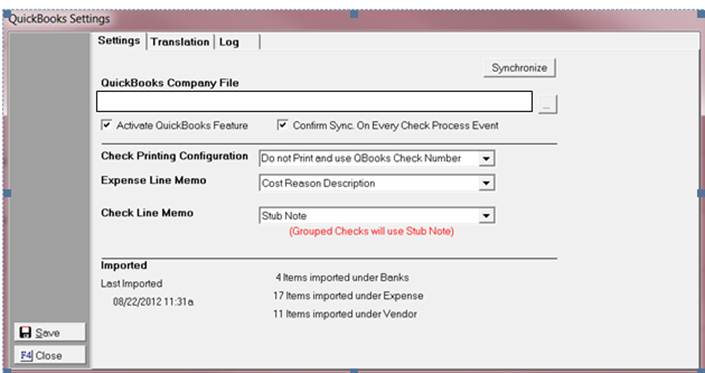
6. Select the box for Activate the QuickBooks Feature. This feature must be turned on to Export to QuickBooks.
![]()
7. Select the box for Confirm Sync on Every Check Process Event. The first sync requires a certificate. It is recommended that the first initial run be done on a computer with QuickBooks on it. We also recommend that you leave this box checked because it will look for any changes in the chart of accounts of QuickBooks before exporting checks.
![]()
8. Select your Check Printing Configuration options. The options available are Print Check and use CollectMax check number and Do not Print and use QuickBooks check number.
![]()
9. Select your Expense Item Memo. The options available are Case Style, and Cost Reason Description, and Account Number, and Custom Format.
![]()
10. Select your Check Line Memo. The options available are Stub Note, Cost Reason Description, Case Style, Account Number,
and Custom Format.![]()
11. The Imported section will show the items imported and a time stamp of the last sync.

JST Hints: We recommend the following settings:
Always select Confirm Sync on Every Check Process Event.
In order to set up CollectMax Bank, Cost, CEX, and Payees with the proper Chart of Accounts in QuickBooks you will need to import your Chart of Accounts. This will be needed to make sure that your transactions are recorded properly in QuickBooks.
Note: QuickBooks must be in Multi-User Mode to be able to import charts of accounts and transactions.
1. Go
to ![]() .
.
2. Go
to ![]() .
.
3. Select ![]() .
.
4. Select
the ![]() tab that should pull up.
tab that should pull up.
5. Then sign into your QuickBooks Company file as an administrator.
6. Then navigate back to CollectMax.
7. Then
click on ![]() .
.
8. The system will pause and you will navigate back to QuickBooks to accept the certificate produced in QuickBooks.
9. You should see the “Application With No Certificate” message appear in QuickBooks.
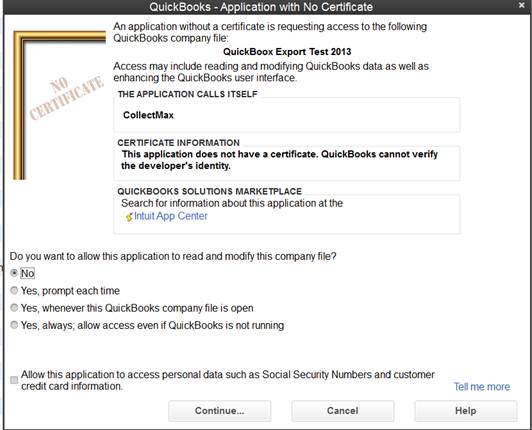
10. Then you should see the name of our software on the Certificate. It will then prompt you with a question Do you want to allow this application to read and modify this company file?
11. The select the appropriate radio button. JST recommends the following setting. Yes, whenever the QuickBooks company file is open.

12. Then
select![]() .
.
13. This box labeled Confirm to Proceed should appear.

14. Then select ![]() .
.
15. Then a box labeled Access Confirmationshould appear.
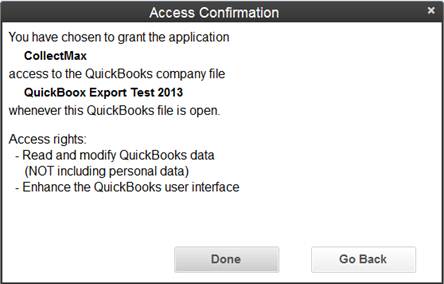
16. Then
select![]() .
.
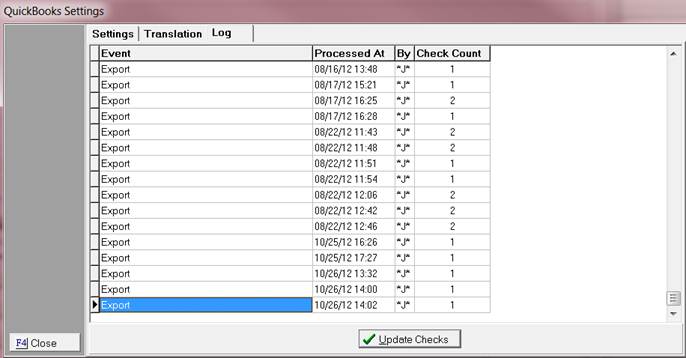
17. If you navigate back to CollectMax you will see the rest of the synchronization complete. When it does you will see an updated log.
18. Verify that you have the same number of Banks, Expenses, and Vendors in QuickBooks 2013.
JST Hints:
The maximum length character length for Banks, Expenses, and Vendors are 120.
Make sure you have one CollectMax workstation on a QuickBooks Workstation.
After Sync make sure the numbers equal what you have in QuickBooks.
Make sure that you have check writing on at the Client Level.
The following types import Bank, Expense, Asset, Current Asset, Current Liability, Expense.
Before exporting cost checks for the first time you will have to set up your Translation types first.
1. Go
to  .
.
2. Go
to ![]() .
.
3. Select ![]() .
.
4. Select
the ![]() tab that should pull up.
tab that should pull up.
5. In
the drop-down select “Bank Accounts”.Then highlight your bank and select ![]() . It should pull up the Chart of Accounts for
Banks in QuickBooks.
. It should pull up the Chart of Accounts for
Banks in QuickBooks.

6. Then select the correct Bank from the chart of accounts link.
7. Then
select  .
.
8. If you have more than one bank account follow steps 5-7for each one.
9. In
the drop-down select “Expense Accounts”. Then highlight your expense and select ![]() .
.
10. It should pull up the Chart of Accounts for Expenses in QuickBooks.

11. Then select the correct Expense from the Chart of Accounts Link.
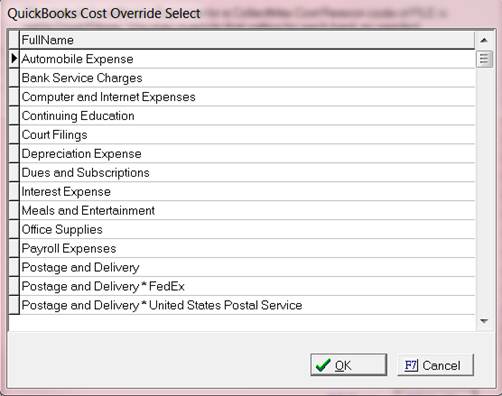
12. If you require more advanced mapping, we have
a ![]() button. This will allow you to Map Costs/Expensesto different banks.
button. This will allow you to Map Costs/Expensesto different banks.

13. Then
highlight your bank and select ![]() . It should pull up the Chart of Accounts for your
Cost Override selections in
QuickBooks.
. It should pull up the Chart of Accounts for your
Cost Override selections in
QuickBooks.
14. Then select ![]() .
.
15. If you have more than one bank account follow steps 11-13 for each one.
16. Select the
![]() tab that should pull up.
tab that should pull up.
17. In the
drop-down select “Vendors”. Then
highlight your bank and select ![]() . It should pull up the Chart of Accounts for
Banks in QuickBooks.
. It should pull up the Chart of Accounts for
Banks in QuickBooks.

18. Then select the correct Vendors from the chart of accounts link.
19. Then select  .
.
20. If you have more than one vendor account follow steps 16-18 for each one.
The first thing step that only needs to be done if you are not sure if you have cost Checks turned on at the Client level. Once you have verified you can skip steps 1-4
1.
From main menu of CollectMax, click the ![]() button.
button.
2.
Select your
Client and click ![]() .
.
3.
Click the ![]() tab.
tab.
4.
Click the ![]() button. Click the
button. Click the ![]() button
next to Generate and Print Cost Checks.
button
next to Generate and Print Cost Checks.

5.
Click the ![]() button and then click the F4 or the
button and then click the F4 or the  button.
6.
From the main menu of CollectMax, click the ![]() button.
button.
7. Select the Debtor Account you need to post a cost payment on.
8.
Once you have
found your account, click on the  .
.
9.
In the Enter
Transaction Code field, type the word COSTand then click ![]() button, or select COST from the
button, or select COST from the ![]() list.
list.

10. The Cost Date will default to today’s date. Edit this field to back-date your cost transaction.
![]()

11. Select a Reasoncode from the Reason ![]() list. Reason codes represent what the cost is for. If you need to create a new Reason code,
click on
list. Reason codes represent what the cost is for. If you need to create a new Reason code,
click on ![]()

12. Enter the Amount of the cost in the amount field. The amount may already be filled in by default if an amount has been attached to a reason code.
![]()
13. Select which Bank account will be funding the cost.
![]()
14. In the Notefield, type any notes specific to the posting of this cost.

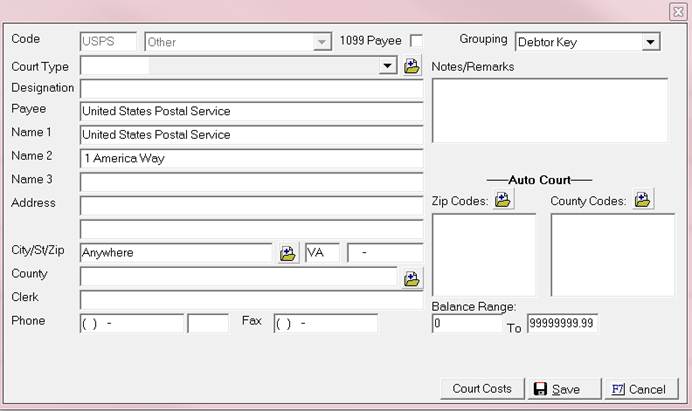
15. If you already have a court attached to this
claim then the check payee will automatically fill in here. If not, you will need to enter in Court Payee
information. Click the ![]() button to select Court Payee. If you need to create a new Court Payee click
button to select Court Payee. If you need to create a new Court Payee click
![]() .
.
![]()
16. Click the ![]() button.
button.
17. Click the ![]() button to return to the main menu screen of
CollectMax.
button to return to the main menu screen of
CollectMax.
The QuickBooks export allows two options for you to print your checks. The first option is to print your checks on CollectMax and send and export file to QuickBooks of the data exported. The second option is to print your cost checks in QuickBooks and mark all items as exported in CollectMax check history section.
1. From the Main Menu of CollectMax, click the  button.
2. Select
the ![]() tab.
tab.
3. Select ![]() .
.
4. Change your Check Printing Configuration .
5. ![]()
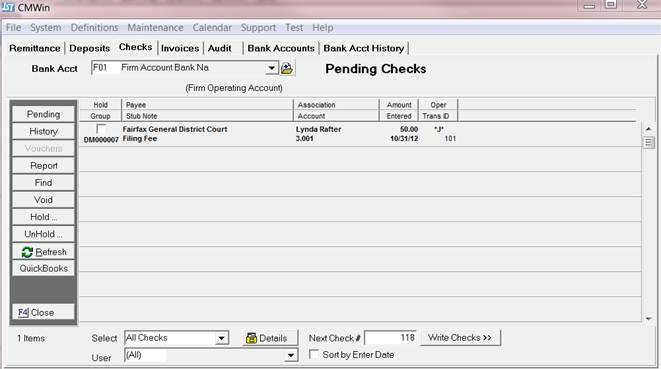
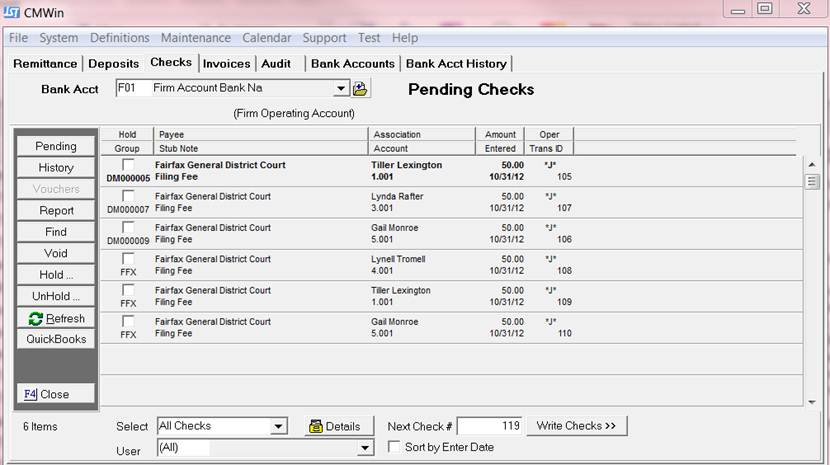
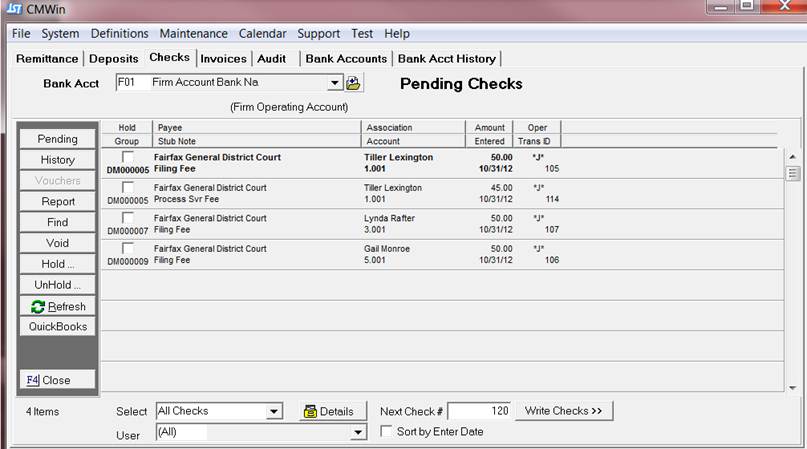
6. When the screen loads you will be aligned to the Pending Check screen. This screen will list a summary of all pending check items for a selected account with an item count listed at the bottom.
7. To
select the Bank Acct, click the ![]() button and select from the list of accounts.
All pending checks for this account will be displayed.
button and select from the list of accounts.
All pending checks for this account will be displayed.
![]()
8. To
Narrow down the listed checks, select the check type to be viewed and/or
printed. By default all checks are
selected. If you select the ![]() button you will have Cost Checks, Firm Transfer
checks, Refund Checks, Remittance Checks, Payee, Amount, Dates. Please
keep in mind even though you have all these selections only COST checks will
export to QuickBooks.
button you will have Cost Checks, Firm Transfer
checks, Refund Checks, Remittance Checks, Payee, Amount, Dates. Please
keep in mind even though you have all these selections only COST checks will
export to QuickBooks.
![]()
9. To select a particular user when requested the
check select the ![]() button and select the user code from the
list.
button and select the user code from the
list.
![]()
10. To find a pending check, click the ![]() button and select from the menu. All checks can be found by transaction id number, payee, amount, or date range.
button and select from the menu. All checks can be found by transaction id number, payee, amount, or date range.
11. Checks can
be held to be printed at another time. To hold a check, click the ![]() box next to the check entry on the pending checks screen.
box next to the check entry on the pending checks screen.
12. To print the checks, enter the next check number into the next check filed.
![]()
13. Then click the ![]() button. The check format screen will be displayed.
button. The check format screen will be displayed.
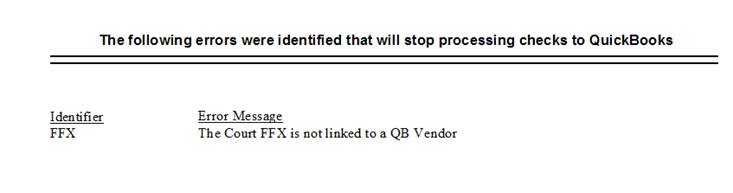
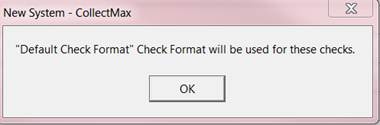
14. If any of your chart of accounts are missing a QuickBooks Link you will get the follow error report for any Bank, Expense, or Vendor that is not defined.
15. If everything is linked properly you should get this box.

16. Then click the  button.
17. The select the ![]() button.
button.
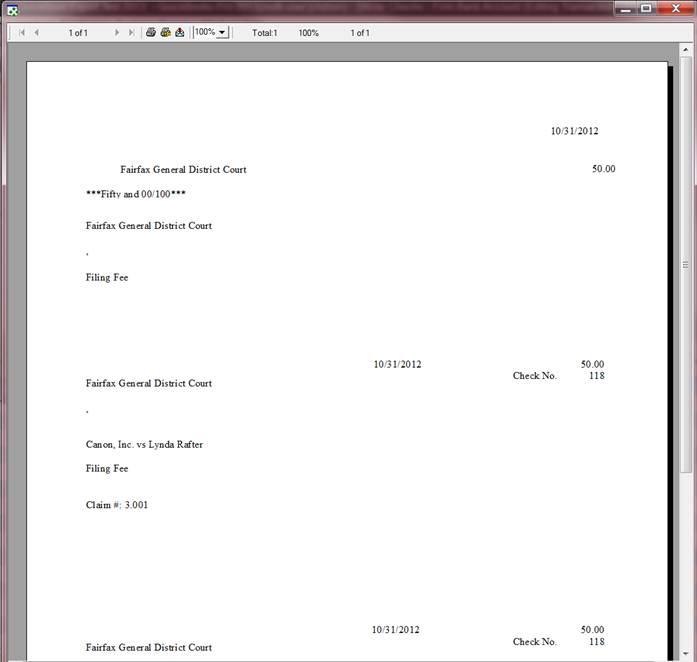
18. Then select the QuickBooks option and you should see an image of your checks.
19. To close
click the ![]() .
.
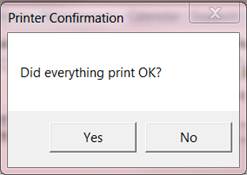
20. Then you should get a box that asks if everything printed ok.

21. Select the ![]() button.
button.
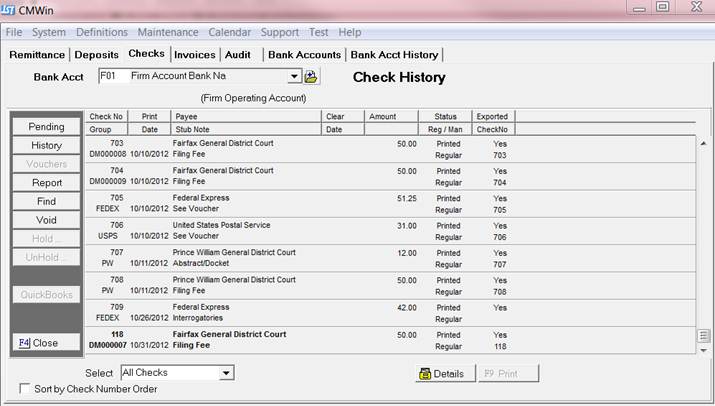
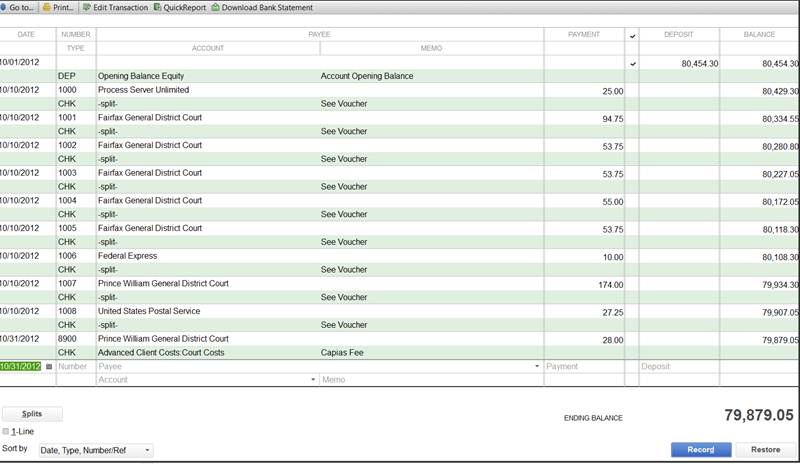
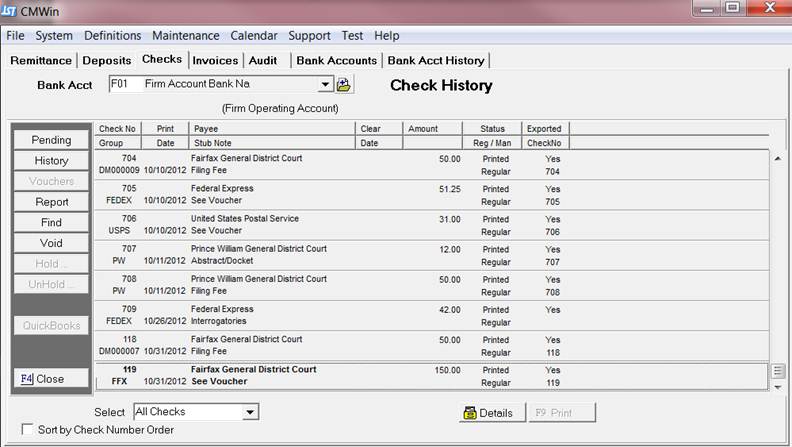
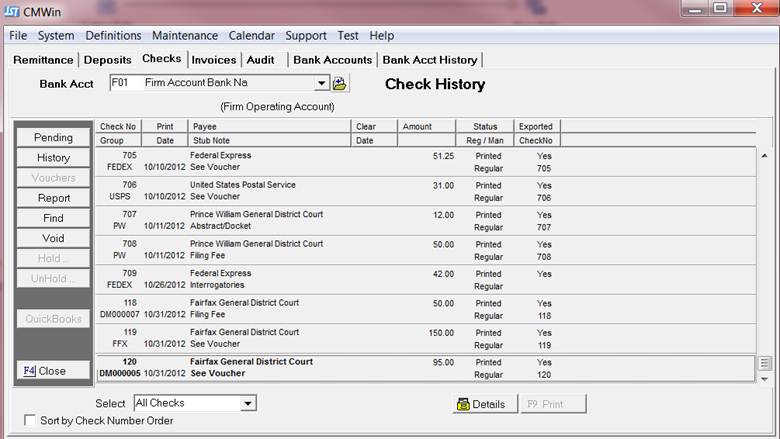
22. If you
select the ![]() button and scroll all the way down you should
see the check you printed. In this example
you will see check number 118 and it
shows that it was exported to QuickBooks because it has a “YES” by it. The check number is missing at this point
because it has not printed in QuickBooks yet or you did not update your checks
log.
button and scroll all the way down you should
see the check you printed. In this example
you will see check number 118 and it
shows that it was exported to QuickBooks because it has a “YES” by it. The check number is missing at this point
because it has not printed in QuickBooks yet or you did not update your checks
log.

23. If you go to QuickBooks you can go to ![]() .
.
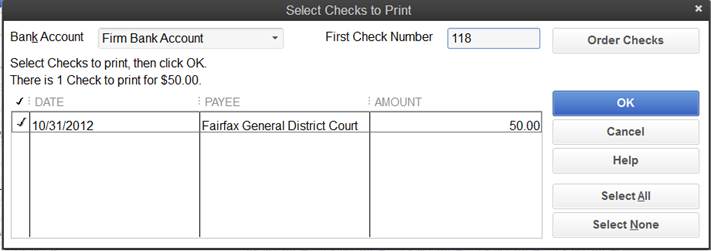
24. Select Print Forms and then select CHECK and the appropriate bank.
25. This form should pull up and the enter the check number and check all the checks that you want to print and then select ok.
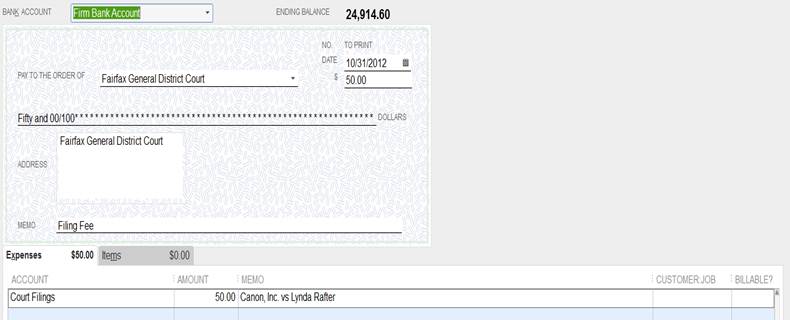
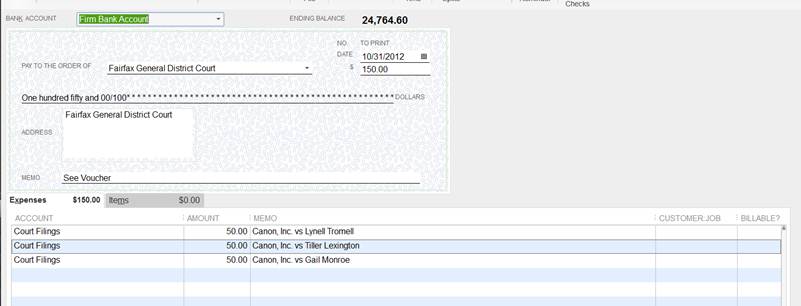
26. To view the physical check select Bankingand then Write Checks and the appropriate bank. The following check should appear. Anything can be altered at this stage in QuickBooks, however in CollectMax the only thing that we will update automatically is the check number.
27. After printing the check it should update the check with the check number .

28. It should show up in your check register. If you go to Banking>Use Register> and select your bank.

29. Once the check is printed in QuickBooks you can then go back to CollectMax.
30. Go to  .
.
31. Go
to ![]() .
.
32. Select ![]() .
.
33. Select
the ![]() tab that should pull up.
tab that should pull up.
34. Then highlight the check batch that you would like to update. This will have an arrow on the left hand side of the word “EXPORT”.

35. Then click the  button.
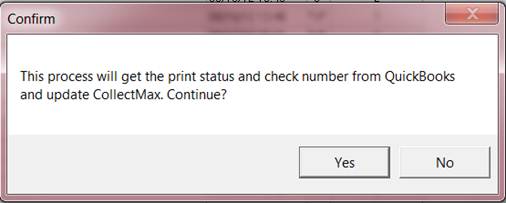
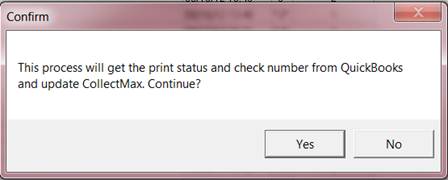
36. Then you will get this box asking if you would like to update your information.
37. If you do click the ![]() button.
button.
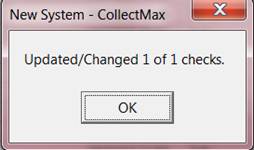
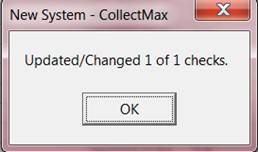
38. Then you should get the status box listed below.
36. If you
select the ![]() button and scroll all the way down you should
see the check you printed. In this example you will see check number 118 and it shows that it was exported to
QuickBooks because it has a “YES” by it. The check number is now filed in.
button and scroll all the way down you should
see the check you printed. In this example you will see check number 118 and it shows that it was exported to
QuickBooks because it has a “YES” by it. The check number is now filed in.
The QuickBooks export allows two options for you to print your checks. The first option is to Print your checks on CollectMaxand send and export file to QuickBooks of the data exported. The second option is to Print your cost checks in QuickBooks and mark all items as exported in CollectMax check history section.
1.
From the
Main Menu of CollectMax, click the 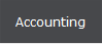 button.
2.
Select the ![]() tab.
tab.
3.
Select ![]() .
.
4. Change your Check Printing Configuration to
![]()
5. When the screen loads you will be aligned to the Pending Check screen. This screen will list a summary of all pending check items for a selected account with an item count listed at the bottom.

6.
To select the Bank Account, click the ![]() button and select from the list of accounts.
All pending checks for this account will be displayed.
button and select from the list of accounts.
All pending checks for this account will be displayed.
![]()
7.
To Narrow down the listed checks, select the
check type to be viewed and/or printed. By default all checks are selected. If you select the ![]() button you will have Cost Checks, Firm Transfer
checks, Refund Checks, Remittance Checks, Payee, Amount, Dates. Please
keep in mind even though you have all these selections only COST checks will
export to QuickBooks.
button you will have Cost Checks, Firm Transfer
checks, Refund Checks, Remittance Checks, Payee, Amount, Dates. Please
keep in mind even though you have all these selections only COST checks will
export to QuickBooks.
![]()
8.
To select
a particular User when requested the
check select the ![]() button and select the user code from the
list.
button and select the user code from the
list.
![]()
9.
To
find a pending check, click the ![]() button and select from the menu. All checks can be found by transaction id number, payee, amount, or date range.
button and select from the menu. All checks can be found by transaction id number, payee, amount, or date range.
10. Checks
can be held to be printed at another time. To hold a check, click the ![]() box next to the check entry on the pending checks screen.
box next to the check entry on the pending checks screen.
11. To print the checks, enter the next check number into the next check filed.
![]()
12. Then click the ![]() button. The check format Screen will be displayed.
button. The check format Screen will be displayed.
13. If any of your chart of accounts are missing a QuickBooks Link you will get an error report for any Bank, Expense, or Vendor that is not defined.
14. If everything is linked properly you should get this box.

15. Then click the ![]() button.
button.
16. The select the ![]() button.
button.
17. Then select the QuickBooks option and you should see an image of your checks.
18. To
close click the ![]() .
.
19. Then you should get a box that asks if everything printed ok.

20. Select the ![]() button.
button.
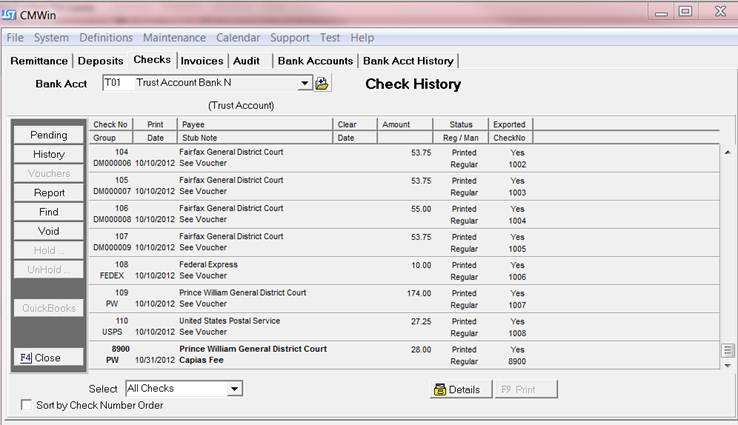
21. If you select the ![]() button and scroll all the way down you should
see the check you printed. In this
example you will see check number 8900 and it shows that it was exported to QuickBooks because it has a “YES” by it.
button and scroll all the way down you should
see the check you printed. In this
example you will see check number 8900 and it shows that it was exported to QuickBooks because it has a “YES” by it.
22. If you go to QuickBooks you can go to ![]() and select Use Register.
and select Use Register.
23. Select the appropriate Bank account. Then you should see this check in the register.
The only different about grouping checks in QuickBooks is now we allow you to group checks by Debtor Key. The grouping of Court/Payee codes can be found under Definitions, Codes, and Court Payees. In the grouping dropdown select Debtor Key and it will group all Debtors with the same payee.

If you need additional help or a touch up on How To Write a Group Check visit this section in our help file.
Provided that your checks our created and ready for print.
1. From the Main Menu of CollectMax, click the  button.
2. Select
the ![]() tab.
tab.
3. Select ![]() .
.
4. Change your Check Printing Configuration.
![]()
5. When the screen loads you will be aligned to the Pending Check screen. This screen will list a summary of all pending check items for a selected account with an item count listed at the bottom.
6. To print the checks, enter the next check number into the next check filed.
![]()
7. Then click the ![]() button. The check format Screen will be displayed.
button. The check format Screen will be displayed.
8. If everything is linked properly you should get this box.
9. Then click the  button.
10. The select the ![]() button.
button.
11. Then select the QuickBooks option and you should see an image of your checks.

12. To close
click the ![]() .
.
13. Then you should get a box that asks if everything printed ok.
14. Select the  button.
15. Then this box will appear.
16. Click on the ![]() button.
button.
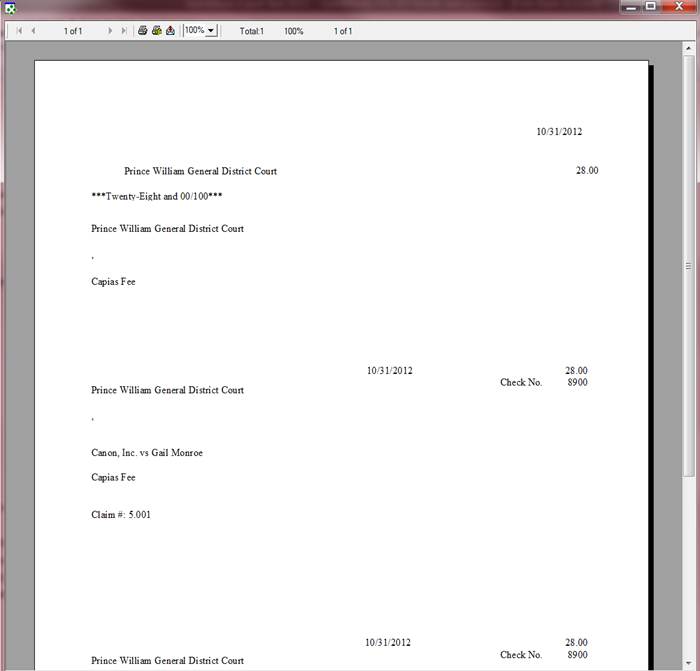
17. Then select to print to screen.
18. The following printable report will pull up.

19. To close
click the  .
.
20. Then you should get a box that asks if everything printed ok.

21. Select the  button.
22. If you
select the ![]() button and scroll all the way down you should
see the check you printed. In this example you will see check number 119 and it shows that it was exported to
QuickBooks because it has a “YES” by it. The check number is missing at this point because it has not printed in
QuickBooks yet or you did not update your checks log.
button and scroll all the way down you should
see the check you printed. In this example you will see check number 119 and it shows that it was exported to
QuickBooks because it has a “YES” by it. The check number is missing at this point because it has not printed in
QuickBooks yet or you did not update your checks log.

23. If you go to QuickBooks you can go to ![]() .
.
24. Select Print Forms and then select CHECK and the appropriate bank.
25.This form should pull up and the enter the check number and check all the checks that you want to print and then select ok.

26.To view the physical check select Banking and then Write Checks and the appropriate bank. The following check should appear. Anything can be altered at this stage in QuickBooks, however in CollectMax the only thing that we will update automatically is the check number.
27. After printing the check it should update the check with the check number.

28. It should show up in your check register. If you go to Banking>Use Register> and select your bank.

29. Once the check is printed in QuickBooks you can then go back to CollectMax.
30. Go to  .
.
31. Go
to ![]() .
.
32. Select ![]() .
.
33. Select
the ![]() tab that should pull up.
tab that should pull up.
34. Then highlight the check batch that you would like to update. This will have an arrow on the left hand side of the word “EXPORT”.
35. Then click the button.
36. Then you will get this box asking if you would like to update your information.
37. If you do click the ![]() button.
button.
38. Then you should get the status box listed below.
39. If you
select the ![]() button and scroll all the way down you should
see the check you printed. In this
example you will see check number 119 and it shows that it was exported to QuickBooks because it has a “YES” by it. The check number is now
filed in
button and scroll all the way down you should
see the check you printed. In this
example you will see check number 119 and it shows that it was exported to QuickBooks because it has a “YES” by it. The check number is now
filed in
40. The check number is now updated.
The only different about grouping checks in QuickBooks is now we allow you to group checks by Debtor Key. The grouping of Court/Payee codes can be found under Definitions, Codes, and Court Payees. In the grouping dropdown select Debtor Key and it will group all Debtors with the same payee.
If you need additional help or a touch up on How To Write a Group Check visit this section in our help file.
Provided that your checks our created and ready for print.
1. From the Main Menu of CollectMax, click the ![]() button.
button.
2. Select
the ![]() tab.
tab.
3. Select ![]() .
.
4. Change your Check Printing Configuration.
![]()
5. When the screen loads you will be aligned to the Pending Check screen. This screen will list a summary of all pending check items for a selected account with an item count listed at the bottom.
6. Checks
can be held to be printed at another time. To hold a check, click the ![]() box next to the check entry on the pending checks screen.
box next to the check entry on the pending checks screen. 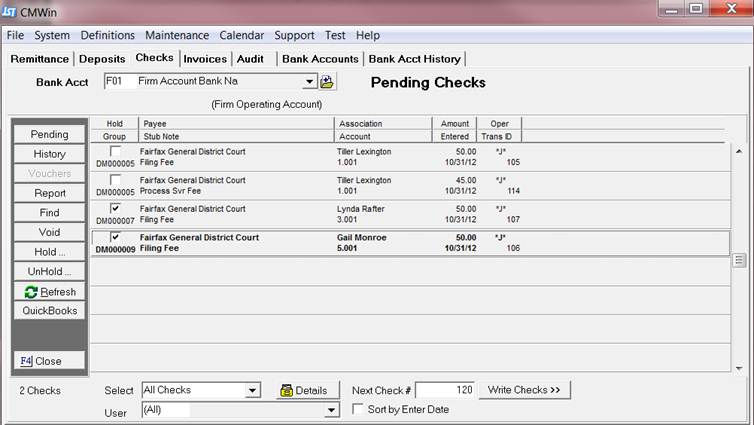
7. To print the checks, enter the next check number into the next check filed.
![]()
8. Then click the ![]() button. The check format Screen will be displayed.
button. The check format Screen will be displayed.
9. If everything is linked properly you should get this box.

10. Then click the ![]() button.
button.
11. The select the  button.
12. Then Select the QuickBooks option and you should see an image of your checks.
13. To close
click the ![]() .
.
14. Then you should get a box that asks if everything printed ok.
15. Select the ![]() button.
button.
16. Then this box will appear.
17. Click on the ![]() button.
button.
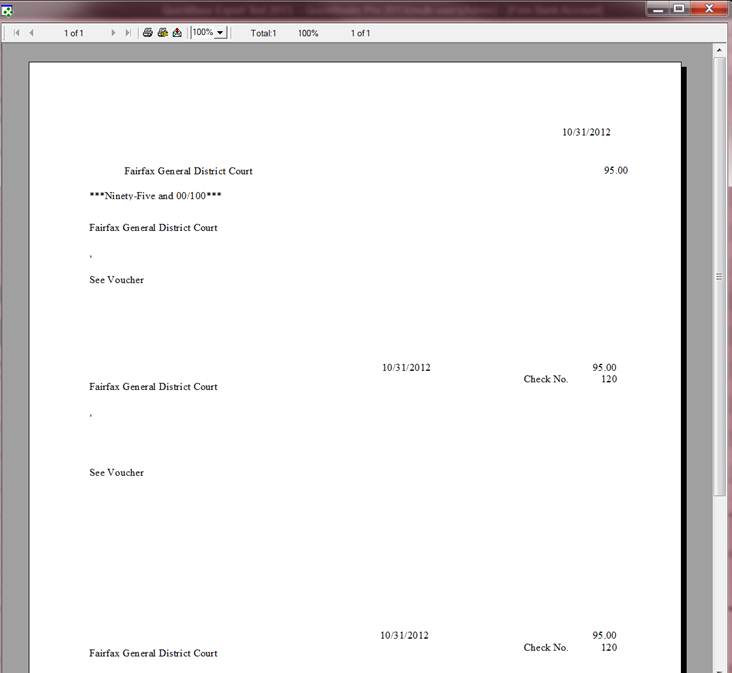
18. Then select to print to screen.
19. The following printable report will pull up.

20. To close
click the ![]() .
.
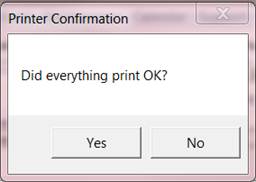
21. Then you should get a box that asks if everything printed ok.

22. Select the  button.
23. If you select the ![]() button and scroll all the way down you should
see the check you printed. In this
example you will see check number 120 and it shows that it was exported to QuickBooks because it has a “YES” by it.
button and scroll all the way down you should
see the check you printed. In this
example you will see check number 120 and it shows that it was exported to QuickBooks because it has a “YES” by it.
24. If you go
to QuickBooks you can go to ![]() and select Use Register.
and select Use Register.
25. Select the appropriate Bank account. Then you should see this check in the register.

JST HINTS:
The advantage of printing the voucher report is for the details and for the check to be added to your reconciliation grid.
Please keep in mind it is totally possible to have a check made payable to a totally different party in CollectMax and then it be linked to another Vendor in QuickBooks. JST recommends that when linking your accounts that you keep the names somewhat similar to keep it easy to understand.
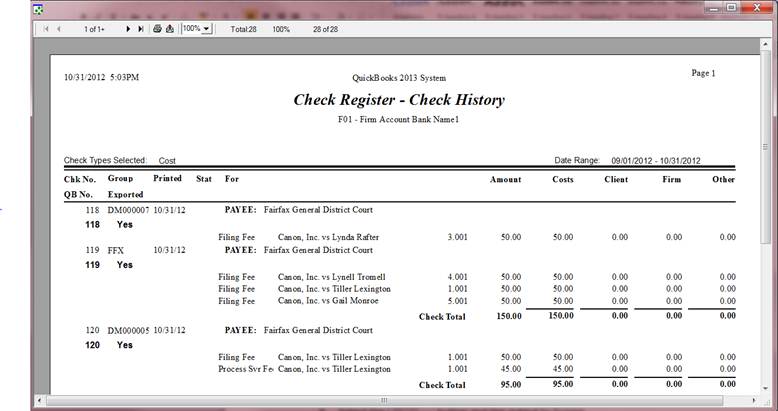
We have some default reports in CollectMax to help you stay on track. This report will show all the item and all the details of checks that were exported to QuickBooks and we also have a recommend report to use and QuickBooks to make sure that everything stays on track.
1.
From the Main Menu of CollectMax, click the ![]() button.
button.
2.
Select the ![]() tab.
tab.
3.
Click on the  .
.
4.
Click on the ![]()
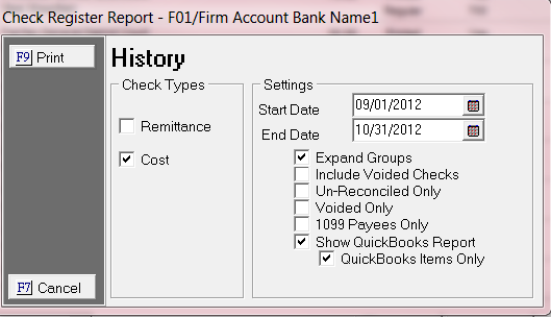
5. Uncheck the box by Remittance. The QuickBooks export does not include remittance checks .
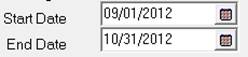
6. Put in your Date Ranges Start and End Date.
![]()
7. Check the Box for Expand Groups this will give you the detail such as the debtors name, amount, check numbers in CollectMax and QuickBooks, Export details.
![]()
8. Check the box to Show QuickBooks Report and QuickBooks Items only.
![]()
9.
Select
the ![]() button and the output to Screen.
button and the output to Screen.
1.
From the Main Menu of QuickBooks, click the ![]() button.
button.
2. Select the Banking.
3. Select the Check Detail Report.
4.
Click on the ![]() .
.
5. Then click on the Display tab and enter the details that are highlighted and checked.

6. Then click on the Header/Footer tab.
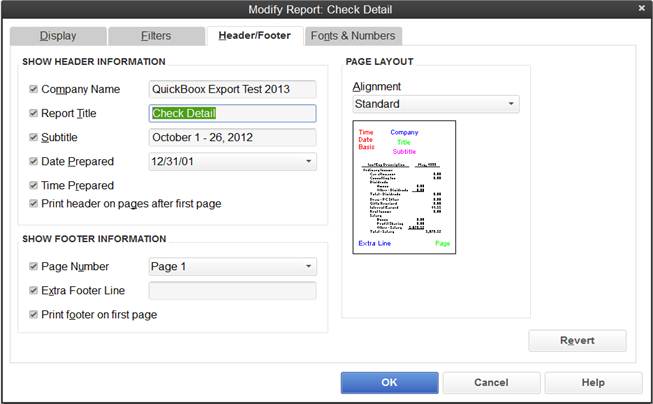
7. Then in the Report Title you will need to save the name of your report.

8. Then select Filterstab.
9. Then select the appropriate highlighted items.

10. Then select ![]() to save all your changes.
to save all your changes.
11. This report can also be saved. This can be done by selecting your ![]() button in QuickBooks.
button in QuickBooks.
12. This box will show up
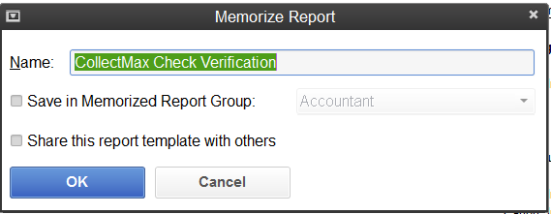
13. Then name your memorized report.
14. Then click ![]() .
.
All voids and deletes will have to be done manually in CollectMax and then you will need to do the appropriate transaction in QuickBooks to delete or void any unwanted checks. Please review your QuickBooks program on how to properly void or delete a transaction. The below instructions are for how to void a check in CollectMax.
1.
From the
Main Menu of CollectMax, click the  button.
2.
Select the ![]() tab.
tab.
3.
Select the ![]() tab.
tab.
4. Find the check that you want to void.

5.
Click the ![]() .
.
6. This window will pop up.

7.
Then select your ![]() button.
button.
8. Enter you master password for your system.
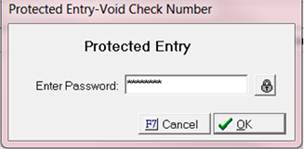
9.
Click the
![]() button.
button.
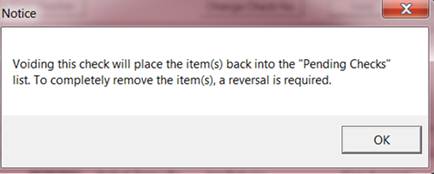
10. Then this window will pop up.
11. Then
select the  button.
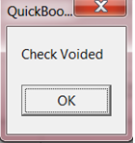
12. To confirm that the check was voided this box will show up and you item will be back in pending.
JST HINTS:
Please keep in mind you will not be able to void a reconciled cost check.
This is also helpful if you printed the wrong check number . Also if you
do not want to reprint the check you can just manually change the check number
by following steps 1-6 and then click the ![]() button.
button.
We have some default reports in CollectMax to help you stay on track. This report will show all the voided items and all the details of checks that were exported to QuickBooks and we also have a recommend report to use and QuickBooks to make sure that everything stays on track.
1.
From the
Main Menu of CollectMax, click the ![]() button.
button.
2.
Select the ![]() tab.
tab.
3.
Click on the ![]() .
.
4.
Click on the ![]() .
.

5. Uncheck the box by Remittance. The QuickBooks export does not include remittance checks .
6. Put in your Date ranges Start and End Date
7. Check the Box for Expand Groups this will give you the detail such as the debtors name, amount, check numbers in CollectMax and QuickBooks, Export details.
![]()
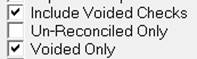
8. Then select Include Voided checks and Voided only. By selecting one by default it checks the other.
9. Check the box to Show QuickBooks Report and QuickBooks Items only.
![]()
10. Select the  button and the output to Screen.

1. From
the Main Menu of QuickBooks, click
the ![]() button.
button.
2. Select the Accountant & Taxes.
3. Select the Voided/Deleted Transactions Detail.
4. Click
on the ![]() .
.
5. Then click on the Filters and enter the details for Transaction Type.
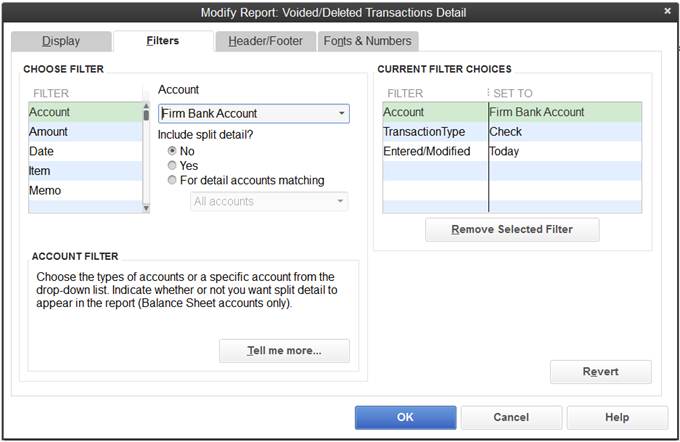
6. Then click on the Filters and enter the details for Account.

7. Then select the Display tab.

8. Then select ![]() to save all your changes.
to save all your changes.
9. This report can also be saved. This can be done by selecting your ![]() button in QuickBooks.
button in QuickBooks.
10. This box will show up. In the name field give a Title to your memorized report.
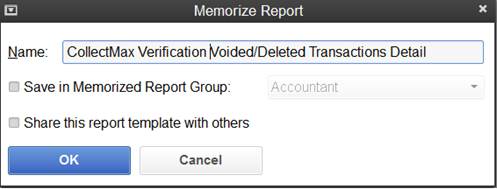
11. Then
click ![]() to save your changes.
to save your changes.