The You've Got Claims Interface sends one upload file with both network notes and financials. For each account downloaded the upload will send an acknowledgment code back to YGC.
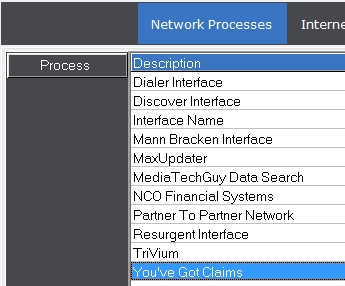
From the Network Processes screen, Click the selected network.
Click the
 button.
Then click
the
button.
Then click
the ![]() tab.
This will
take you to the notes upload screen.
tab.
This will
take you to the notes upload screen.
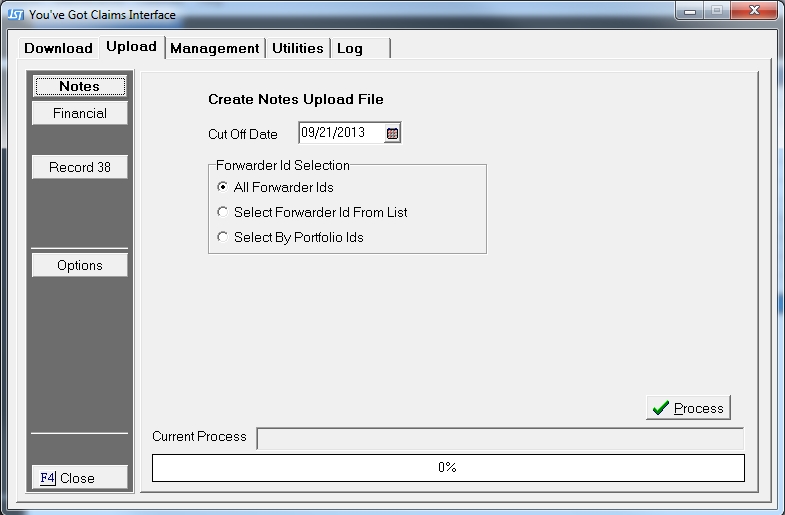
Click the
![]() button to display the Create Notes Upload File Screen.
button to display the Create Notes Upload File Screen.
Select the
Cut Off Date by typing in a date in the MM/DD/YYYY
format or using the ![]() button. Notes
posted through that date that have not already been uploaded will be included
in this upload file.
button. Notes
posted through that date that have not already been uploaded will be included
in this upload file.
Next, select the Forwarders to include in this upload file.
Click the
 button next to the correct selection.
After making
this selection by clicking the button next to Select Forwarder
Codes from the List, the YGC Forwarder Code List Selection screen will
be displayed.
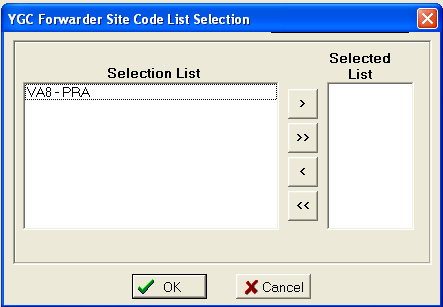
From the
list of available, highlight the Forwarders to include in the upload,
then click the  button to move the code into the selected
list. Continue
until all codes are added. Then,
click the
button to move the code into the selected
list. Continue
until all codes are added. Then,
click the ![]() button to exit this screen.
button to exit this screen.
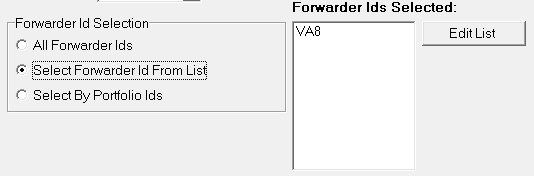
To make changes
click the ![]() button.
button.
After making
this selection by clicking the button next to Select By Portfolio IDs.
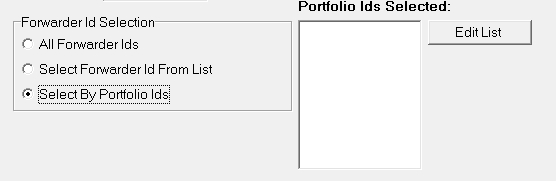
A Portfolio Selection Screen will be displayed.
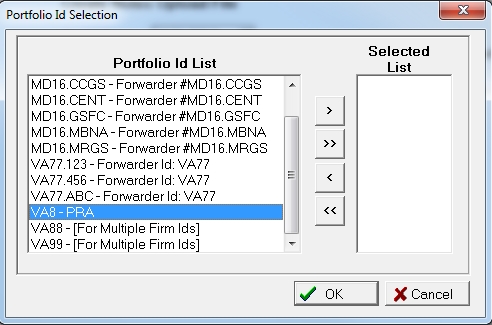
From the
list of available, highlight the Portfolio to include in the upload,
then click the button to move the code into the selected
list. Continue
until all codes are added. Then,
click the ![]() button to exit this screen.
button to exit this screen.
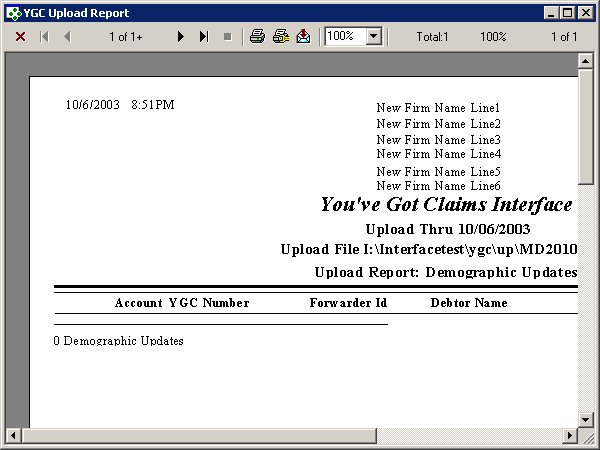
Once the
Forwarder(s)
have been selected click the button,
select to print to
printer, screen or file. JST
always recommends printing to screen. The upload report will be
printed.
Once this is complete a message will asked users if they would like to create a file upload file.
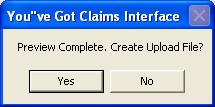
Note:
If the user, has printed the preview report to screen, they will have
to click X to exit before getting this message.
Click the
![]() if the upload report did not list the proper upload notes.
Users may preview the upload file as many times as they like before creating
a upload file.
if the upload report did not list the proper upload notes.
Users may preview the upload file as many times as they like before creating
a upload file.
Click the
![]() button,
to continue the upload process and create an upload file for the client.
The amount
of upload data will determine how fast this process will go. Users
are provided a status bar to monitor the upload progress.
button,
to continue the upload process and create an upload file for the client.
The amount
of upload data will determine how fast this process will go. Users
are provided a status bar to monitor the upload progress.
The final upload process will create an upload file in the upload data directory and a backup file in the backup data directory. The upload report will contain the name and location of the file.
The
interface will only create the upload file. Users
will send the file to their client as per their agreement with their client