 tab
to display the Debtor History Screen.
tab
to display the Debtor History Screen. To upload information back to the client, network notes must be entered on the debtors account.
From any
of the debtors account screens, click
the tab
to display the Debtor History Screen.

Click the  button.
Note: Each Network Note will be labeled with the Forwarder Code.
This will take you to the Add Upload Note screen.
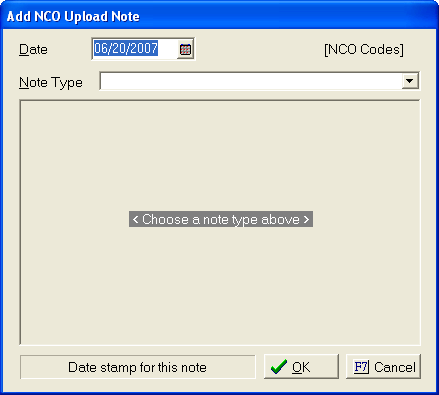
Enter the
date of the note, ![]() . This date should
be added with the date format of MM/DD/YYYY.
. This date should
be added with the date format of MM/DD/YYYY.
Or click
the ![]() button and selected a date.
button and selected a date.
Enter a Note
type by, clicking the  button and
displaying the allowed network notes and clicking on the appropriate one.
button and
displaying the allowed network notes and clicking on the appropriate one.
These codes are setup by the Network. Any requests for changes should be made to the Network representative for the firm. Any missing codes should be reported to JST Technical Support.
Users may or may not be asked to add additional information for each note.
Once that
is complete, click the ![]() button.
This will
save the note in
button.
This will
save the note in
history.
Click ![]() button to cancel the add process.
button to cancel the add process.
This network note will now be uploaded on the next notes upload for this interface. To verify, do a preview notes upload.
Users may change the upload status, see Remarking Individual Network Notes.