MaxPlans is an extremely powerful tool that allows CollectMax users to automatically manage workflows via user defined steps. With Maxplans, events such as evaluating a condition, generating a document, adding an action item, sending an email, changing a status, or a delay in activity can be performed without the need for someone to review each file in order to move the account through the workflow process.
Note: This feature is an add-on. For pricing information, please contact Sales.
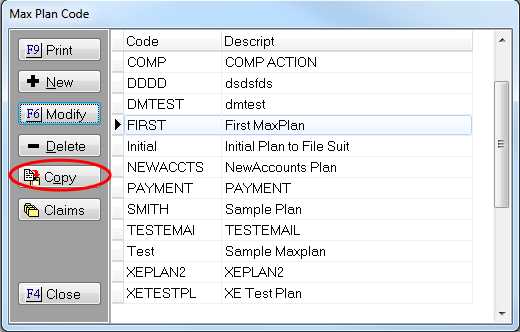
Go to Definitions/MaxPlans and select MaxPlan Templates.
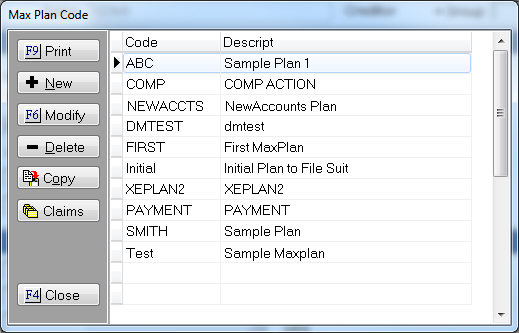
Here you can print the list of existing MaxPlans, create a new plan, and copy, modify or delete an existing plan. The Claims button will display a list of claims that are currently on the highlighted plan which can be exported as well.

JST recommends creating a flow chart or something similar to map out the various steps before creating your plan. From MaxPlan Templates, click New.
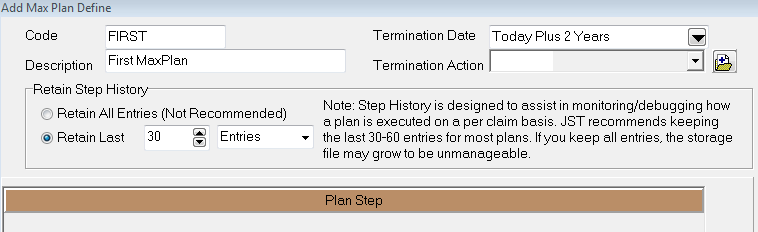
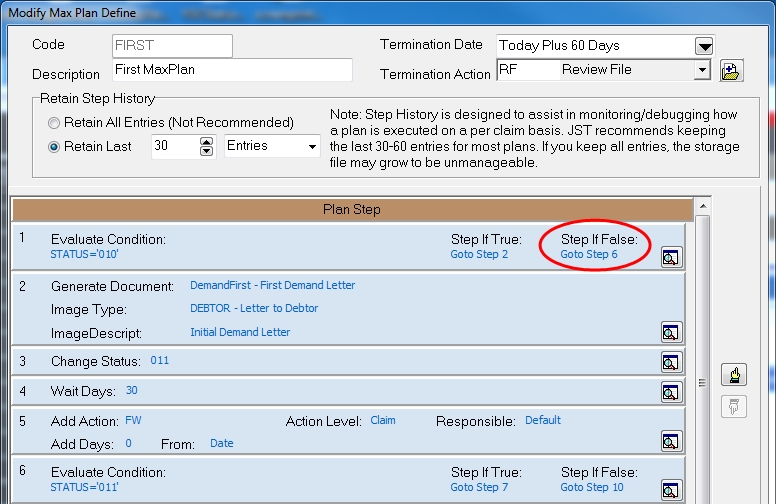
After you have given your new plan a Name and Description, let’s take a look at the other options on the screen.
Note: It is not recommended to select Retain All Entries. This option is designed for debugging purposes and could dramatically increase the size of the storage file.
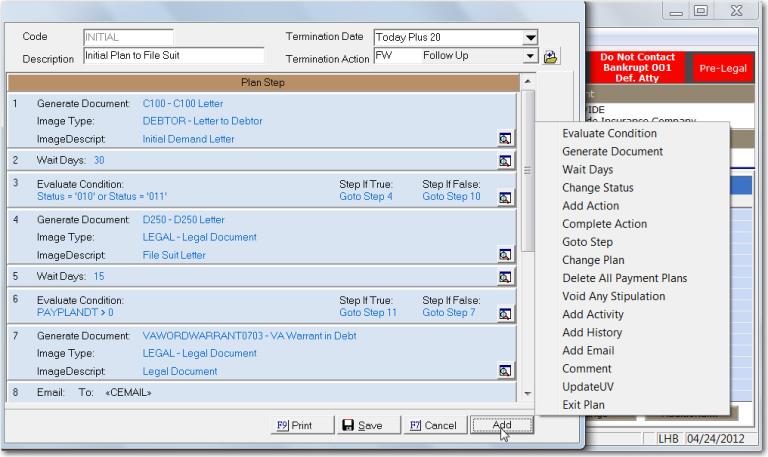
Now we are ready to add steps to the plan. Click the  button.
As seen above, you have quite a few options to choose from. Since our scenario here is for newly added claims, we will select Evaluate Condition.
The ability to add or remove Flash messages has been added in Version 7. For information on obtaining this feature, please contact the Sales Department.
The ability to update litigation user fields and Complete All Actions has been added in Version 10. For information on obtaining this feature, please contact the Sales Department.

From here, click the  button to the right. This will bring up your Condition Editor. After setting your condition, you will set your true/false steps.

Note: For more information on using the Condition Editor, click here.
For other sample conditions, click here.
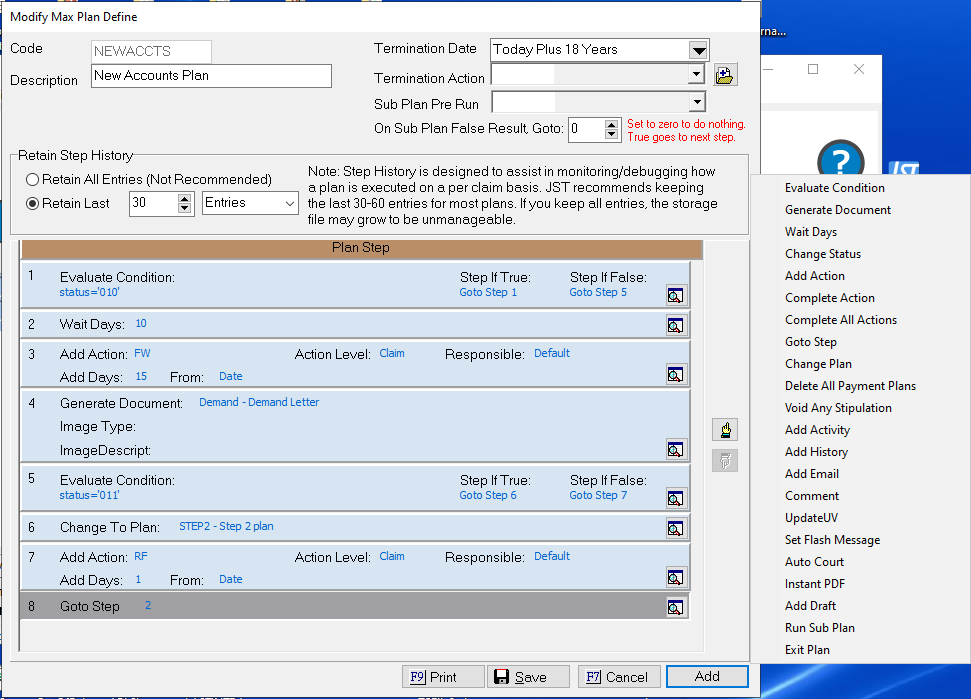
The example below shows a sample plan with added steps. However, there appears to be a mistake in step 1.
By clicking the button on the right, you can edit the individual steps. You may also use the  and
and  buttons on the side to change where the steps in the plan will happen. If you have multiple review steps that must be performed daily or the same steps on different Plans, please see SubPlans for options of mapping the steps once instead of many times in a plan.

When you are done with the layout of your plan, click the  button.
Hint: If you need to create a MaxPlan that is similar to an existing plan, use the  button. This way you can make changes to the copied plan, saving you time and potential for error.
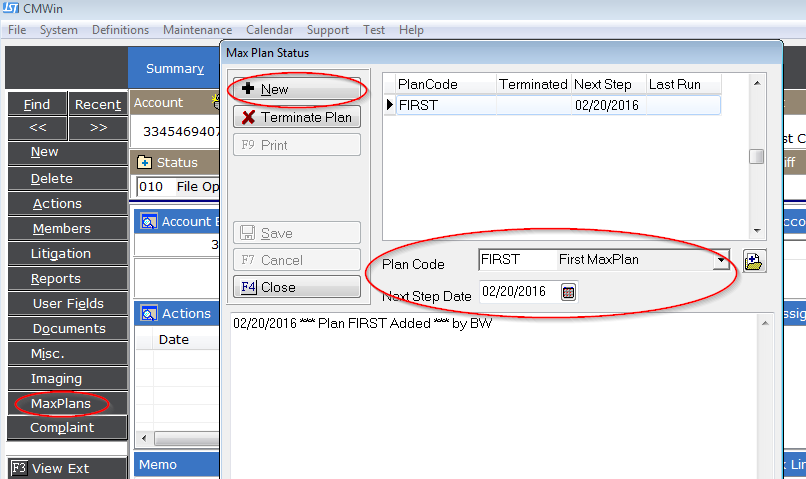
There are a several different methods you can use to add claims to your plan. The first is to add an existing claim from the debtor screen. From the left side column, select the  button. Then click the
  button, and choose the plan from the Plan Code
  menu. Enter the date you would like the plan to start for the claim, and click the button.
Another way is to attach a MaxPlan when adding new accounts. On the Initial Settings tab, you can select your plan there.
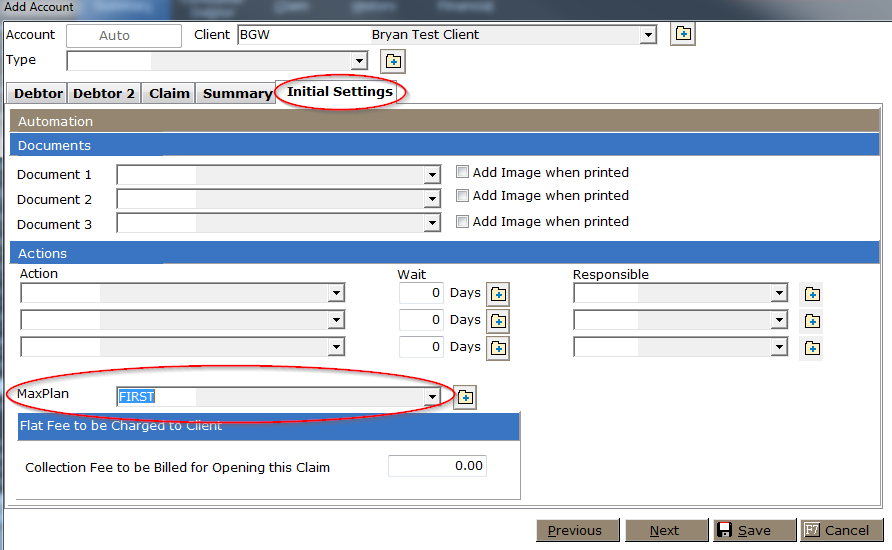
Hint: You may also set this option in Client/Debtor PreSets/Account Setup. When employing this method, the plan selected in Account Setup Settings will populate by default.
For more information on Batch Processes, click here.
For more information on Client/Debtor PreSets/Account Setup, click here.
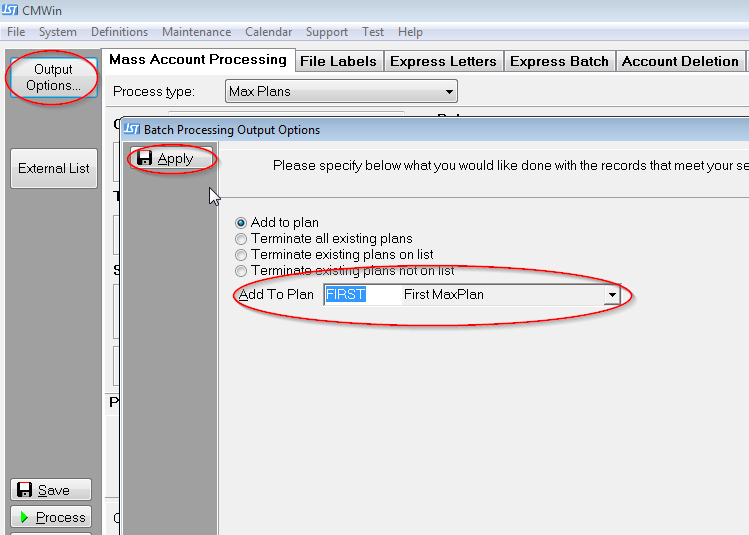
The next method of adding claims to MaxPlans is through Batch Processes. This method is beneficial if you have recently added a MaxPlan template and want to attach it to existing claims. To do this, choose MaxPlans from the Process Type drop-down menu. Select your criteria, and click the Output Options button on the left. From the Add to Plan drop-down menu, select your plan and click Apply.
Hint: This may be automated by saving the report settings.
For more information on Batch Process Automation, click here.
Hint: You may also use this for removing plans from claims added in error.
For more information on Batch Processes, click here.
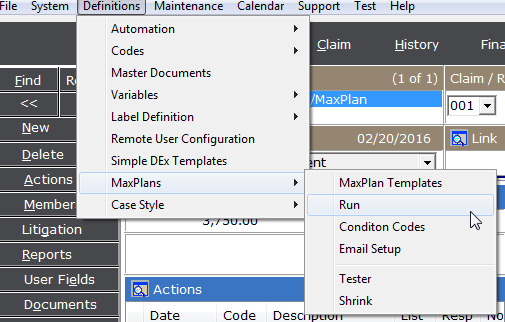
Go to Definitions/MaxPlans and select Run. Check the plan you would like to run, and click the  button.
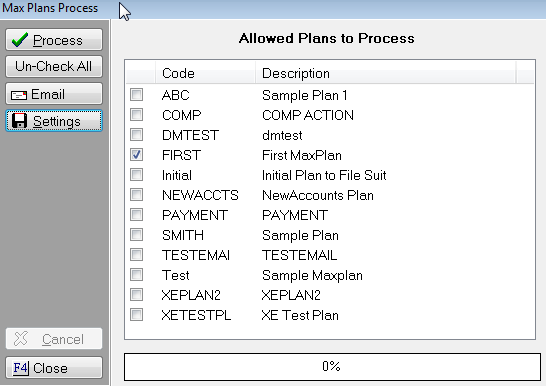
After you click the button, you will be given two options: Preview and Final. The Preview allows you to see the steps in the plan being taken as well as the number of claims that will be affected. This will be followed by a report. Final will actually process the MaxPlan.


As seen below in History, the MaxPlan generated the Demand Letter, changed the status, and added the FW action code.
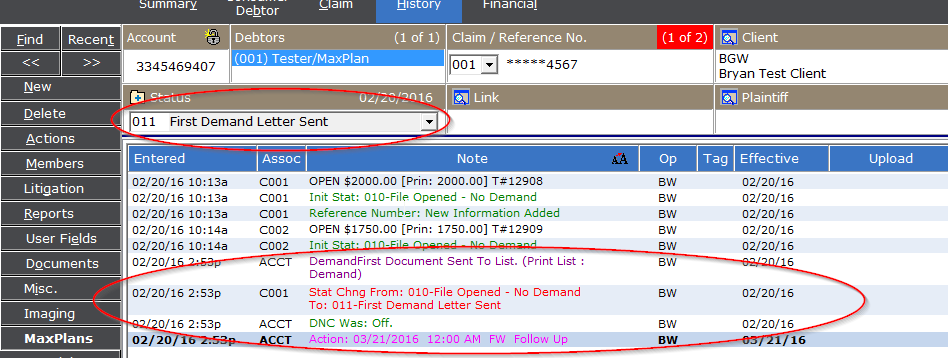
You may also see the plan progress by clicking on the MaxPlans button on the left.
Note: It should be emphasized that MaxPlans works on the claim level. If you have multiple claims on an individual account, you must add each claim to a plan in order for them to participate in MaxPlans.
Click the MaxPlans button on the left and click the Terminate Plan button. Similar to the method of adding claims, you may also use Batch Processes to terminate multiple claims from their respective plans.

In Definitions/MaxPlans, there are some other features added as well.
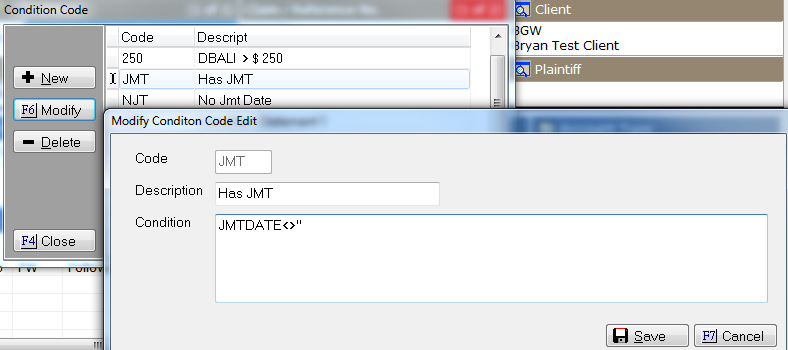
The Condition Codes allows you to save your more frequently used conditions into their very own code. Here is an example of a condition used to identify a judgment.
The Email Setup function is necessary if you have a step that sends email in your plan, such as email to client.
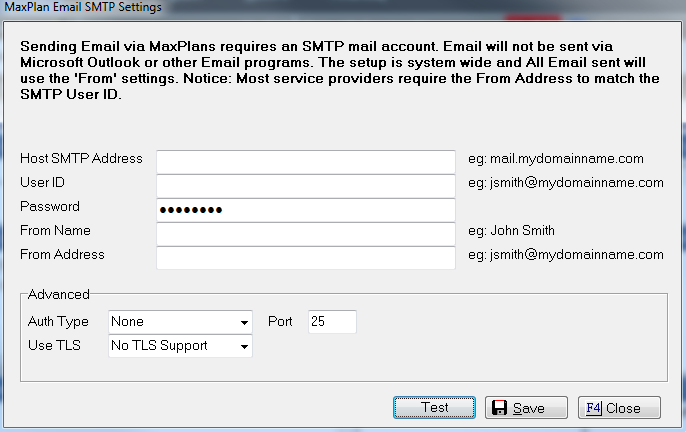
Note: Since these settings come from your firm’s domain environment, it’s strongly recommended that you refer to your IT manager/consultant for assistance, before contacting JST on this.
The Tester will bring up the Condition Editor. Here you can test any conditions you want to add to your plan.
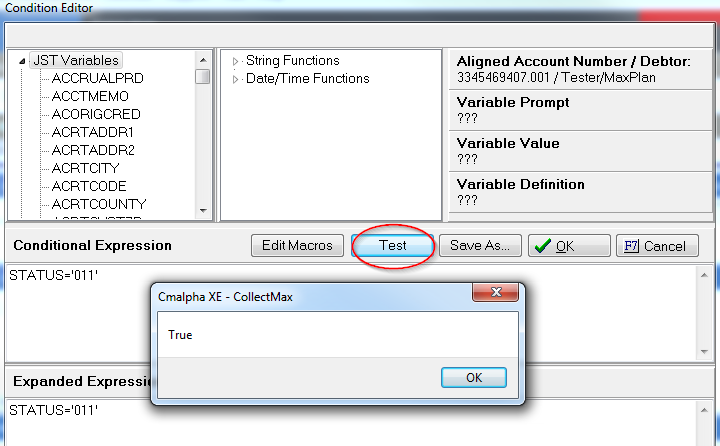
Note: You must be aligned to an claim in your system in order to use this feature. Failure to do so could yield false results.
The Shrink feature condenses the MaxPlan history for each claim as defined on the template (Retain Step History). You should only need to do this once, unless you change the settings on a template.