This feature adds the ability to send a mass email to debtors that can include external document attachments from pre-set and stored email templates. Once the email has been sent a copy can be attached to the debtor's history. It also gives you an opt out option at the debtor level to remove debtors from receiving emails if so instructed.
This is a Version 6 Feature. For information on obtaining this or any other features, please contact the Sales Department
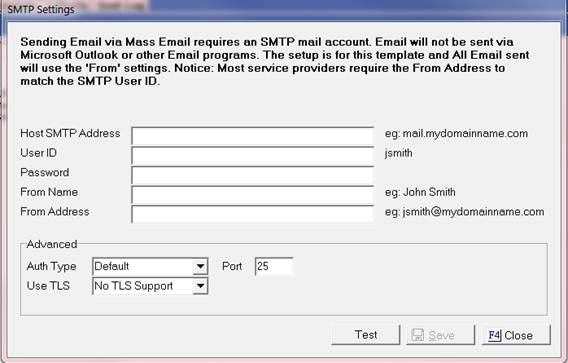
To set up the Mass Email for the first time, JST recommends that your IT department or professional set this up for you. At the minimum you should also know the following information before starting. The Host SMTP Address, User ID, Password, Auth Type, Port, and USE TLS. It is imperative that you know this information prior to calling us for assistance because we will not know this information nor will we be able to obtain it for you.
If you want the debtor to participate in Mass emails make sure that they have an email address and that the Opt Out checkbox is not checked. By default, everyone is set to send. In order for that to take place make sure that the email address is recorded.
![]()
The information you obtained in the Getting Started section will be used here.
1. Go to the Main
Menu and select  .
.
2. Then select  .
.
3. Select ![]() .
.
4. Enter your “Host SMTP Address”.

5. Enter your “User ID”.
![]()
6. Enter your “Password”.
![]()
7. Enter your “From Name”.
![]()
8. Enter your “From Address”.

9. Under the Advanced section. Enter your “AUTH TYPE”.
![]()
10. Enter your “Port”.
![]()
11. Select your “Use TLS”.
![]()
12. Then click the ![]() button.
button.
13. Then click the ![]() button.
button.
14. This will confirm that your setup works properly by sending you a test email.
15. To exit setup click on![]() .
.
After setting up your Default SMTP, create your own template.
1. Go to the Main
Menu and select .
2. Then select![]() .
.
3. Then select![]() .
.
4. Enter your “Template Name”.
![]()
5. Enter your “Description”
![]()
6. on the ![]() tab.
tab.
7. Enter your “From”information.
![]()
8. If you want to have the template sent back to you, check the box for “BCC template to me."
![]()
9. If you want to “Save email text to history note”.
![]()
10. If your Default SMTP is not your email address and you
need the emails to come to you for the template you are creating. Click this![]() . Then this screen will pop up.
. Then this screen will pop up.
11. In this section copy everything from the default setup and then ONLY replace the values for User Id, Password, From Name, From Address.
12. After updating your changes click the ![]() button.
button.
13. Then click the ![]() button.
button.
14. This will confirm that your setup works properly by sending you a test email.
15. To exit setup click on![]() .
.
16. On the![]() .
.
17. Enter your “Subject” by clicking on![]() .
.
18. This window will pull up.
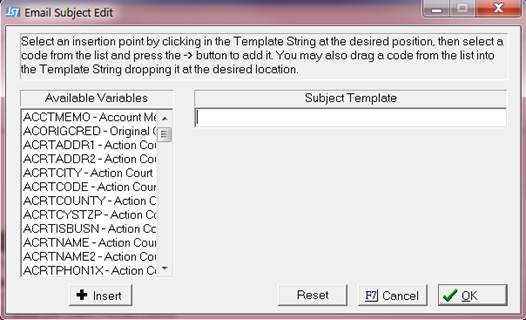
19. Select your variable under Available Variablesor type your Free Text Subject.
20. To select a variable highlight it and then click the ![]() button. If you choose the wrong selection, click the
button. If you choose the wrong selection, click the ![]() button. To disregard a selection and not to add any values, click the
button. To disregard a selection and not to add any values, click the ![]() button.
button.
21. If you want to
save your selections, click the  button.
22. Enter your “Body” by clicking on![]() .
.
23. This window will pull up.

24. Select your variable under Available Variables or type your Free Text Subject.
25. To select a variable highlight it and then click the ![]() button. If you make the wrong selection, click the
button. If you make the wrong selection, click the ![]() button. To disregard this section and not to add any values click the
button. To disregard this section and not to add any values click the ![]() button.
button.
26. If you want to
save your selections click the button.
27. Enter your “Attachments” by clicking on . If you select the incorrect attachment select
the
. If you select the incorrect attachment select
the ![]() button. The
button. The ![]() button is used after you select your
attachments the purpose is to allow you to check all of the boxes at one time.
button is used after you select your
attachments the purpose is to allow you to check all of the boxes at one time.
28. Then select your “Email Party” this can be done by clicking the appropriate radio button.

29. Then click your  button.
30. On the ![]() tab.
tab.
31. Enter your “Client” selection criteria.

32. Enter your “Type” selection criteria.

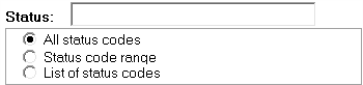
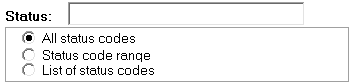
33. Enter your “Status”selection criteria.
34. Select the drop-down for your “Inactive Accounts”.

35. Select a “Responsible”.

36. Enter a “Balance Range”.

37. Enter a “Claim Open Date Range”.

38. Enter an “Account Number Range”.

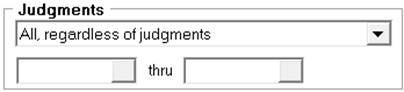
39. Select your “Judgments”criteria.
40. Select your “Exclusions” criteria.
![]()
41. If you have MaxConditions you can use this field to add conditions to your selection Criteria. This is a add on feature for more information please contact our sales department.

42. Select
your “Action Items” using the drop
down to select the appropriate level of your actions. Then use the ![]() button and select the appropriate actions.
button and select the appropriate actions.

43. Enter your “Date” Criteria.

44. Then select  .
.
45. This will send out emails based on your criteria.
46. On the  tab.
tab.
47. In this section it will show a log to all the emails sent from this template.

48. To close window select the![]() .
.
1. Go to the Main
Menu and select .
2. Then select .
.
3. Select your template on the right hand side and then double click.
4. On the ![]() tab.
tab.
5. Enter your “Client” selection criteria.

6. Enter your “Type” selection criteria.

7. Enter your “Status”selection criteria.
8. Select the drop-down for your “Inactive Accounts”.

9. Select a “Responsible”.
![]()
10. Enter a “Balance Range”.

11. Enter a “Claim Open Date Range”.
![]()
12. Enter an “Account Number Range”.
![]()
13. Select your “Judgments”criteria.

14. Select your “Exclusions” criteria.
![]()
15. If you have MaxConditions you can use this field to add conditions to your selection criteria. This is a add on feature for more information please contact our sales department.

16. Select
your “Action Items” using the drop
down to select the appropriate level of your actions. Then use the ![]() button and select the appropriate actions.
button and select the appropriate actions.

17. Enter your “Date” Criteria.

18. Then select .
19. This will send out emails based on your criteria. Remember that if you want a: bcc sent to your email box make sure you select the check box on the Sender’s tab before processing your template.
JST Hints:
The Attachments feature works for static documents only. A static document would be a document that is found on your hard drive or your network. It does not merge fields so the document must be fully completed.
We do have a Batch Process that will allow you to “Set Email Opt” on debtors account. This can be found from the Main Menu>Batch Process>Under Process types>Select “Set Email Opt”
The variable for “Set Email Opt” is DEEMOPTOUT. The result of the variable is a True or False.
The Conditions section only works, if you have our MaxConditions add-on feature.
This feature will Complete Triggering actions.
We do have security available for this feature.
This feature allows you to Modify, Copy, and Delete existing templates from the Mass Email main screen.