 .
.For Version 6 Users, please review Enhanced Payment Plans for information on the new projection and plan types features.
1.
From the
main menu of CollectMax click .
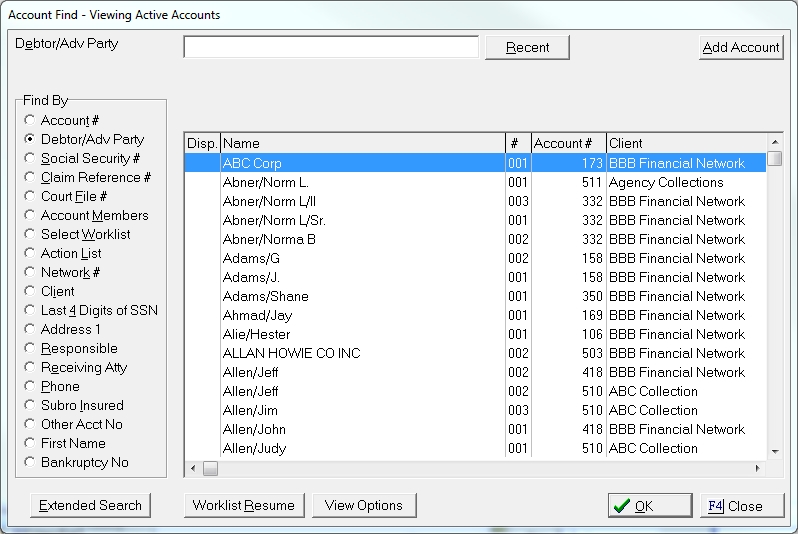
2. Find the Debtor Account you need to set the payment plan for.
3. Click on the Summary Tab.
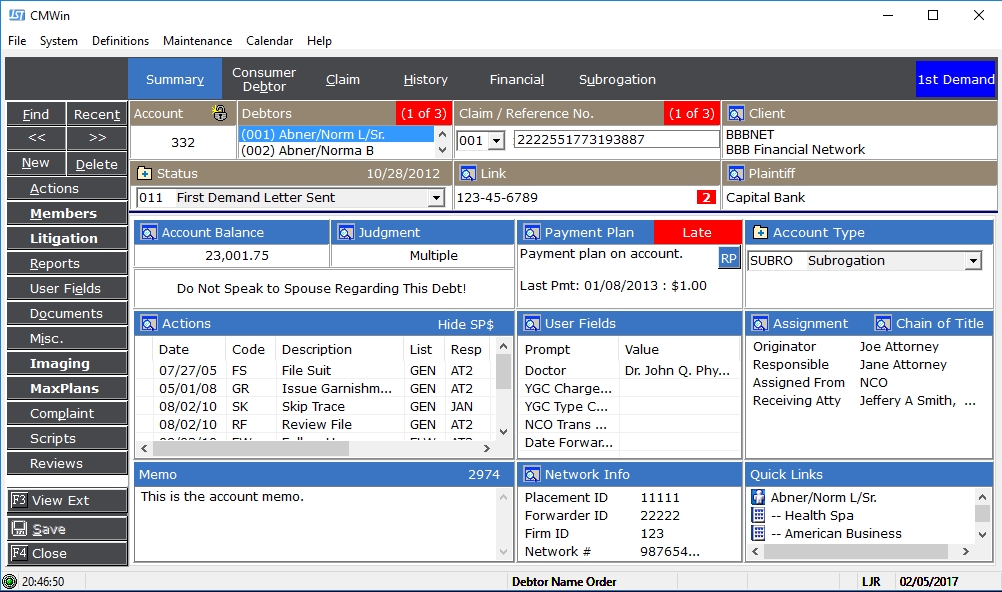
4.
Click on the  button to enter a new payment plan.
5.
Click the ![]() button.
button.

Select Account Level Plans or Debtor Level Plans.

6. Enter the Amount for the new plan.

7. Enter the frequency of the plan.

8.
Type in
the beginning date in the MM/DD/YYYY format or click on the ![]() to choose the beginning date.
to choose the beginning date.
9.
Click  .
.
10. A new screen will appear with the default information for the next payment date.

Click the
 button to change either date. The
Due Date should be modified if the Debtor must change the next due date
because of some circumstance. The
Plan Date should be modified if the plan must be changed to a new due
date.
button to change either date. The
Due Date should be modified if the Debtor must change the next due date
because of some circumstance. The
Plan Date should be modified if the plan must be changed to a new due
date.
11.
Enter the due date by typing in the date or clicking on the ![]() to choose the date.
to choose the date.
![]()
12.
Enter the plan date by typing in the date or clicking on the ![]() to choose the date. This date will probably be the
same as the due date.
to choose the date. This date will probably be the
same as the due date.
![]()
13.
If there are no additional steps, click  . If there
is an additional step, click
. If there
is an additional step, click ![]() to add a second step to the
payment plan. After all steps have been entered click to
return to the debtor screen.
to add a second step to the
payment plan. After all steps have been entered click to
return to the debtor screen.
14.
Click to return to the main menu of CollectMax .
Note: Adding a payment plan will also add a DU action in the Action Items section. The only way to remove or modify this action item is to delete or modify the payment plan.