 button to begin
the Invoice Process.
button to begin
the Invoice Process.
1.
Click on
the button to begin
the Invoice Process.
2. Choose the Invoice Tab.
Note: Depending which version of CollectMax that you have, you may not have all the tabs as shown below.
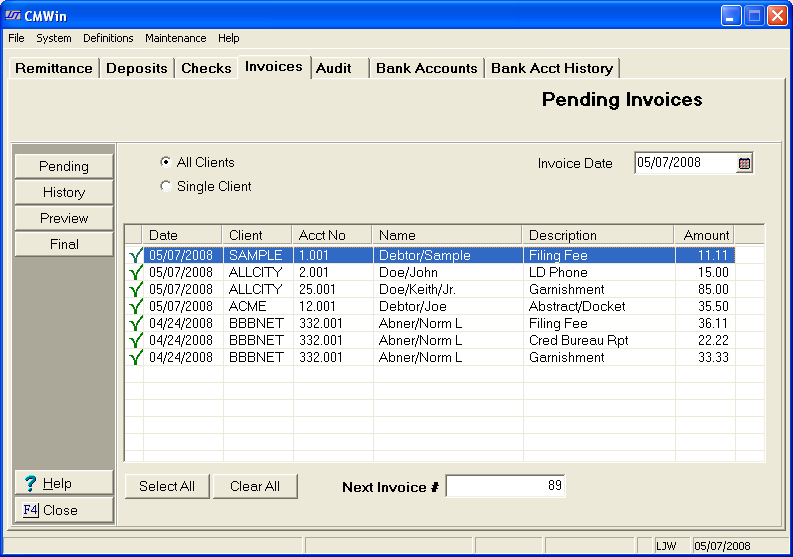
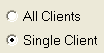
3. You can choose to process invoices for either a single client or all clients. For the purposes of this tutorial, choose Single Client by clicking the button.
4.
You may
then choose the appropriate client from the  list.
list.
![]()
5.
Choose
the appropriate date to process through by either typing in the date or
clicking the ![]() beside the Invoice Date field.
beside the Invoice Date field.
![]()
6.
All of
the costs that have been posted for that particular client, through the
invoice date that you have selected well then show in the window. You
will note that all transactions are marked with a ![]() indicating
that they will be included in this invoice. Any transactions that you
do not wish to invoice on at this time may be unselected by clicking in
the box. This will remove the
indicating
that they will be included in this invoice. Any transactions that you
do not wish to invoice on at this time may be unselected by clicking in
the box. This will remove the ![]() mark and prevent these from
showing on the invoice.
mark and prevent these from
showing on the invoice.
7.
You may
use the ![]() or the
or the ![]() buttons in helping to
check or uncheck
the appropriate transactions.
buttons in helping to
check or uncheck
the appropriate transactions.
8. You may override the automatic invoice number generation, by typing in the appropriate invoice number in the next invoice field.
![]()
9. Click preview and choose the appropriate printer choice.
10.
If after reviewing the invoice there are no transaction adjustments necessary,
you can then finalize the invoice. In order to do so, click on the ![]() button. Again you will have options of where to print the
report.
button. Again you will have options of where to print the
report.
11. After making your printer option, you will be asked to finalize the report.
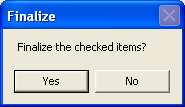
12.
Click the ![]() button, only if you have reviewed the preview
and there are no adjustments necessary.
button, only if you have reviewed the preview
and there are no adjustments necessary.
13. A message will show that the invoice has been generated.
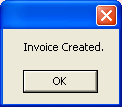
14. Click the
 button.