 from the menu bar.
1.
Click from the menu bar.
2.
Click  from the menu.
3.
Click the
![]() button.
button.
4.
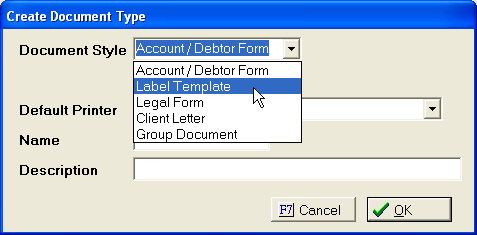
Select
Document Style as Label Template
from the  list.
list.
5.
Select
a Default Printer from the list..
![]()
6. Give document a Name and Description.

7.
Click the
![]() button.
button.
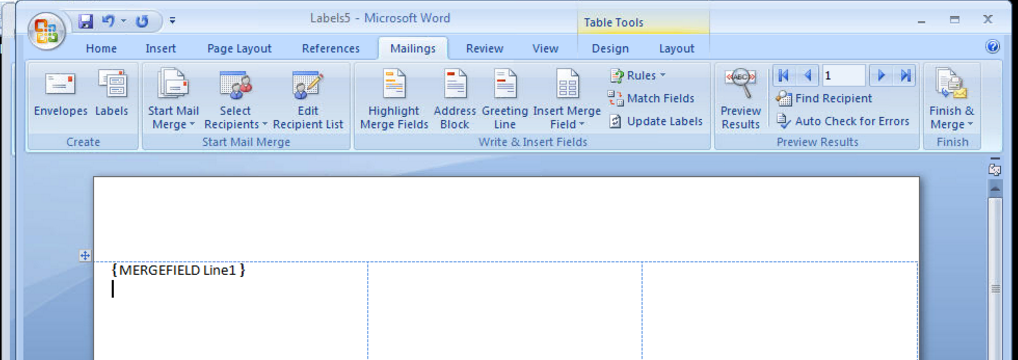
8. In Word, the mail merge header should be displayed.
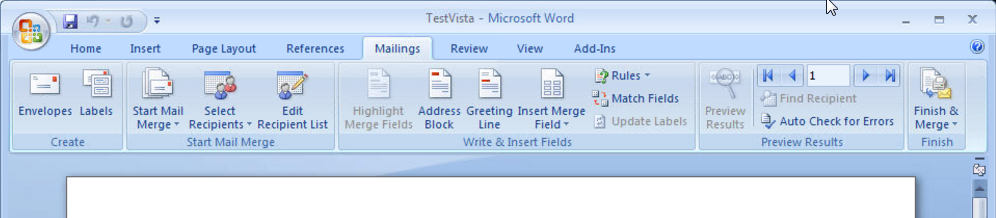
If not ,
click the ![]() tab to display the mail merge tool bar.
tab to display the mail merge tool bar.
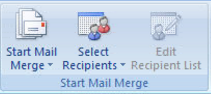
9.
Click the
 button in the Start Mail Merge section.
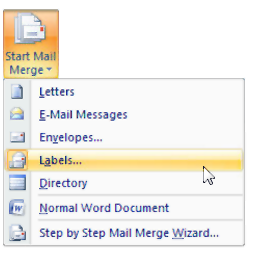
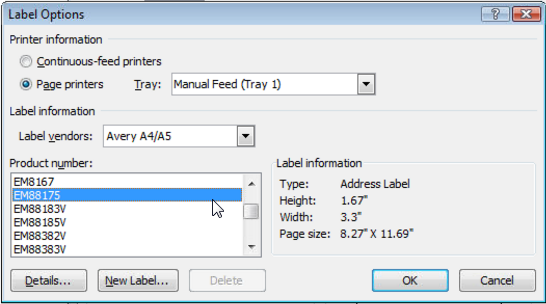
10. Select Labels from the list to display the Label Screen.
11. Select the Printer Information. Continuous-Feed printers do not work with CollectMax Labels. So, select the Page Printers. Next, select the Tray Options that work for the printer that will printing the labels.

12. Select the Label Vendor/Manufacturer and Product Number of the labels purchased to use with CollectMax.
If the File
Label is not listed or a custom label is preferred or to customize the
existing label, click the ![]() button to display the Label Details
Screen.
button to display the Label Details
Screen.
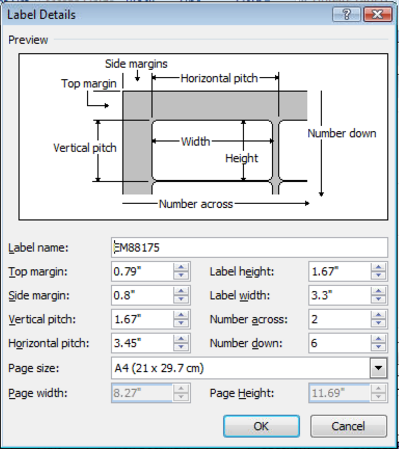
Select the
Label Name and adjust the margins. Click
the ![]() button to be taken back to the Label Options Screen.
button to be taken back to the Label Options Screen.
13.
Click the ![]() tab to display the mail merge tool bar.
tab to display the mail merge tool bar.
14.
From
the Start Mail Merge Section, click the  button.
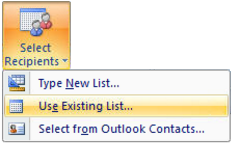
15. Select Use Existing List from the menu list.
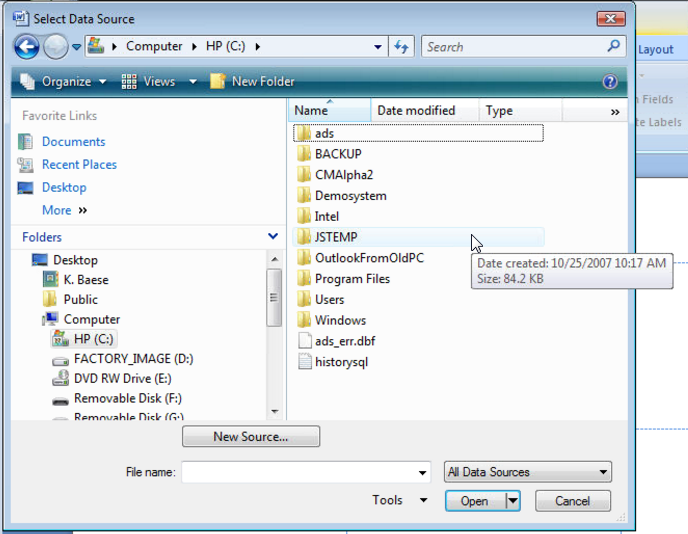
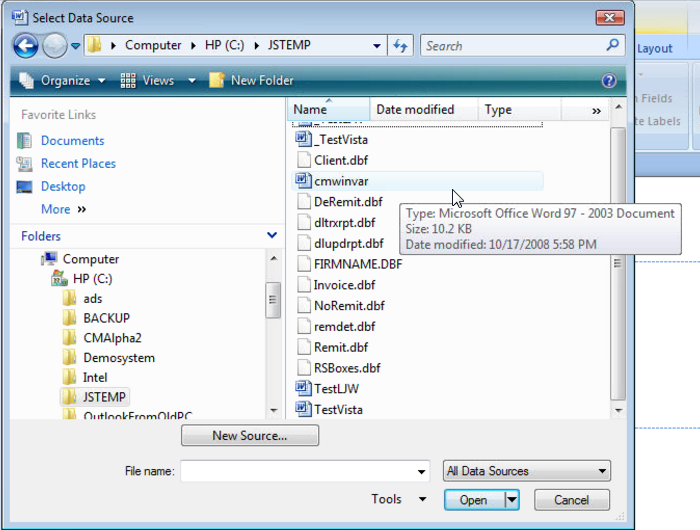
16. In the Select Data Source Browse Window, Click My Computer or Computer. Find and double click the C: drive. On the right-side select the JSTEMP directory/folder.
17.
Open the
JSTEMP directory/folder. Select
the CMWINVAR data source and click the ![]() button.
button.
18.
In the
Write & Insert Field Section, 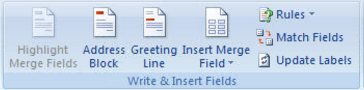
click the
 button.
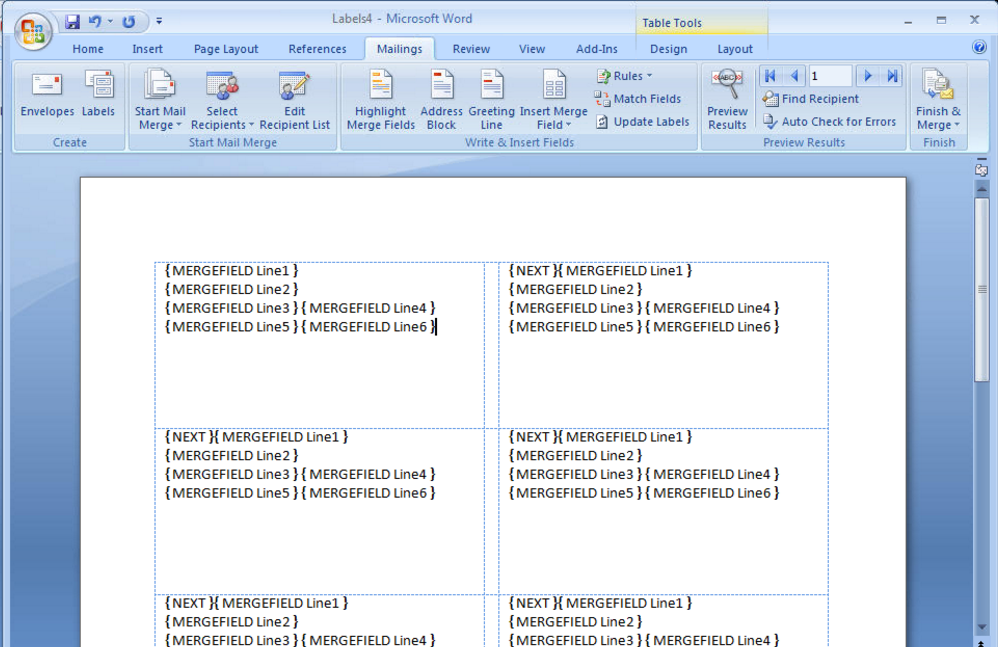
19. Click to Insert the merge fields. These merge fields will correspond to the label definition variables. Insert the Lines in order.
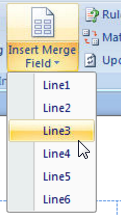
Once the first line is inserted, select the location of the second line by entering, tabbing or spacing. Enter as many lines as needed.
20.
Once all lines are entered and put in the proper location on the label,
click the ![]() button to insert the fields into all labels.
button to insert the fields into all labels.
21.
If the  or
or ![]() are not available, click the
are not available, click the
 button and check the
 ![]() box to select the
first line in the recipients grid. Then
go back to step 22 or 23.
box to select the
first line in the recipients grid. Then
go back to step 22 or 23.
22.
Select the ![]() tab to display the JST buttons.
tab to display the JST buttons.
23.
Click the ![]() button to be taken back to CollectMax.
button to be taken back to CollectMax.
1.
Click from the menu bar.
2. Click LABEL DEFINITION.
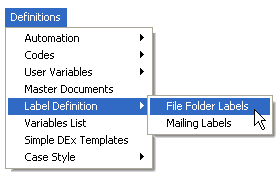
3. Select FILE FOLDER LABELS.
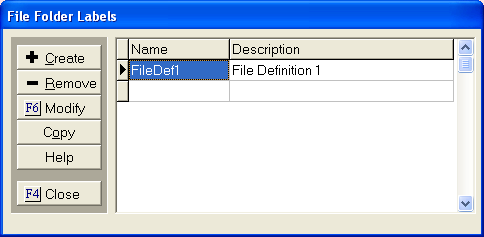
4.
Click the
![]() button.
button.
5. Enter a NAME and DESCRIPTION .
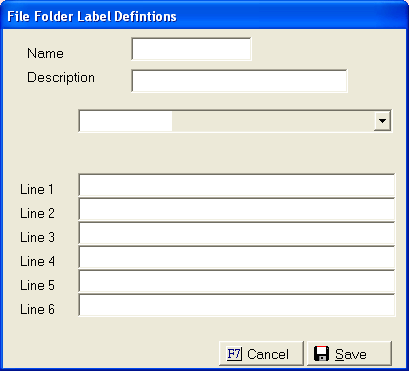
6. Click in the LABEL LINE 1 field.
7.
Select
a variable from the list to insert on label line.
I.E. Line 1 DENAMEL1
8. Repeat steps 6-7 for additional label lines.
9.
Click the
 button.
10.
Click the
 button.
1.
Click on
the  button from main menu of CollectMax.
2.
Click on
![]() tab.
tab.
3.
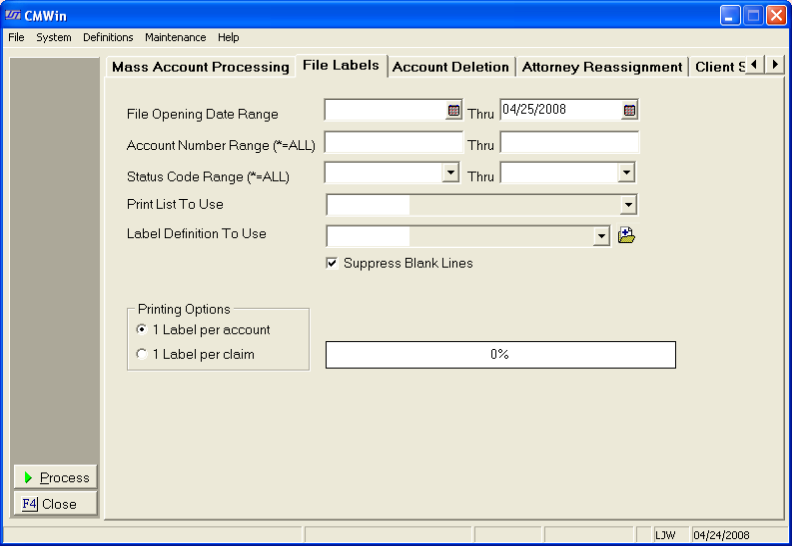
Enter the
FILE OPENING DATE RANGE. Click
in the text box and enter date or click on the ![]() and select
date from calender.
and select
date from calender.
![]()
4. Enter the ACCOUNT NUMBER RANGE. Click in text box and enter range or type. Enter * for all debtors.
![]()
5. Enter the STATUS CODE RANGE. Click in text box and enter range or enter * for all status codes.
![]()
6.
Select
a PRINT LIST. Click
the button and select print list.
![]()
7.
Enter the
LABEL DEFINITION. Click
the button and select label definition.
![]()
8.
Click the
![]() box to Suppress Blank Lines on the Label.
box to Suppress Blank Lines on the Label.
![]()
9.
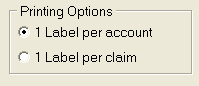
Choose the PRINTING OPTIONS. Click
 button for 1 label per account or 1 label per claim.
For the Action Item selection criteria, see Mass File Label Action List Selection a Version 7 Feature.
10.
Click the
 button.
11.
Click the
 button when message box tells you the number of labels
generated.
button when message box tells you the number of labels
generated.

12.
Click the
 button.
1.
At main
menu in CollectMax, click the  button.
2. Select the PRINT LIST you sent the labels to.
3.
Click the
 button.
4.
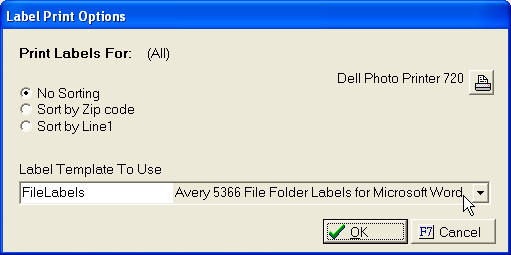
Make sure
the correct label template is selected. If
not, click the button and select correct template.
Select to
sort by Zip Code or Label Line 1. Click
the ![]() button to select a different printer.
button to select a different printer.
5.
Click the
![]() button.
button.
6.
You will
then see a print confirmation window. If labels printed correctly, click
the ![]() button. Print
List will then be purged.
button. Print
List will then be purged.
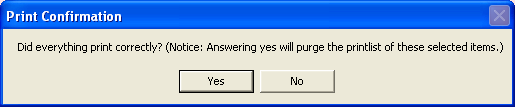
Note: The Print List will be purged after the
![]() button has been clicked.
button has been clicked.
7.
Click the
 button to return to the main menu screen.