This feature allows you to create documents for review and electronic signature. Drafts can be accessed from Review Lists and from Imaging on an Account.
Note: This is a Version 9 Feature. For information on obtaining Version 9 or any other optional Module, please contact the Sales Department.
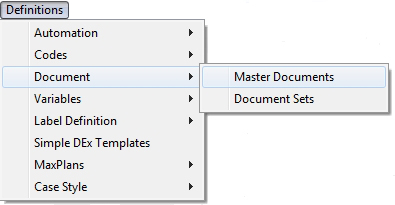
To setup the draft properties of a document, go to Definitions, Documents, Master Documents.
Find the document you want to update in the list, click on it and click the  button to display the Document Properties. Next select the Draft Tab.

Enter the following Draft Settings if applicable:
Note: The Document Properties for Drafts are not required. You may do a draft of a document without having these properties selected. JST does recommend setting them for Documents routinely used for Drafts.
From a Debtor Account, click the  button to display or click the
  button from the Litigation Screen to display the Documents Screen.

Select the Document needed to create the Draft and click the  button to get to the Draft Add Options.
Note: If you need to preview the document variables before creating the draft, there is a create draft button on the Preview Document Screen as well.

The options set on the Document Properties for this Document will be displayed. You can choose to change them or just continue on by clicking the  button. If the properties of this document have not been setup, then enter the appropriate settings:
Once it is correct and you want to continue click the button.
A confirmation screen will appear that will allow you to view the Draft immediately. Click Yes to view immediately. Click No to continue your work.
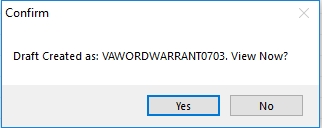
If selecting yes, the Draft will be displayed in the Draft View/Builder Screen.
To access the drafts from a debtor account, click the  button to display the images

Select the  button to display the Draft List Screen.
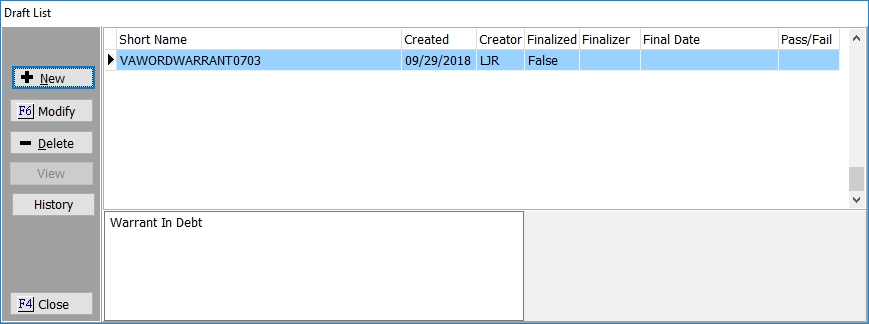
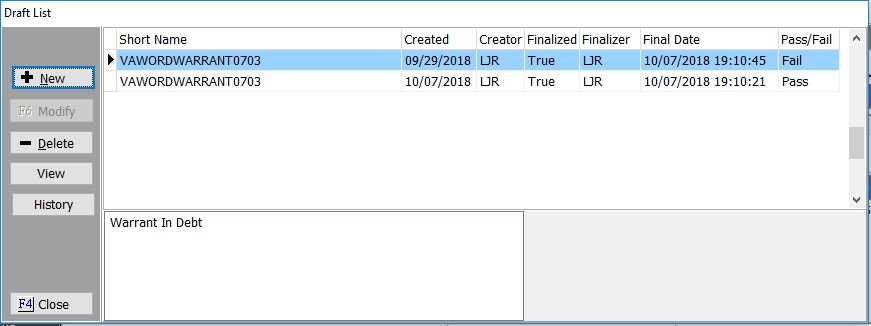
A list of all Drafts to be reviewed will be displayed with information about when the draft was created, who created it, if it was finalized, the final date and if it passed or failed. If selected the description will be displayed at the bottom.
Click the  button to view and modify the Draft on the Draft View/Builder Screen.
You can also choose to create a draft from a document outside of CollectMax by clicking the button to display the Image List Screen.
Click the button to view the Drafts List Screen.
Click the  button to display the Draft Add Option Screen. Enter the applicable Draft Properties:
The Draft View/Build Screen will be displayed.
Select File and browse to the document you would like to use to create the draft. Once selected the Draft will be displayed in the Draft View/Builder Screen.
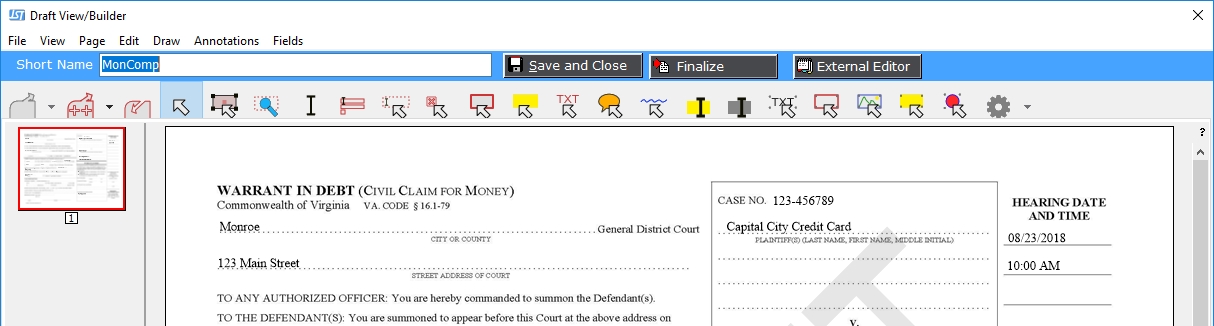
Drafts can modified from the Draft View/Builder Screen. Click the  button to display the Draft.
Note: This feature allows for minimal modifications to the Draft. Any document modifications should be adjusted prior to making a Draft.
The Draft is an Image so any of the following modification will in front of the draft and may obscure the draft document. Adding objects may also cause you to lose the Draft Watermark.
 : Allows you to insert other Documents or Images to the Draft.
 : Allows you to Save the Draft outside of CollectMax.
 : Allows you to Pan through the Draft.
 : Allows you to Select Text.
 : Allows you to Zoom on Selected Text
 : Allows you to Select Text.
 : Allows you to fill any fields added to this Draft.
 : Allows you to create a Textbox. Please note that the textbox will be created over the Draft Image.
 : Allows you to create a checkbox.
 : Allows you to add a Frame.
 : Allows you to select a box to add yellow highlight.
 : Allows you to add text to the Textboxes you created.
 : Allows you to add text to a popup box.
 : Allows you to add a squiggly red line under selected text.
 : Allows you to select text to highlight.
 : Allows you to add a line of text to the image.
 : Allows you to insert an Image on to the Draft Image.
: Another way to allow you to highlight text.
 : Allows you to draw a Circle.
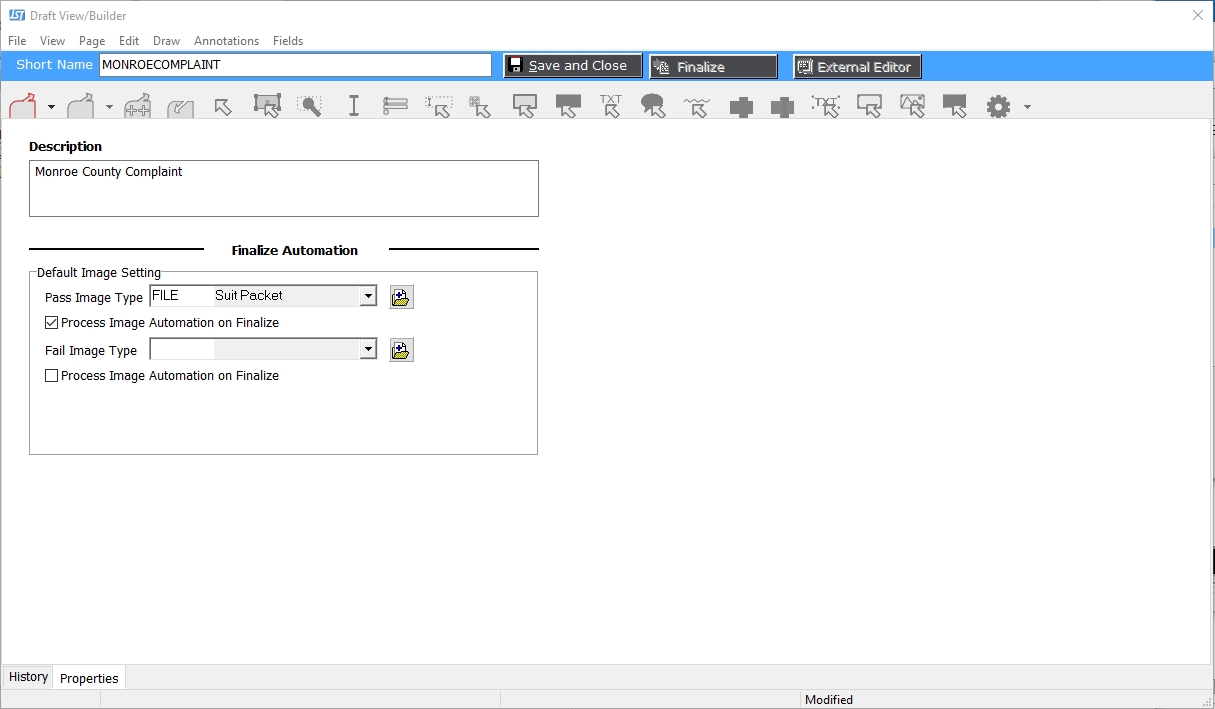
 : Click the History Tab to display the History of this Draft. Click the Properties Tab to display the Draft Properties including pass and fail image types and descriptions.
Additionally in the top menu bar, you will see all the above options listed and an Undo option. If you choose to undo, you will lose the Draft watermark.
To Mask data on the image use the following buttons.
 : Allows you to highlight a line of text to be masked.
 : Allows you to draw a box around data that will be masked.
Note: Please note that this is not true redaction. If you open this draft in an outside editor, you may be able to remove the masking. For true redaction, export to the external editor and redact using their tools.
If you need to add an E-signature to your draft, click the  button. If you have not saved your edits to the Draft, you will prompted to do so.
Note: The workstation must have Adobe Acrobat to open the draft. Reader and Standard both have signature capabilities.
A confirmation message will appear to insure you want to open your Draft with the default Adobe Acrobat Reader/Standard. Click Yes, to open the Draft Image.
The Adobe Acrobat Reader/Standard will open. If you have the signature feature, use this feature to add the signature.
Note: If you have any questions or concerns on how to add a signature using your Adobe Acrobat Reader/Standard, please contact their software support.
Save the signature and any other changes to the Draft. Save using the name and location that defaults in the save window. The External Edit Screen will be displayed:
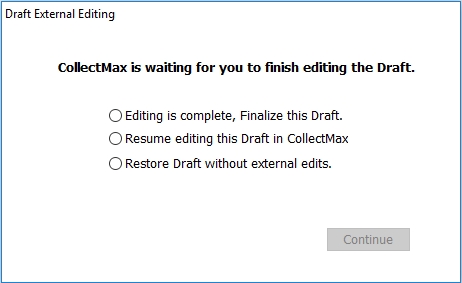
Select from the following options:
Click the  button to go to your selection.
If you need to save the Draft to work on later, click the  button to save any changes and close the edit screen.
When the Draft as been reviewed and any editing completed, click the  button and select if the Draft Document passed or failed review.
If you select Pass or Fail, the confirmation message letting you know once you have finalized the Draft that it cannot be reversed. If you are sure you want to finalize, click the Yes button.
If you select Pass, the Image/File Import screen will be displayed. The image Type will default to the previously setup selections including Description, Details, Pass Type and Process Automation. You can override these options if needed before clicking the Ok button.
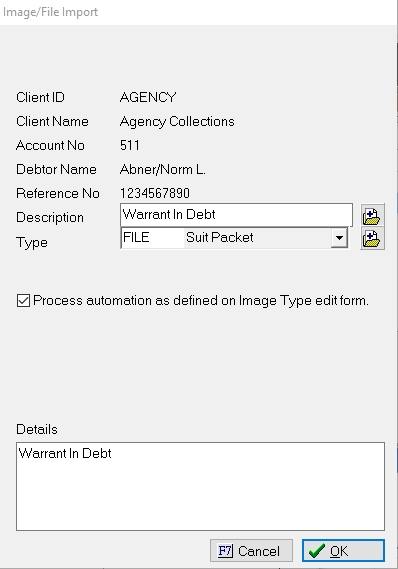
If you selected Fail, the Image/File Import screen will be displayed. The image Type will default to the previously setup selections including Description, Details, Pass Type and Process Automation. You can override these options if needed before clicking the Ok button.
Pass or Fail the Draft List Screen will be updated to include additional information about the finalization.
The pass/fail image will be added to the list of images. The Draft Watermark will be removed. If you have the Version 9 Feature: Auto Export Image Types setup, then the image can be saved in a location that will allow for easy exporting to E-Filing.
On the Draft List Screen, select the Draft to view. Click the  button. The image will be displayed in your PDF viewer. Close the View to go back to the Draft List Screen.
On the Draft List Screen, select a Draft to view the history. Click the  button to display the Draft History.

This screen will list the history of events have taken place on this Draft.
Click the OK button to exit the History.
On the Draft List Screen, select a Draft to be deleted. Click the  button to delete the Draft. Once a draft is deleted, no record of it will be listed on the Draft List Screen and no image of the draft will be available to display.
The Draft List can be displayed while on a Review Item. To add the ability to see the list on a Review Item, go to Definitions, Account Review, Review Item Codes. Find the Review Item that you would like to add the view Draft List. Click the button. Or if adding a new review item click the  button. On the Add/Modify Review Item Edit Screen,
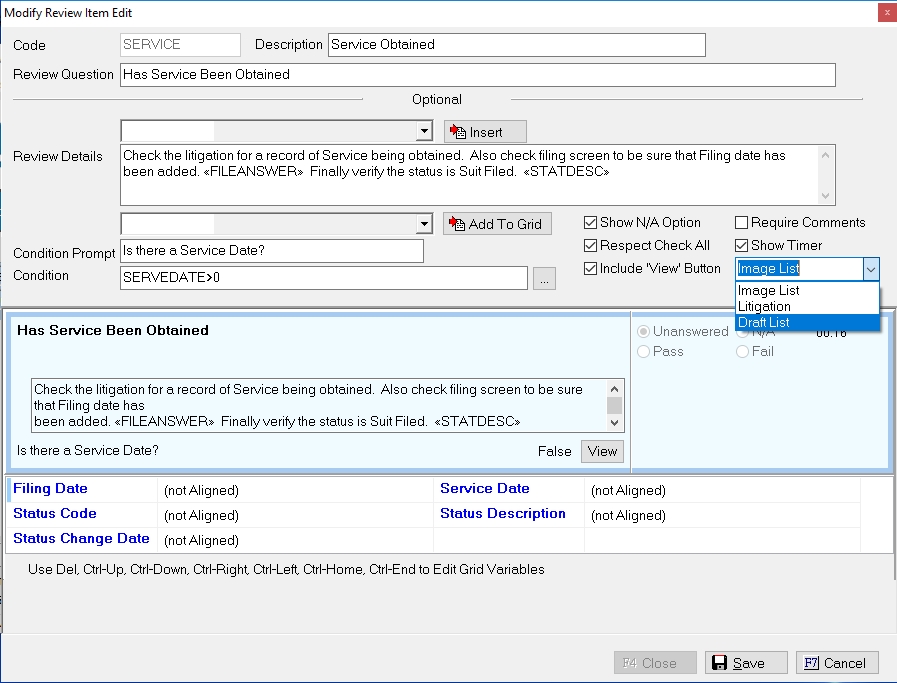
Check the Box that says include View Button and select Draft List. Save the changes.
On the Review, a  button will be displayed on the selected item.

Click the button and the Draft List Screen will be displayed.
The MaxPlan Template will have an Add Draft Step Option. When you select the Add Draft Step the Draft PDF screen will be displayed.
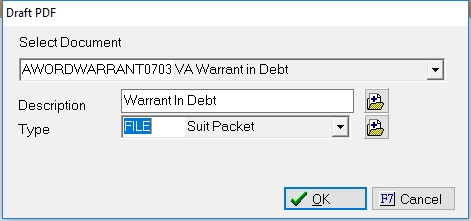
Select the Document you would like to set as a Draft.
Add a Description and Image type.
Click Ok and a Draft will be created on the accounts that reach this MaxPlan Step.