
Allows you to add up to three actions, change the status code, advance payment plans, add activity codes and change responsible codes when the document is printed or sent to the Print List. Client Level Documents are not eligible for Automation.
If you would like the document to add an action, click the
![]() button
and make their selections from the list.
button
and make their selections from the list.

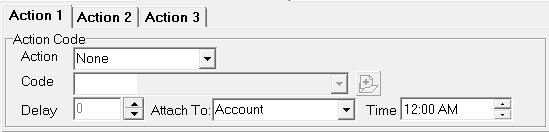
Select the
Action code you would like assigned to an account when this document is
generated by clicking the  button and selecting from the list.

Click  if you would like to create a new
action code to be created with this document.
if you would like to create a new
action code to be created with this document.
Delay: Enter the number of Days until the action is due to be worked.

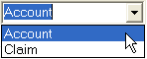
Select
to attach the action to the Account
or Claim by clicking the button and selecting from
the list.
Enter the Action Time.

If you would like the document to add an additional action, click the  tab and add an action as above. Additionally, to have the document add a third action, click the
  tab and add the action as above.

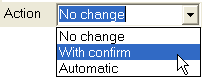
Action: Users
can click the button and make their
selections from the list.
Status: Select the
new Status Code from the list. This will be the account's
new status after document generation.
![]()
Click if you would like to
create a new status code to be created with this document.
To update all open claims for this debtor with the new status
code, check the  box next to Update
All Open Claims.
box next to Update
All Open Claims.
Note: If not selected, the status will change only the claim you are viewing or aligned to when requesting the document.

Check the box to Advance
the Payment Plan date. If
selected, enter the number of Days
to advance the payment plan.
Note: This setting will not be used on any documents that are assigned as Payment Acknowledgment Letters.

In the Activity
Code Section, click the ![]() button next the Action field
and select how to add/update the activity code.
button next the Action field
and select how to add/update the activity code.
Click the
![]() button next to the Activity field and select the activity
code. This
code will be added or update on the account when the document is printed
or put on the printlist.
button next to the Activity field and select the activity
code. This
code will be added or update on the account when the document is printed
or put on the printlist.
To add up to 2 additional activity codes, click the Activity 2 and Activity 3 tabs and enter as above.
Note: This is a Version 8 Feature. For information on obtaining this or any other feature, please contact the Sales Department

Action:
Users can click the ![]() button
and make their selections from the list.
button
and make their selections from the list.
Responsible:
Click the
![]() button and select
the Responsible Code from list.
button and select
the Responsible Code from list.
Click the  button.
Note: The automation options will be executed when the document is sent to the print list and not when it is printed from the print list. Documents selected for Print Now will execute the automation options when printed.